Swipe through all 23 ideas
See every idea at a glance, then jump to the one you like.
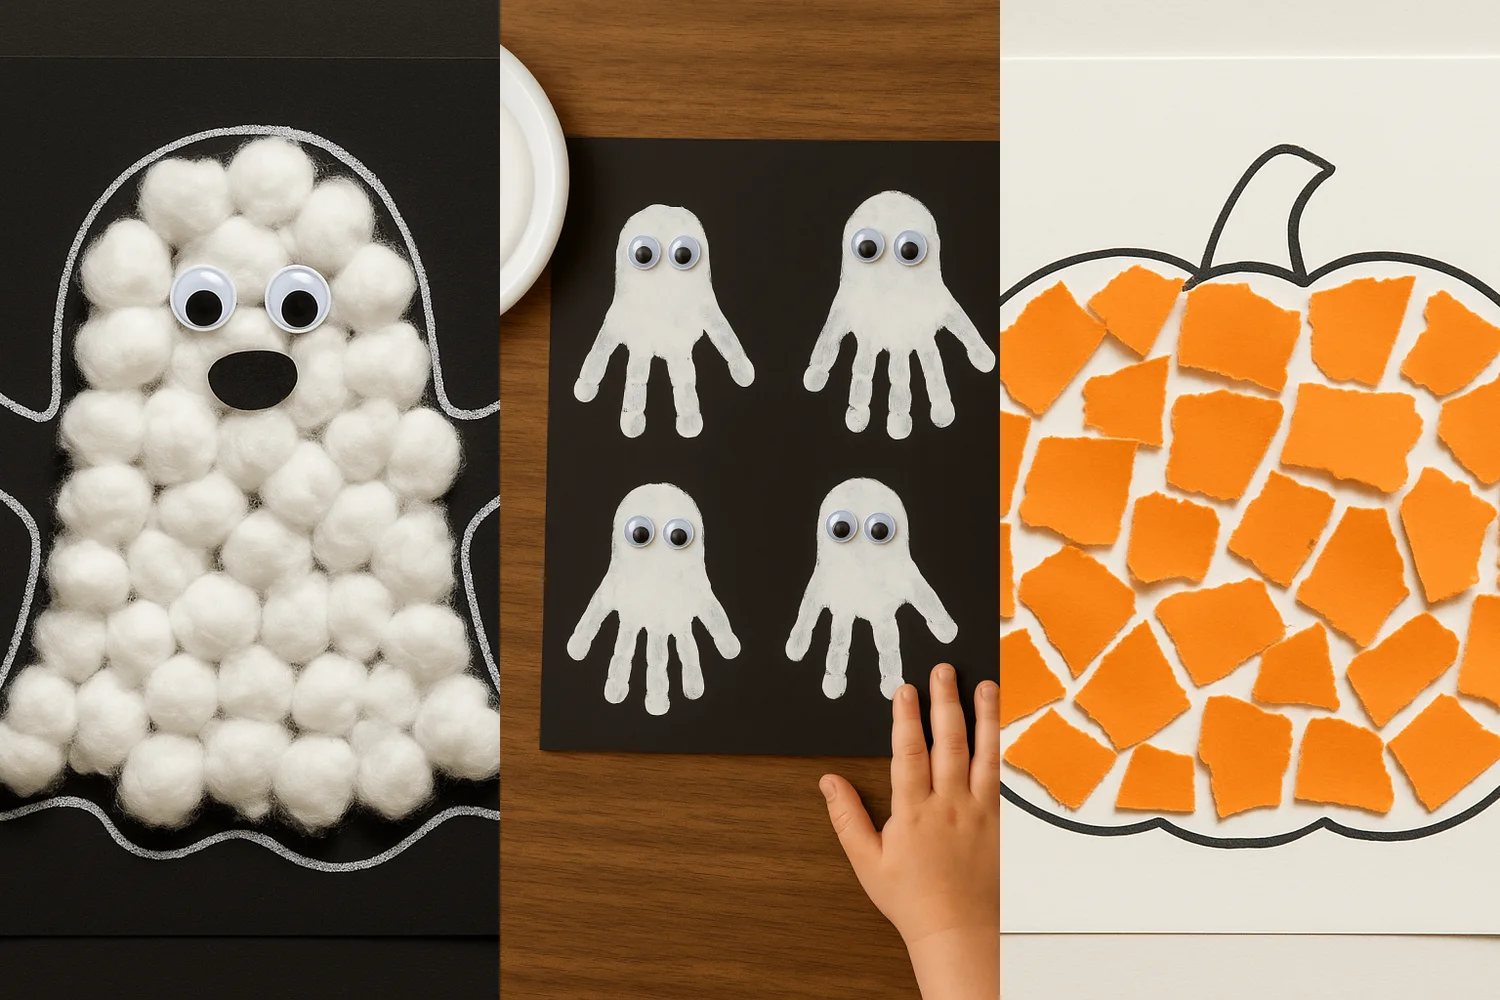
Halloween crafts for toddlers do not need to be fancy. Most of the best ones use paper, washable paint, glue sticks and a few googly eyes, and they are done before the next snack. Below are 21 easy Halloween crafts for toddlers, each with what you need and how to put it together.
Every idea is made for little hands, ages one to three, with a grown up close by. Pick two or three for a rainy afternoon or put a few out on a tray and let your toddler choose. After the list you will find a short set of safety tips, because small parts and toddlers need a little extra care.
1. Handprint ghosts
 Save
Credit: Kid Activities with Alexa
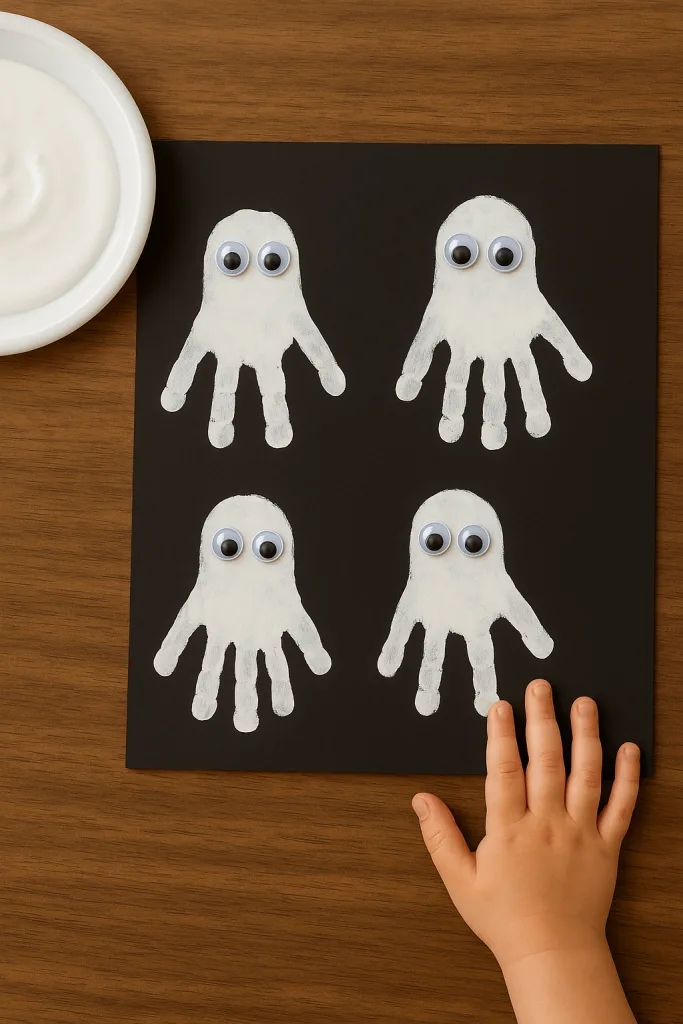
A handprint ghost is the Halloween keepsake most families end up keeping. Press a hand into a plate of white washable paint, then stamp it on black paper with the fingers pointing down. Add two googly eyes once the paint is dry.
Wash the little hand right away with warm water. This one works from about 18 months with a grown up guiding the stamp.
2. Cotton ball ghosts
 Save
Credit: Kid Activities with Alexa
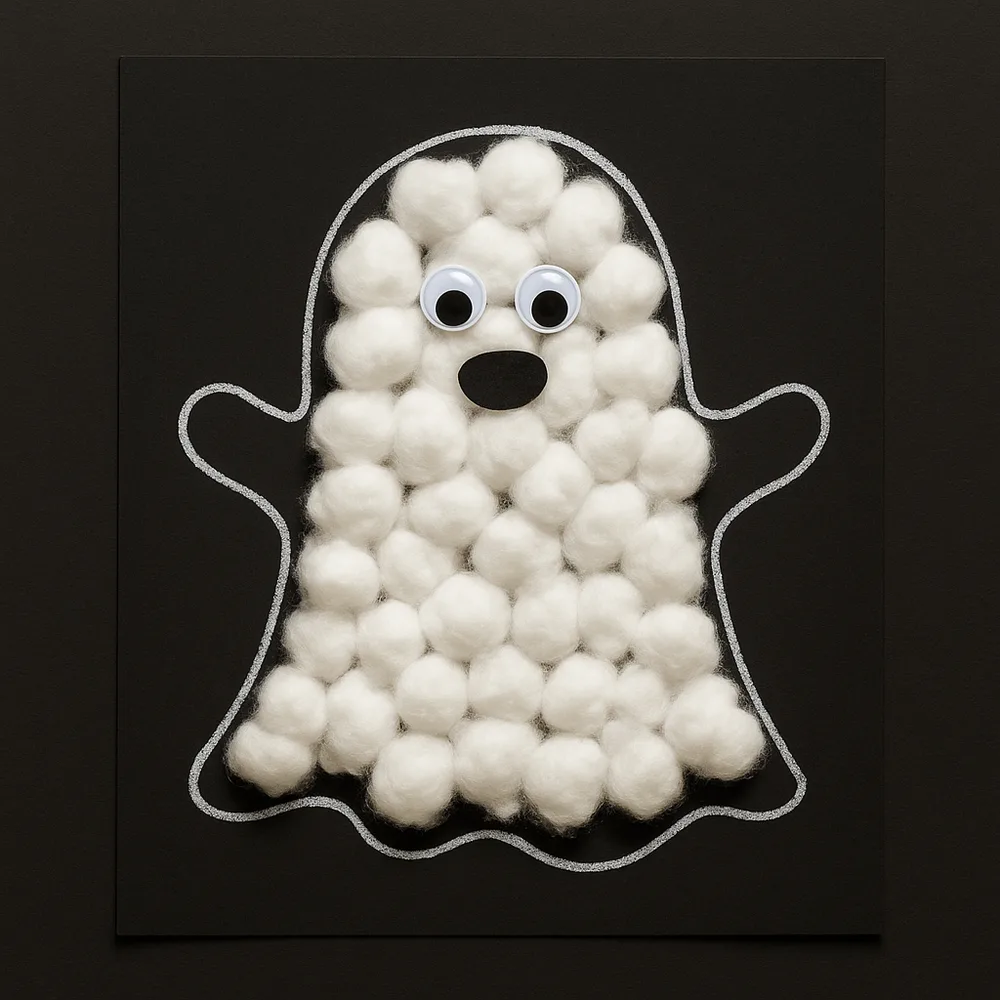
Draw a ghost outline on black or dark blue cardstock and let your toddler glue cotton balls inside it. Squeeze the glue in small dots so the cotton sticks without a puddle.
Fluffy and soft, it is an easy first craft for little hands that love to pinch and pull. A grown up should add the eyes and mouth.
3. Paper plate ghost
 Save
Credit: Crafts on Sea
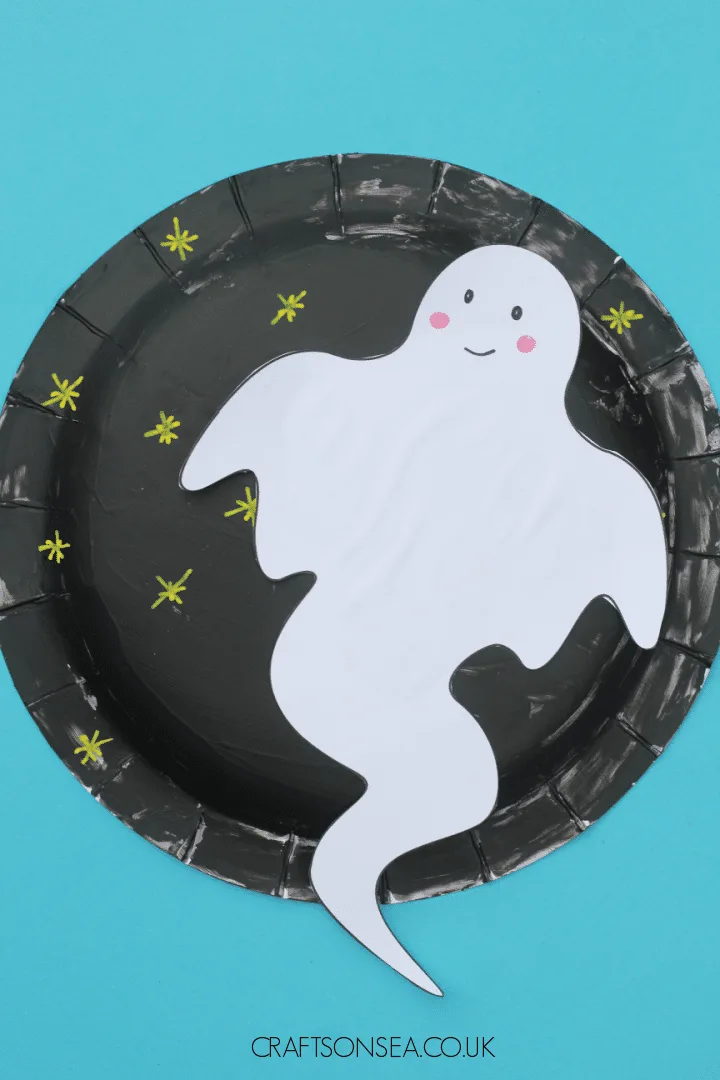
Paint a paper plate black and let it dry while you cut a ghost shape from white paper. Your toddler glues the ghost on the plate and draws stars around it with a yellow crayon.
Hang the finished plate in a window. It looks like a ghost floating through the night sky.
4. Sponge stamped ghost
 Save
Credit: Crafts on Sea
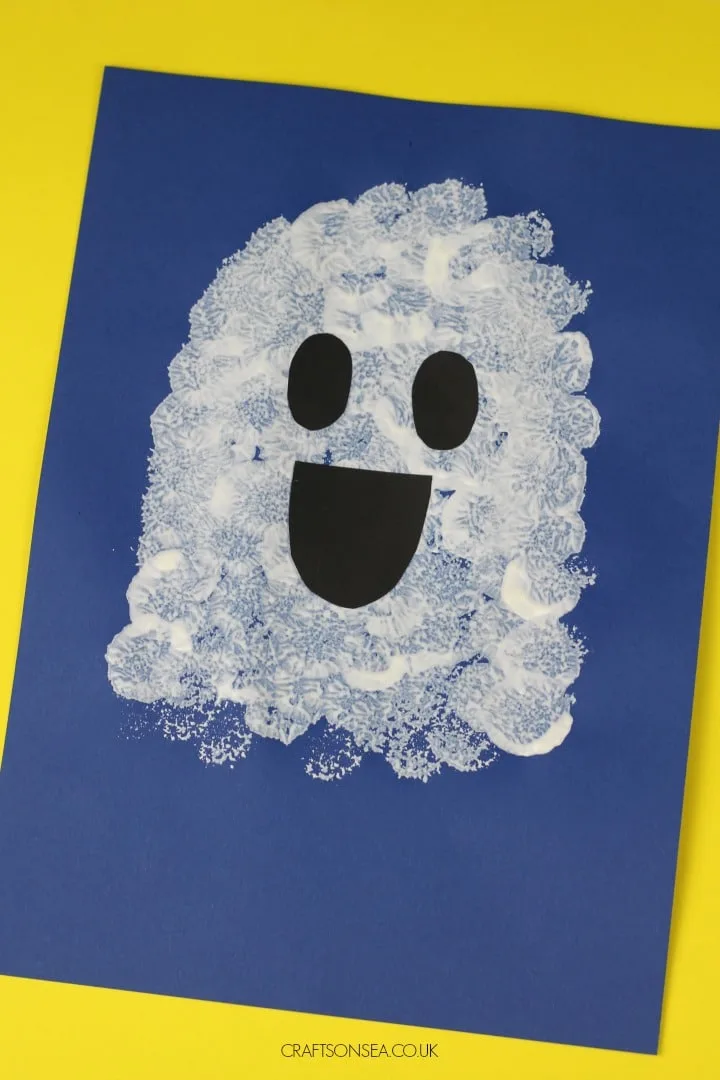
Dip a pom pom or small sponge in white washable paint and dab it all over a ghost shape drawn on dark blue paper. The messy dabbing is the whole fun of it.
When the paint dries, stick on two black paper ovals for eyes and a bigger one for a mouth. Use a clothespin to hold the pom pom if little fingers get too painty.
5. Torn paper pumpkin
 Save
Credit: Kid Activities with Alexa
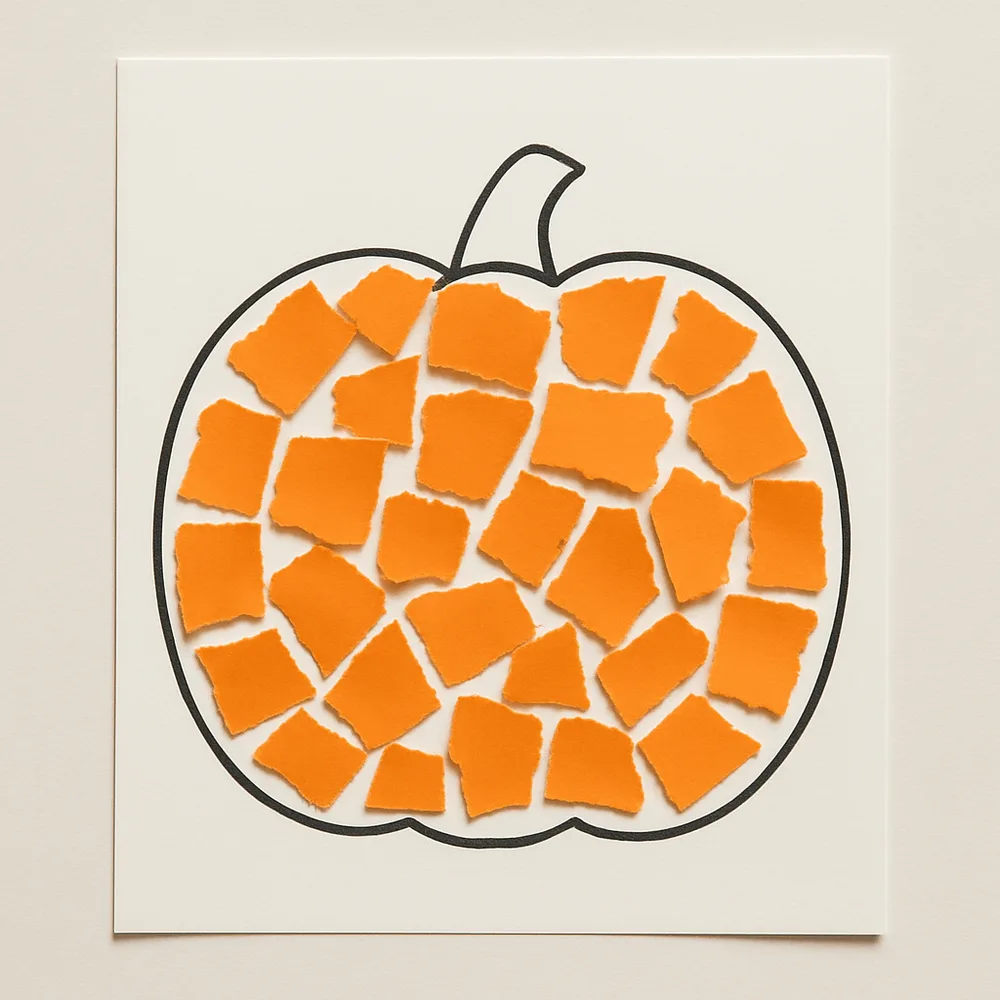
Draw a big pumpkin outline on white paper and hand your toddler a pile of orange paper. Tearing is great practice for small hands and it is much easier than cutting.
Glue the pieces inside the outline with a glue stick. Add a green stem and you have a fall pumpkin in about ten minutes.
6. Dabbed paint pumpkin
 Save
Credit: Crafts on Sea
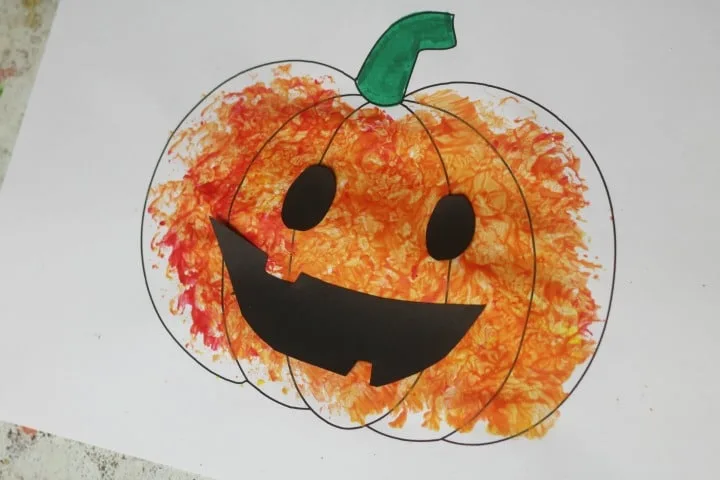
Draw a round pumpkin on white paper and let your toddler dab orange paint inside the lines with a pom pom or sponge. There is no wrong way to do it.
Cut a triangle nose, eyes and a wide smile from black paper and glue them on once the paint is dry. A grown up can do the cutting.
7. Dot sticker pumpkin
 Save
Credit: Kid Activities with Alexa
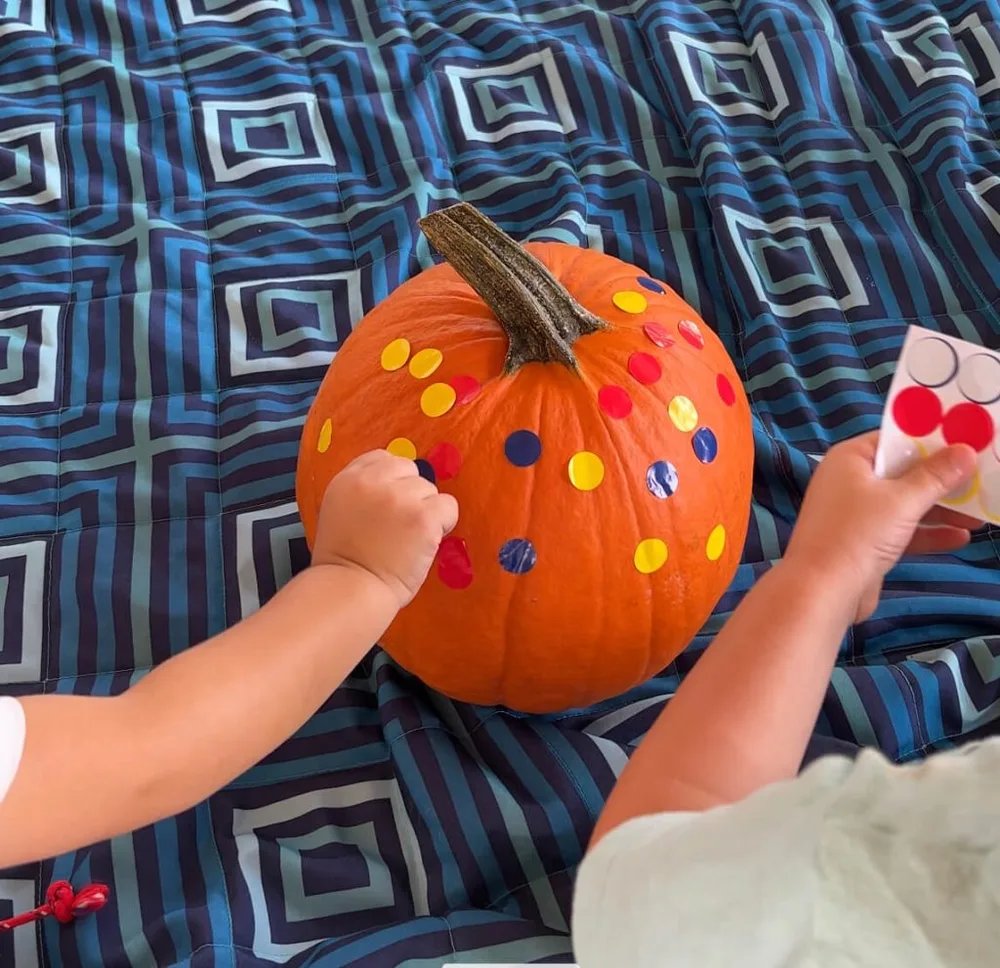
Skip the carving and let your toddler decorate a small pumpkin with dot stickers. Peeling and sticking is good fine motor practice, and the stickers come off easily.
Pick a smooth pumpkin that sits flat so it does not roll. Keep it where your toddler can reach it for a few days of extra sticking. For bigger kids, see our pumpkin painting ideas and pumpkin carving ideas.
8. Pumpkin golf tee hammering
 Save
Credit: Kid Activities with Alexa
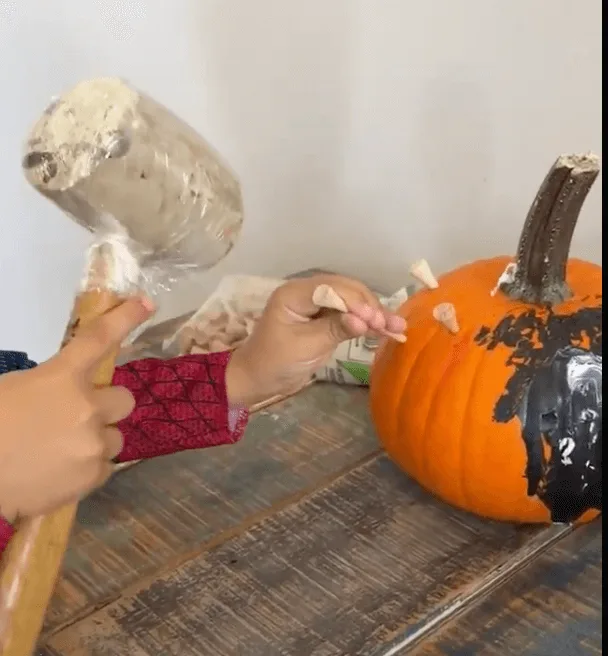
Give your toddler a mini pumpkin, a handful of golf tees and a soft toy hammer. Start each tee with a gentle push so it stands up in the pumpkin, then let them tap it in.
This one needs a grown up right beside them. Count the tees before and after, and put them away when you finish so none end up in little mouths. Save the seeds if you cut a pumpkin open and roast pumpkin seeds for a snack.
9. Cookie cutter stamping
 Save
Credit: Kid Activities with Alexa
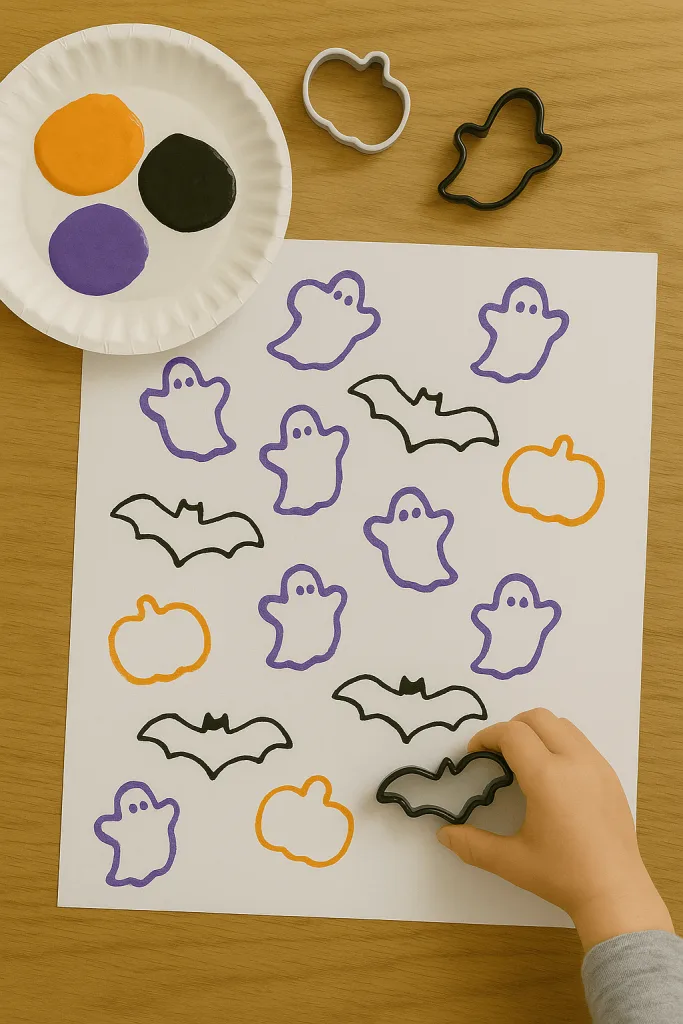
Squeeze a little washable paint on a paper plate and press Halloween cookie cutters into it. Stamp ghosts, bats and pumpkins all over a sheet of paper.
It is quick, it uses what you already have in the kitchen and it makes a pretty wrapping paper or card. Wash and dry the cutters afterward.
10. Finger paint monsters
 Save
Credit: Kid Activities with Alexa
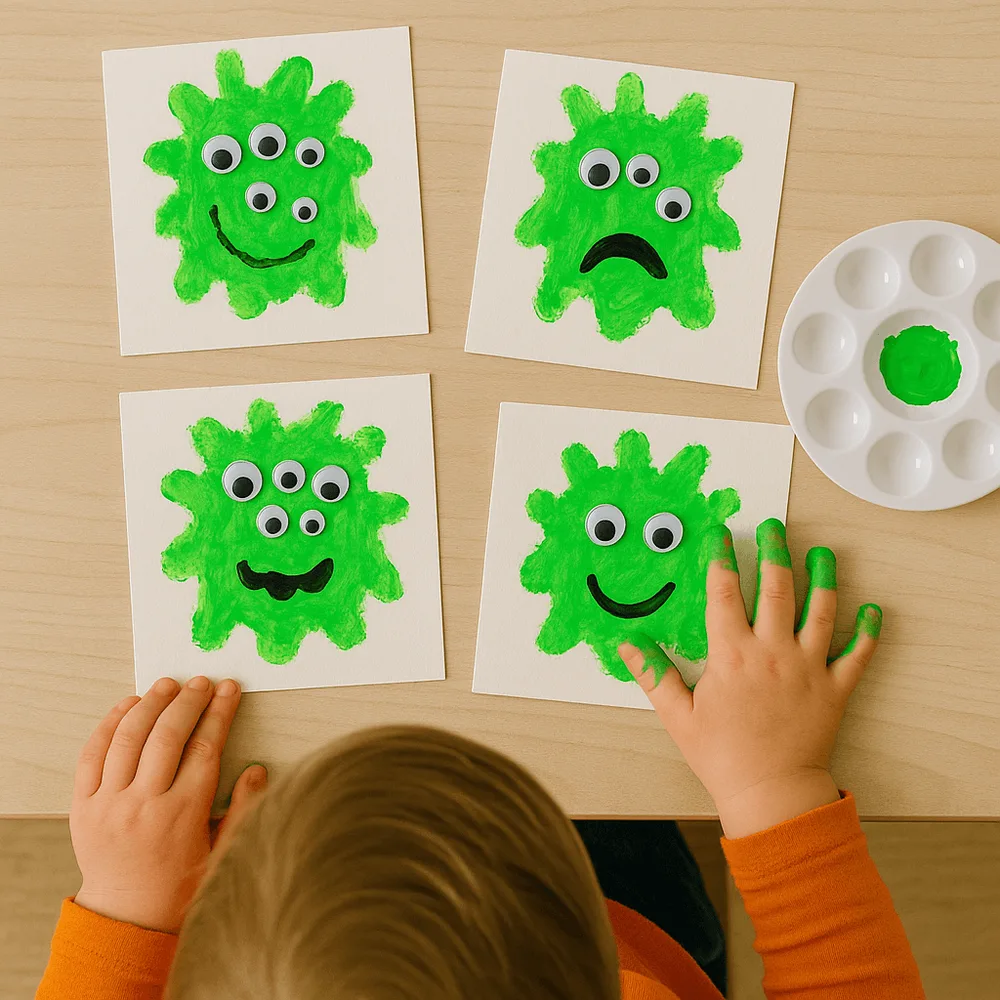
Spread green washable paint on a sheet of thick paper and let your toddler paint a blob with their hands. Stick googly eyes on the wet paint and add a mouth with a marker.
Every monster comes out different, and that is the point. Use large googly eyes, since small ones can be a choking risk.
11. Paper plate monster
 Save
Credit: Crafts on Sea
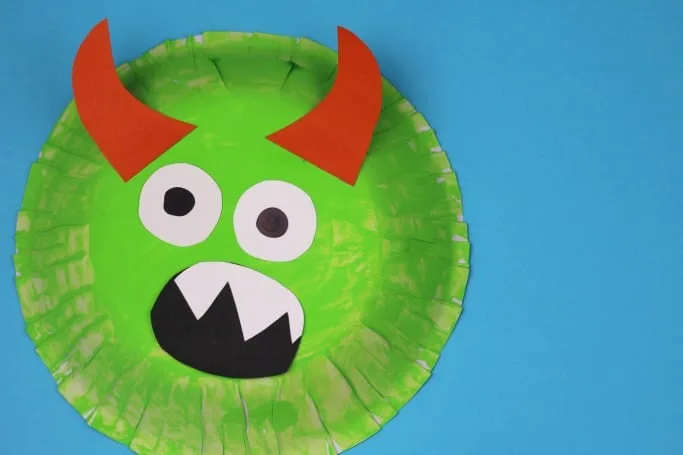
Paint a paper plate green and add red paper horns, white eyes and a row of paper teeth along the mouth. Your toddler can choose where every piece goes.
Glue sticks are the easiest tool for this age. Punch a hole at the top and hang it on the door for a friendly welcome.
12. Paper bag mummy
 Save
Credit: Crafts on Sea
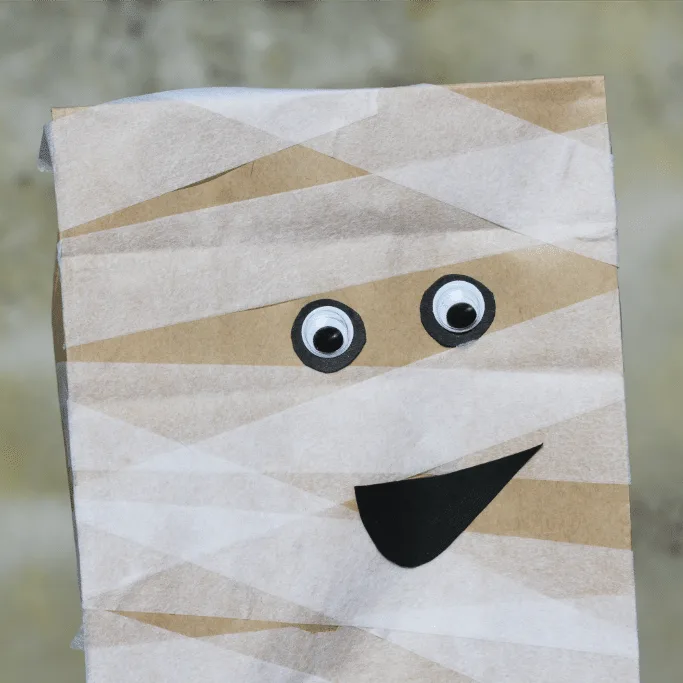
Take a small paper lunch bag and glue strips of white tissue or crepe paper across it for the mummy wrappings. Leave a gap for the eyes.
Stick on two googly eyes and a black paper mouth. Slip your hand inside and it becomes a puppet for pretend play.
13. Paper bag witch puppet
 Save
Credit: Crafts on Sea
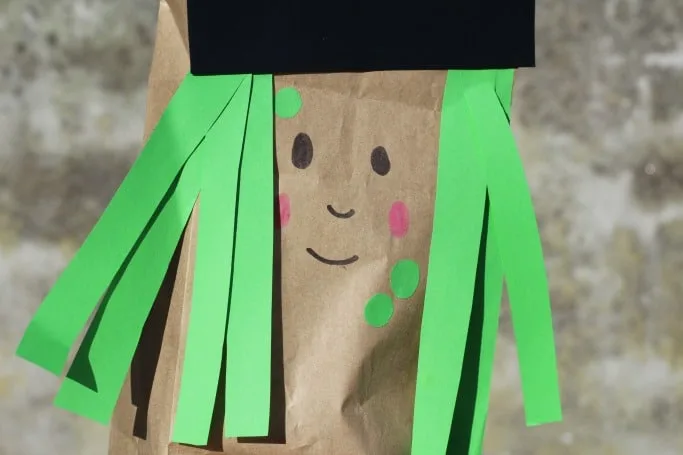
Turn a paper bag into a witch with a black paper hat and green strips of paper for hair. Cut the strips yourself and let your toddler glue them in a messy fringe.
Draw a smile and rosy cheeks with crayons. It is cheap, it takes minutes and it is a puppet when you are done.
14. Color and build a witch hat
 Save
Credit: Crafts on Sea
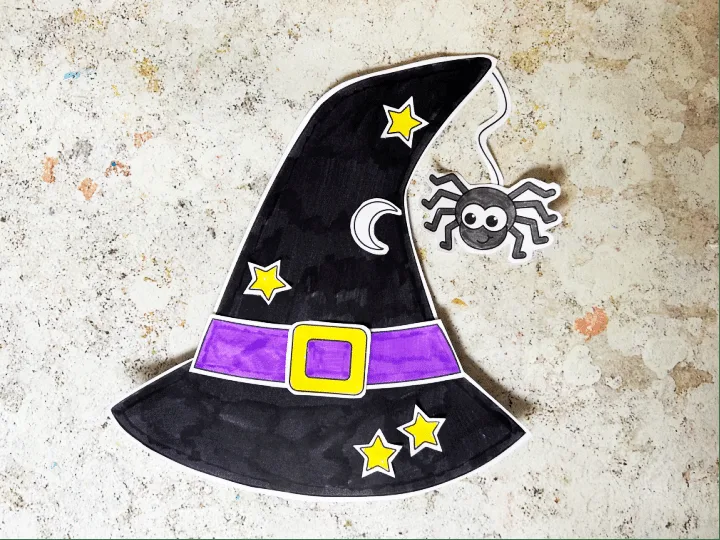
Print a witch hat outline on regular paper and let your toddler color it with chunky crayons. Add star stickers for a quick finish.
Cut it out ahead of time and glue on a spider or two. It is a quiet craft that works well when you only have a few minutes.
15. Paper plate spider
 Save
Credit: Kid Activities with Alexa
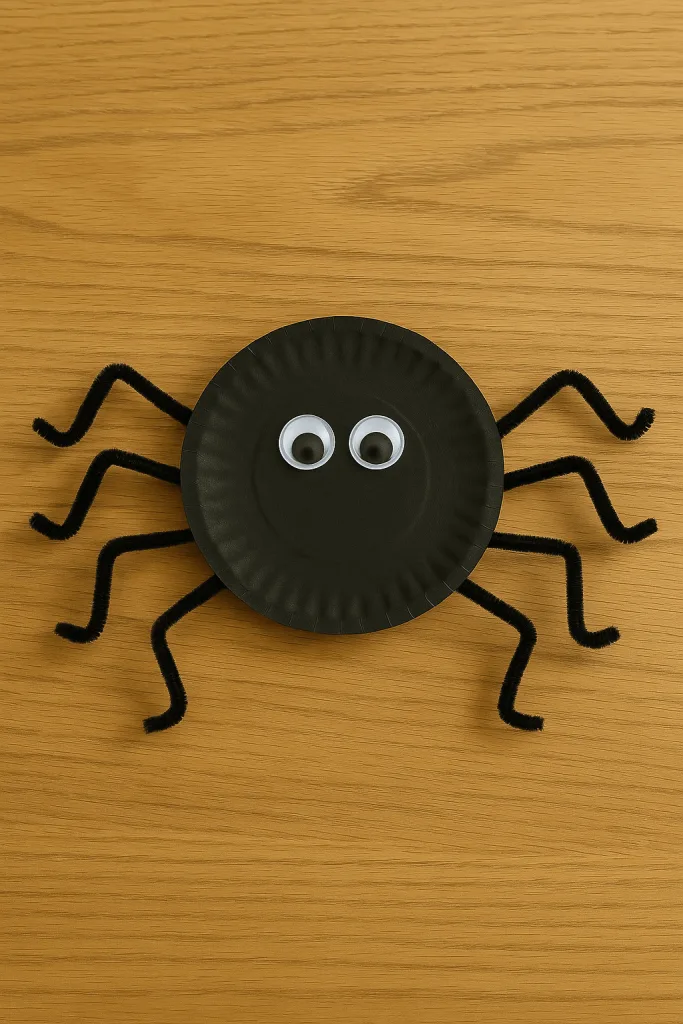
Paint a paper plate black and let it dry. Glue on two big googly eyes and poke four pipe cleaners through the plate to make eight bendy legs.
A grown up should poke the holes and tuck in the sharp wire ends. Toddlers love bending the legs into silly shapes.
16. Scrunched tissue paper spider
 Save
Credit: Crafts on Sea
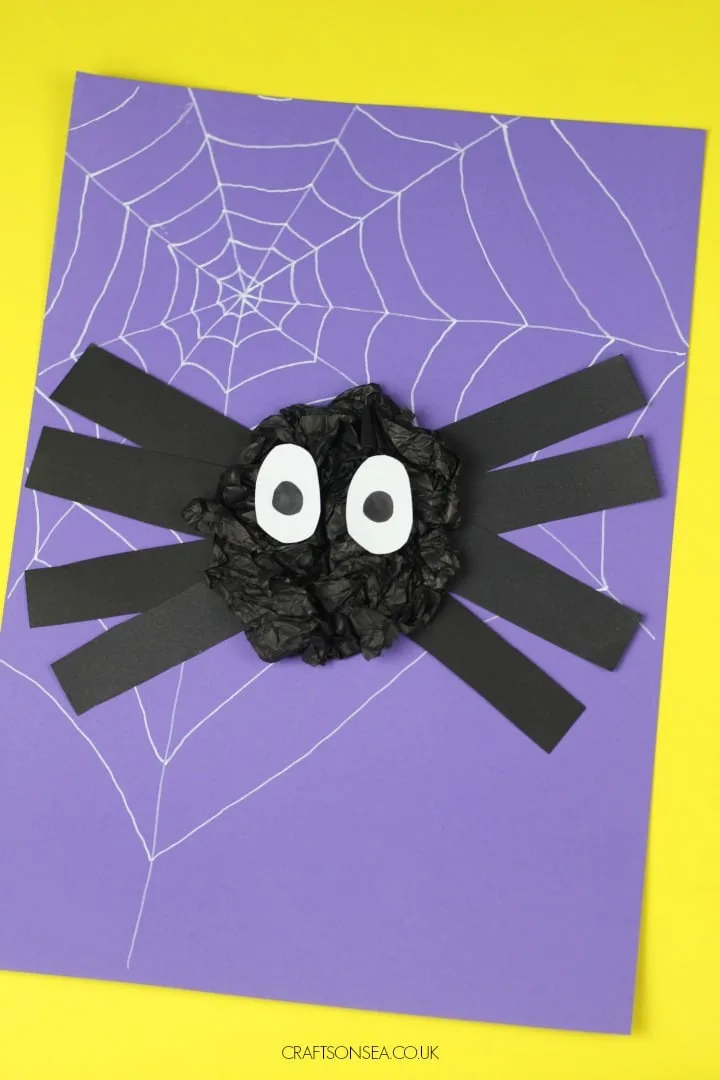
Scrunch black tissue paper into a ball and glue it down for the spider body. Add eight black paper strips for legs and two paper eyes.
Draw a web in white crayon on the paper first. Your toddler will enjoy scrunching, and it is good for little fingers.
17. Pom pom spider
 Save
Credit: Crafts on Sea
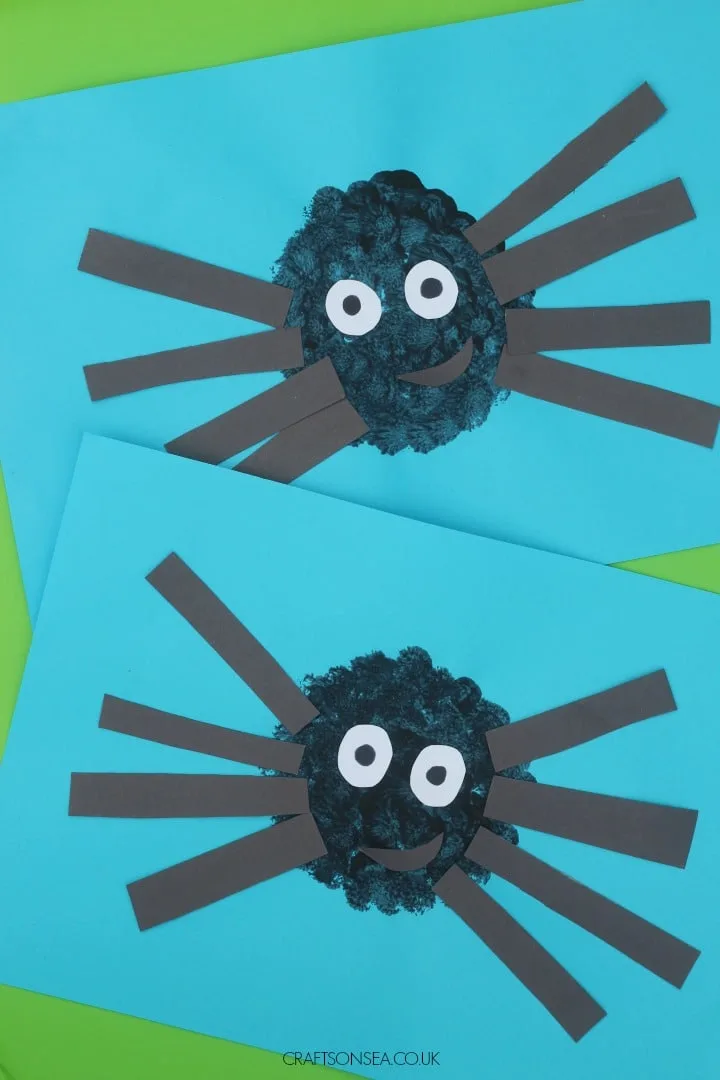
Dab black paint on blue paper with a pom pom to make a round spider body. Glue on black paper strips for legs and add two paper eyes.
Use a clothespin as a pom pom holder to keep hands clean. It is a great way to practice dabbing.
18. Mosaic bat
 Save
Credit: Crafts on Sea
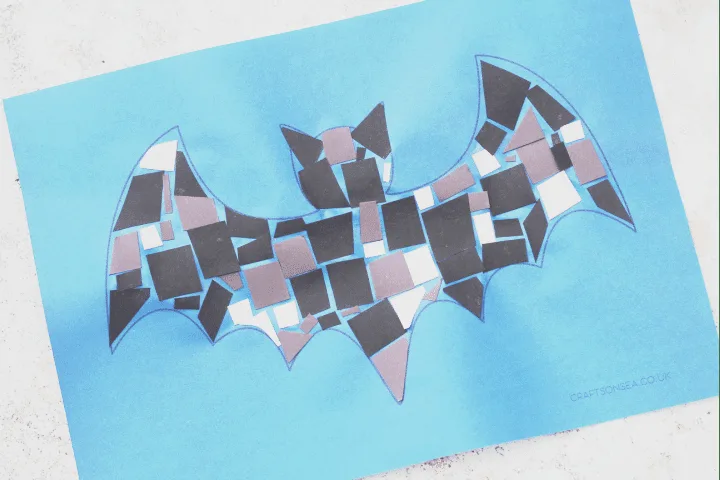
Draw a bat shape on light blue paper and fill it in with small torn or cut pieces of black, white and gray paper. Your toddler glues them on in any pattern.
Tearing and sticking builds hand strength. Let the bat dry flat before you hang it up.
19. Bat paint resist art
 Save
Credit: Crafts on Sea
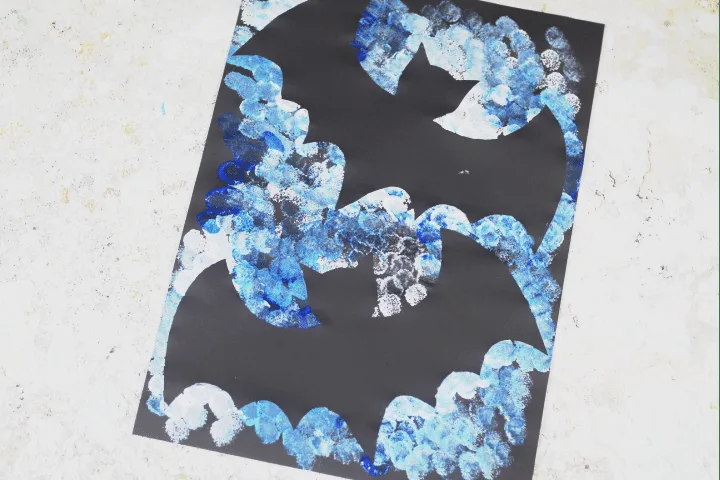
Cut a bat shape from black paper and tape it onto white paper. Dab blue and white paint around the edges with a pom pom, then peel the bat off.
A white bat shape is left behind in the middle. It is a toddler friendly way to try resist art, and it looks like a night sky.
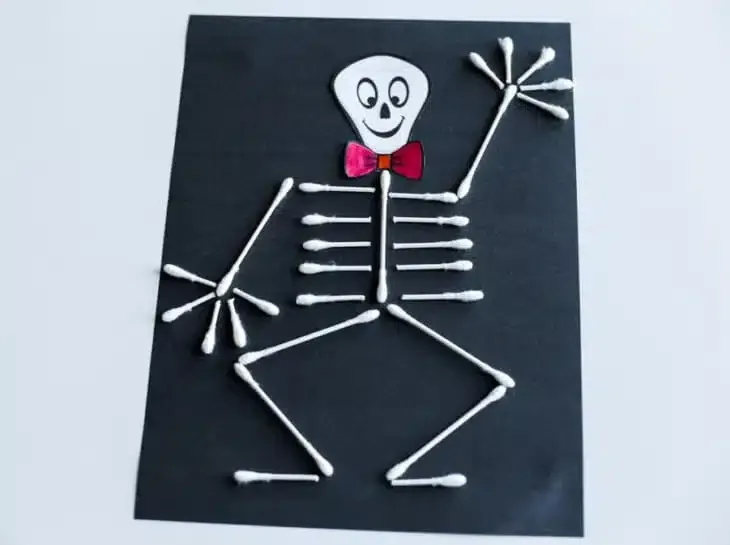
20. Cotton swab skeleton
 Save
Credit: Crafts on Sea
Glue cotton swabs onto black paper in the shape of a skeleton, with a paper skull on top. A grown up should lay the pieces out first, and your toddler presses them down.
Keep cotton swabs away from ears and mouths and use this one with close supervision. A glue stick works better than liquid glue.
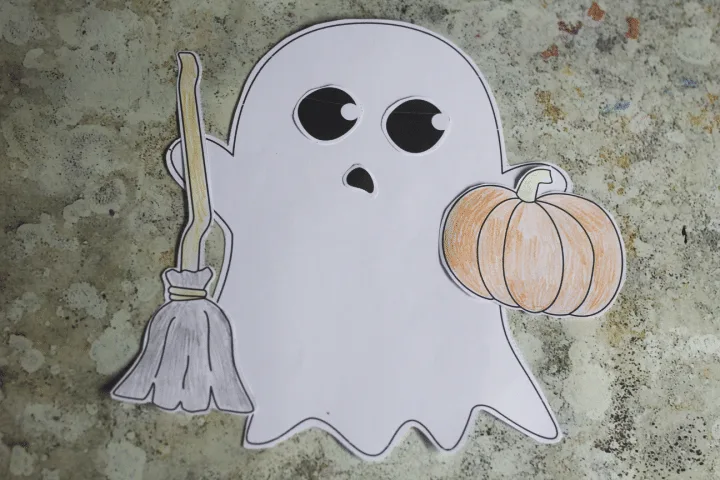
21. Cut and paste ghost
 Save
Credit: Crafts on Sea
Print a ghost template, color the broom and pumpkin and cut the pieces out. Younger toddlers can color while a grown up cuts, and older ones can try safety scissors.
Glue the pieces on to build the ghost. It is a calm, quiet craft for the end of the day.
Supplies to keep on hand
Most of these crafts use the same short list. Stock up once and you can make almost anything above on a whim.
- Washable paint in orange, black, white and green
- Paper plates and lunch bags
- Construction paper in orange, black, white and green
- Glue sticks, which are neater than liquid glue
- Large googly eyes
- Pom poms or small sponges for dabbing
- Chunky crayons and washable markers
- Safety scissors and a roll of masking tape
Safety tips for Halloween crafts for toddlers
Toddlers put things in their mouths, so choose supplies with that in mind. Here are the habits that keep craft time calm.
Use large googly eyes and big pom poms, because small ones are a choking risk. Stay beside your toddler for every craft with paint, glue, golf tees or cotton swabs.
Pick washable, non toxic paint and glue sticks, and keep hot glue guns far out of reach. Do the cutting yourself for the youngest kids, and sweep up bits of paper and tape when you finish. If your toddler likes to help, our farm chores for kids list has more jobs for small hands.
Frequently asked questions
What Halloween crafts can a one year old do?
Stamping with cookie cutters, dabbing paint with a pom pom and finger painting are great for one year olds. Skip anything with tiny pieces and stay close.
What are easy Halloween crafts for a two year old?
Paper plate spiders, cotton ball ghosts, torn paper pumpkins and paper bag puppets all work well. Two year olds can glue and tear paper with a little help.
How do I keep Halloween crafts with toddlers from getting too messy?
Spread newspaper or a cheap plastic tablecloth, put paint in a shallow dish and keep wipes handy. Washable paint comes out of most clothes and tables.
Are googly eyes safe for toddlers?
Large ones are fine when a grown up supervises, and you should glue them down yourself. Skip the tiny ones for this age.