The best electric fence for cattle isn’t always the charger with the highest voltage. Solar units make up most of the market, yet AC and dual-power models often deliver more power for less money.
Use this five-step process to match your charger and fence layout to your pasture, soil, weather, and herd.
We priced 5 cattle fence chargers across current manufacturer and retailer listings, 3 AC-powered and 2 solar. The AC chargers, from Parmak and Zareba, ranged from $209.00 to $339.99 for 50 to 100 rated miles, averaging $3.93 per mile. The solar chargers, the Parmak DF-SP-LI and Gallagher S12, ranged from $189.00 to $299.99 for 4 to 25 rated miles, averaging $29.62 per mile. Matching power source to pasture conditions, not chasing a solar label, is where the price per mile favors AC.
1. The Easy Homestead
The Easy Homestead is the best first step when you need to find fencing help or a local farm supplier, not a charger brand. Our directory lets you search verified listings by ZIP code or county, which matters when you need a fencing contractor who understands cattle pressure, rocky soil, gates, and long runs.
Start by searching the fencing and farm construction category near your property. Look for a local supplier or contractor who can answer four questions before you buy:
- How much fence line can the charger support under load?
- Which wire or twine works with the proposed insulators?
- How will the system be grounded in your soil?
- Who can repair the line after storms or livestock damage?
A local contact can save you from buying a charger that looks strong on paper but fails on your land. A fence line through wet pasture behaves differently from one crossing dry ridge soil. Heavy weeds can also pull voltage down before cattle ever touch the wire.
Our directory is useful when you need the wider supply chain too. You may need a feed supplier, large-animal vet, mobile farm service, or fencing crew during the same pasture project. The point is finding the right local person without spending three weeks sorting through scattered posts and word-of-mouth leads.
Use The Easy Homestead to check local availability before you settle on a model. Then compare the charger’s actual specs against your fence plan, rather than buying from a shelf label alone.
Key Takeaway: Find local fencing support first, then choose a charger that fits the full fence line and the conditions around it.
Step 2: Compare cattle chargers by power source and use case
The best electric fence for cattle starts with the right power source. AC is usually the strongest choice near a dependable outlet. Solar fits remote paddocks. Dual-power units give you more room when the pasture changes. For remote setups that power more than the fence, compare solar and generator power options alongside the charger’s battery and backup needs.
Don’t compare mileage claims as if every brand measures them the same way. Some models list fence miles. Others list acres. A 40-mile claim may describe a single strand under ideal conditions, while your cattle fence may use several wires with grass touching the lower line.
The market data points to a useful split.
That doesn’t make every AC unit a better buy. It shows why power source should follow the land. An outlet beside the barn may beat a solar panel on a cloudy slope. A remote back field may make an AC charger useless without a long power run.
| Pasture situation | Power source to consider | What to check first | Main tradeoff |
|---|---|---|---|
| Fence near a reliable outlet | AC | Joule output and total wire length | It won’t help where grid power can’t reach |
| Remote paddock with no outlet | Solar | Battery reserve and winter sun | Clouds can reduce the charging rate |
| Changing pasture layout | Solar or dual-power | Portability and output under load | More parts may mean more upkeep |
| Long boundary with weeds | Low-impedance AC or solar | Performance when vegetation touches wire | Higher power may cost more to run or buy |
For a small rotational setup, the Gallagher S12 has a listed 4-mile range and a built-in earthing system for single-ground installation. Its lower output makes it a poor fit for a determined bull or a long boundary with heavy weed contact.
The Parmak DF-SP-LI lists 7,000-plus volts and a 25-mile range. Its low-impedance design is aimed at holding voltage when vegetation touches the wire. Realpoultry S1000 lists 9,000-plus volts and a 40-mile range, with a feature that lets you pre-charge it from a 120V outlet before installation.
At the larger end, Realpoultry S2500 lists a 60 to 100-mile range and low-impedance operation. Those figures still need a reality check. More wire, more gates, poor joints, and plant contact all add load.
AC models deserve a close look when you have grid power. Parmak SE5 lists more than 8,000 volts of holding power, a 50-mile range capacity, and a digital performance meter.
Solar has its own strong use cases. Gallagher S200 uses dual rechargeable 12V batteries, while Parmak Precision DF-SP-LI is listed for sub-freezing conditions. The Gallagher S200 also carries a listed starting price of $969.99, so its battery setup comes at a steep premium.
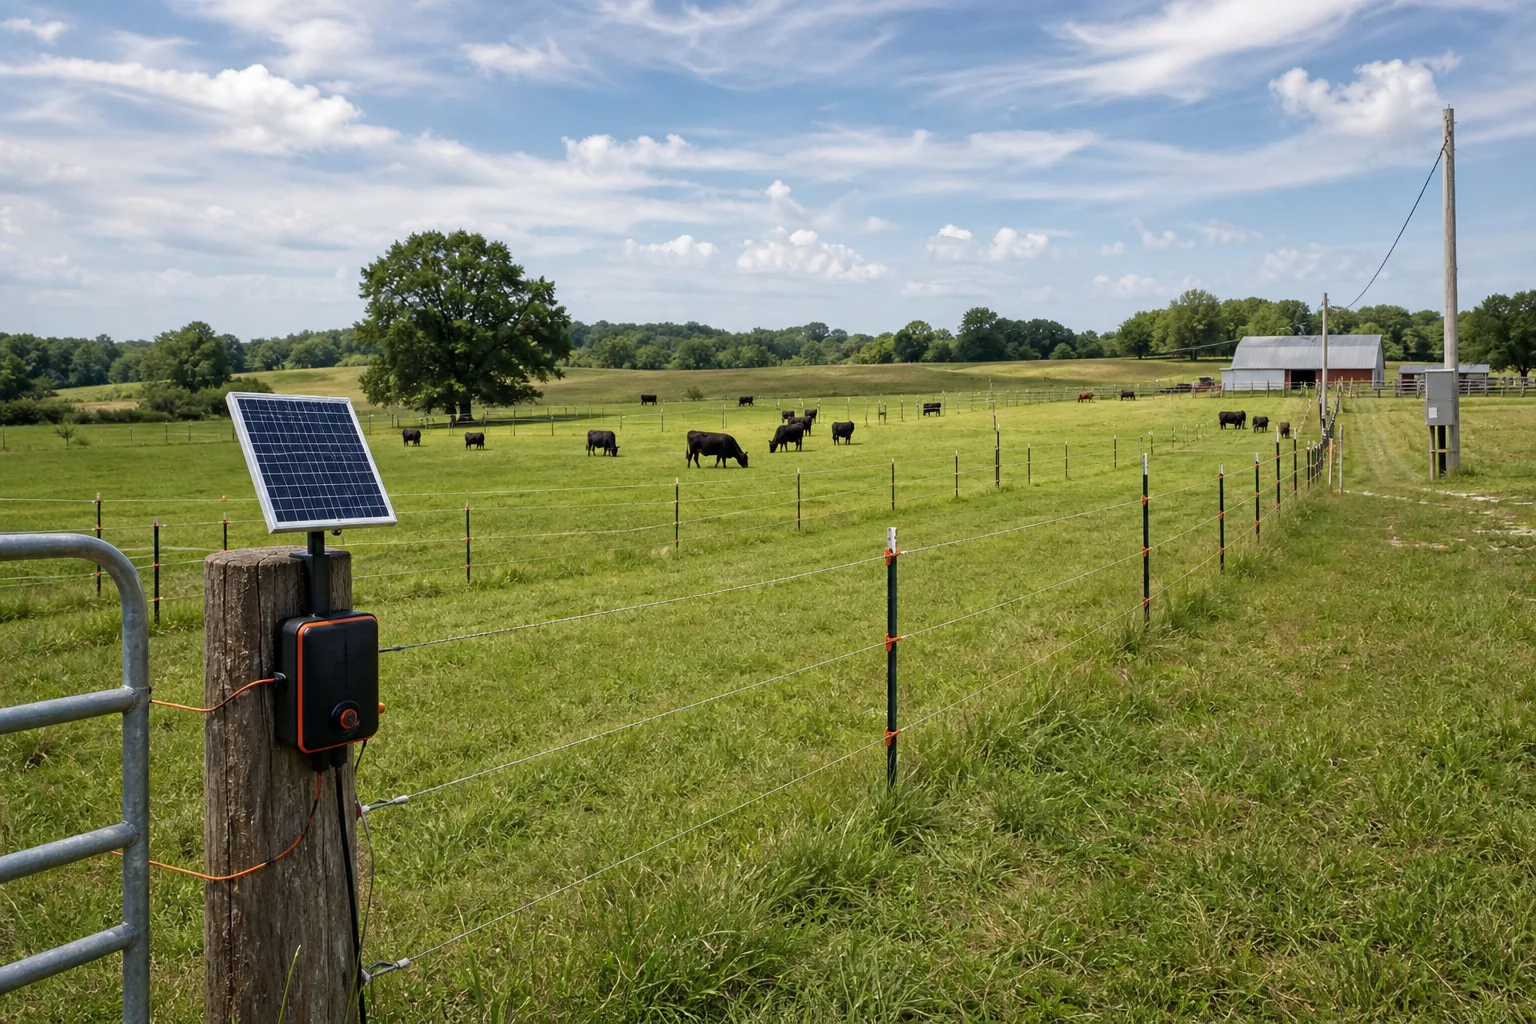
Make a short list before you shop. Write down the total wire length, the number of strands, the worst weed season, and the distance to grid power. Those details will narrow the field faster than a voltage number alone.
Step 3: Build a fence line cattle will respect
The best electric fence for cattle needs a fence line that teaches respect before the herd tests it. A strong charger can’t fix loose wire, poor spacing, or a bad return path through the soil.
Lay out the line before you drive posts. Mark corners, gates, water points, crossings, and spots where the line may meet brush. Keep the route visible enough for inspection. A hidden low wire will collect grass and make faults harder to find.
For cattle, two strands of electric twine can work well in a movable setup. A permanent boundary may need a different wire plan based on herd pressure and terrain. Set the lower strand where cattle will see it without pushing their heads under it. Place the upper strand high enough to discourage leaning over the line.
Use proper insulators at every post. The wire must stay clear of wood, metal, and wet vegetation. At corners, use sturdy posts that won’t tilt when the wire is pulled tight. T-posts can work for corners in suitable ground, while fiberglass or step-in posts fit movable sections.
Plan gates as part of the circuit. A spring gate can keep a passage closed without forcing you to drag wire across the opening. Make sure the gate handle cannot touch a grounded post when you move it.
For a long fence, split the work into sections. Give each section a clear route back to the charger. That makes faults easier to isolate when voltage drops. It also lets you turn off a paddock without taking down the whole system.
The electric fencing guidance for cattle and sheep is a useful reference for planning a livestock fence. Use it alongside your local soil and pasture conditions, since a layout that works on one farm may need changes on yours.
Keep vegetation below the live wire. Mow or trim before turnout, then set an inspection day after the first growth surge. Cattle learn quickly when the pulse stays steady. They also learn quickly when the fence has gone weak.
Pro Tip: Walk the full line with a tester before cattle enter. Test at the charger first, then at the farthest point, so you can see where the loss begins.
Step 4: Install, ground, and test the system before turnout
The best electric fence for cattle is only as good as its ground system. Treat grounding as part of the charger installation, not as a small detail you finish later.
Set the charger in a dry spot with room around it. Protect it from standing water, livestock contact, and falling branches. Solar panels need a clear view of the sky. AC units need a safe outlet and a weather-rated setup.
Follow the charger’s grounding instructions. One model may use a built-in earthing system. Another may need several ground rods spaced apart. Match the rods to the instructions for your unit.
Drive rods into soil that can carry the return current. Rocky ground can make this hard. If you can’t reach suitable depth, ask a local fencing professional about the best ground path for your site.
Connect the ground lead and fence lead with clean, tight connections. Keep the fence lead away from the ground system. A damaged insulator or loose wire can send current into a post and weaken the entire line.
Turn on the charger only after the fence is clear. Check voltage at the charger. Then test the first corner, the middle of the run, and the far end. If the first reading is strong but the far reading is low, inspect for vegetation, bad joins, contact with metal, or a broken conductor.
A fence pulse is brief and high voltage, so use a proper fence tester. Don’t test it with your hand. Keep children and livestock away until the system passes its checks.
Before turnout, let cattle see the fence from a safe enclosure or a small training area. Watch their first contact. A herd that has learned the pulse is less likely to test a distant boundary later.
For a second reference on setup choices, the fencing setup reference offers additional planning guidance.
Step 5: Troubleshoot voltage loss and seasonal failures
The best electric fence for cattle must keep working after rain, weeds, heat, and storms. Test the line on a schedule instead of waiting for an escape.
Start at the charger when voltage falls. A weak reading there points to the power source, battery, charger, or ground. A strong reading there but a weak reading at the far end points to the fence line.
Check these faults in order:
- Remove grass and weeds from the lower wire.
- Look for broken wire after fallen limbs or animal contact.
- Inspect every gate and corner connection.
- Check insulators for cracks or contact with metal.
- Test the ground system away from the charger.
Solar systems need extra checks during long cloudy stretches. A unit with battery reserve may keep the pulse going, but reserve time depends on the model and load. Keep the panel clean and clear of shade.
Lightning protection can affect your choice in storm-prone areas. Zareba lists built-in lightning protection, while some AC systems may need added protection at the power source. Follow the charger’s instructions and inspect the unit after a nearby strike.
Seasonal maintenance should be written on the farm calendar. Walk the line after spring growth begins. Check again before winter weather. Move portable twine or netting before snow and ice can damage it.
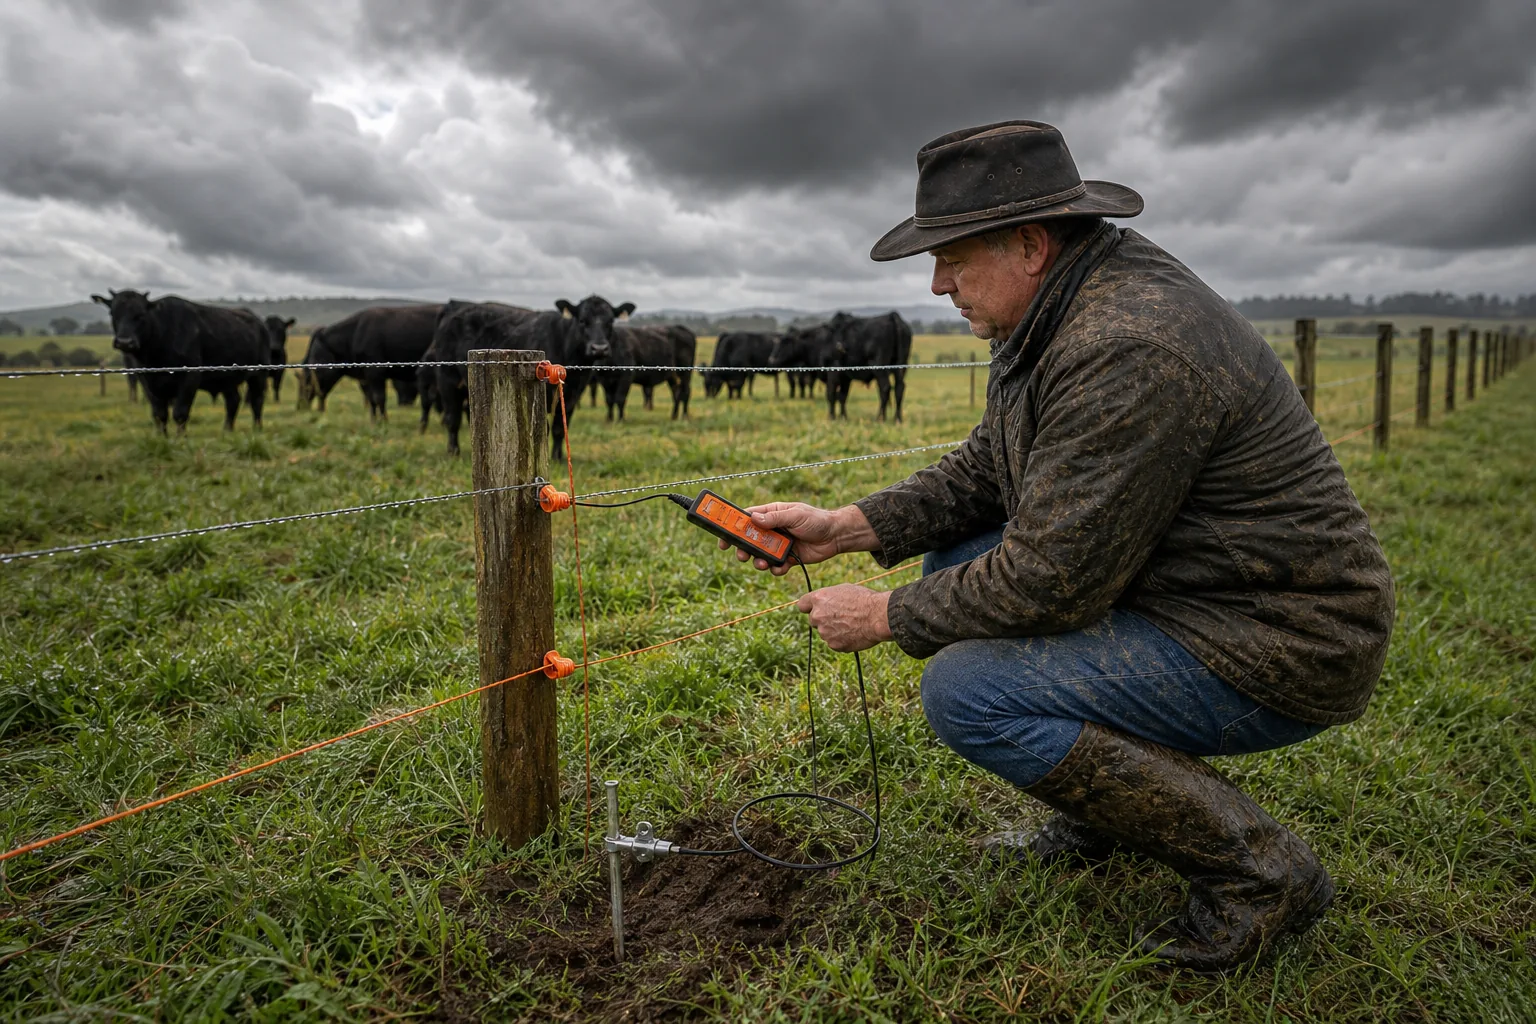
If the fault keeps returning, stop replacing parts at random. Record readings at the charger and far end, then search The Easy Homestead for a local fencing and farm construction provider who can trace the problem on site.
FAQ
What is the best electric fence for cattle?
The best electric fence for cattle is a system matched to your wire length, soil, herd, and power access. AC chargers suit pastures near a reliable outlet. Solar works for remote paddocks. Dual-power units add flexibility. Choose by loaded fence performance, not the highest open-line voltage printed on the box.
How many volts does a cattle electric fence need?
A cattle fence needs enough voltage to give a clear pulse through your actual fence conditions. The reviewed models list outputs from lower portable units to more than 9,000 volts. Vegetation, multiple strands, poor joints, and weak grounding reduce voltage at the animal. Test the far end instead of trusting the charger’s label.
Is AC or solar better for a cattle fence?
AC is better when grid power sits close to the charger and stays reliable. Solar is better for remote pasture where running power would cost more or create a long cord run. Solar models need enough battery reserve for cloudy weather. A dual-power charger can make sense when you move between fields.
How far apart should cattle fence ground rods be?
Ground rod spacing depends on the charger instructions and your soil. Use the manufacturer’s plan, then test the ground and fence at several points before turnout.
How do I find help installing an electric cattle fence?
You can find local installation help through The Easy Homestead’s fencing and farm construction listings. Search by ZIP code or county, then ask about cattle work, fence length, grounding, gates, and repair visits. Local knowledge matters most when your soil is rocky or your pasture has heavy seasonal weed growth.
Conclusion
Choose AC when the grid is close, solar when the pasture is remote, and dual power when your setup changes. Before you buy, write down the full wire length and test plan. Then find a farm fencing provider near you on The Easy Homestead who can check the layout and grounding on your land.