You can set up a functioning beehive in your first season without losing the colony by winter , but only if you get the sequence right. Most new beekeepers lose their first hive not from bad equipment but from skipping the steps that actually matter: mite monitoring, proper siting, and sourcing bees with solid genetics. Here’s the order that works.
Step 1: Decide if beekeeping fits your property and schedule
The first question isn’t what hive to buy. It’s whether your land and local rules actually allow you to keep bees in the first place.
Check your zoning before anything else. Many residential counties require a permit for backyard hives. Requirements vary widely by jurisdiction — some counties require a one-time permit, limit hive placement to side or rear yards with property-line setbacks, and tie the number of hives to your lot size. Your county may be looser or tighter. HOA covenants can ban hives entirely regardless of what the county allows, so read both before spending a dollar.
Tennessee adds a paperwork layer worth knowing about. The state’s beekeeping compliance checklist includes four mandatory steps: annual registration (a $10 fee through the official BeeWhere portal), displaying a sign on each hive with owner name, address, and telephone number, written or oral landowner approval before locating an apiary on private or public land, and a 72-hour relocation notice when moving colonies. One odd note: the checklist cites California Food and Agricultural Code rather than Tennessee law, which suggests the document was adapted from another state’s source. Verify current requirements directly with your county agricultural commissioner before registering.
On the schedule side, expect to spend two to four hours per week during peak season (late spring through summer) and much less in fall and winter. One inspection a week is enough during the active season. More than that stresses the colony; less than that lets problems compound fast.
Bee venom allergy is a hard stop. A mild localized reaction , swelling at the sting site , is normal and not disqualifying. Symptoms like throat tightening, hives spreading away from the sting, or a racing pulse are signs of a systemic reaction, and you should see an allergist before keeping bees.
Step 2: Get educated before you buy anything
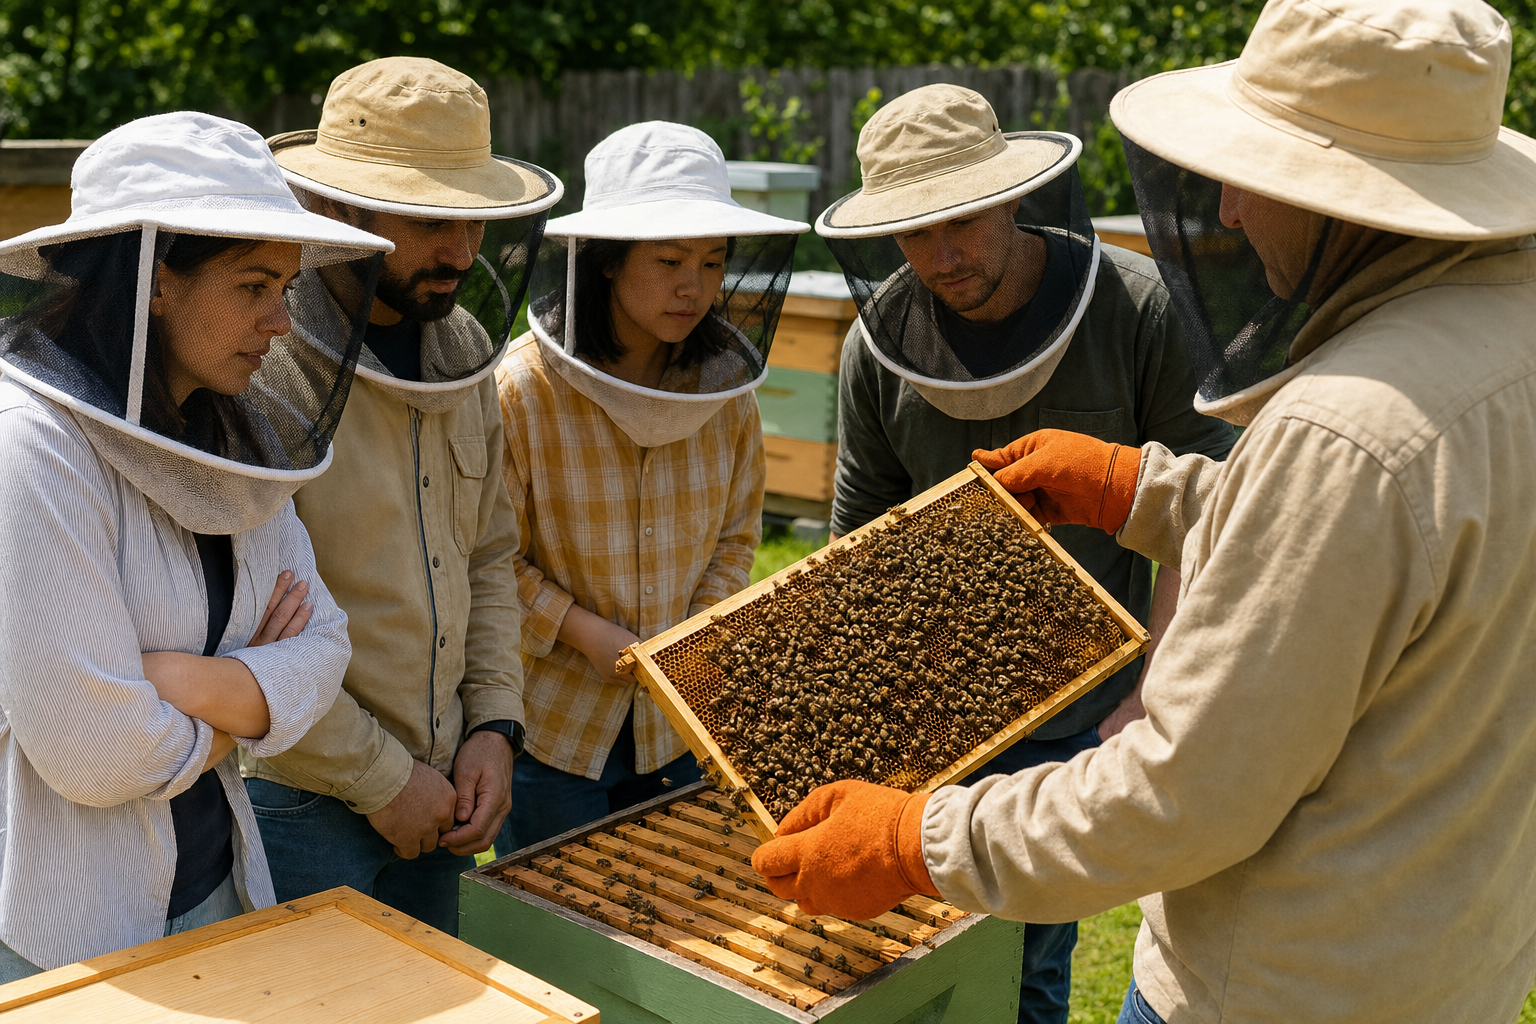
Every experienced beekeeper gives the same advice: learn before you spend. Equipment purchased without understanding your local hive style, supplier compatibility, and seasonal timing often doesn’t fit together and ends up costing more to replace.
The fastest path to real knowledge is a local beekeeping association. Most run spring taster days where you can work a live hive under supervision before committing to anything. Many state and regional associations run hands-on workshops open to the public that cover best management practices for Langstroth and top-bar hives. Look for something similar in your state. One afternoon in a bee yard teaches you more about frame handling and bee temperament than a week of reading.
Finding a mentor is worth the effort. A mentor cuts out the rookie mistakes that otherwise cost you colonies. Your local association can usually connect you with someone in your area. If not, ask at your nearest feed store , they often know who the active beekeepers are in the county.
For books, pick a well-regarded beekeeping reference that covers your hive style and region. Options range from introductory guides suited to quick lookups in your first year to more technical references you’ll return to as your operation grows. You don’t need multiple titles , pick one and read it cover to cover before your bees arrive.
One thing the books won’t fully prepare you for: varroa mites. Most beginners lose their first hive to the mite, not to weather or equipment failure. Start learning varroa biology and monitoring methods (alcohol wash is the most accurate) before your colony is in the ground. ScientificBeekeeping is a solid resource for digging into the research behind mite management.
Pro Tip: When you attend a workshop or association meeting, ask specifically about the most common hive types used in your county. Buying equipment that matches what local mentors and suppliers stock means you can borrow tools and source replacement parts without a three-week wait.
Step 3: Choose your hive type and budget your equipment
The Langstroth hive is the right starting point for most people in the US. It’s what local suppliers stock, what mentors use, and what the most repair parts and second-hand equipment are sized for. Top-bar and Warré hives have real advantages, but they reduce your ability to get hands-on help from experienced beekeepers in your area, and that matters a lot in year one.
Here’s what a basic Langstroth setup requires and roughly what to expect to pay, based on new equipment:
| Item | Purpose | Notes for Beginners |
|---|---|---|
| Hive stand | Improves hive off ground, improves drainage | DIY cinder block works; commercial stands cost $20–$40 |
| Bottom board (screened) | Floor of the hive; screened helps with mite monitoring | Screened is worth the small extra cost |
| Two deep brood boxes with frames | Where the queen lays and bees overwinter | Start with two deeps before adding honey supers |
| Beeswax-coated plastic foundation | Guides comb building inside frames | Pre-waxed plastic holds up better than pure wax for beginners |
| Queen excluder | Keeps queen out of honey supers | Not needed until you add a honey super |
| Honey super (medium) with frames | Where bees store harvestable honey | Add only after both brood boxes are 80% drawn |
| Inner cover and outer cover | Insulation and weather protection | — |
| Entrance reducer and mouse guard | Reduces entrance for small colonies and winter | Mouse guard goes on in fall before temps drop to 50°F |
| Hive tool | Pries apart propolis-sealed frames and lids | Buy two — you will lose one |
| Smoker | Masks alarm pheromones during inspections | A quality smoker with bellows lasts years |
| Veil and protective suit | Face and body protection | Full suit recommended for year one regardless of temperament claims |
Equipment costs vary by supplier and region — pricing varies by season and source, so get quotes from at least two local woodenware suppliers before ordering. Equipment to get a hive started before you add bees is a real investment, and it’s genuinely addictive — many beekeepers find themselves doubling their colonies within two years. Run the numbers now so the expansion doesn’t catch you off guard.
One thing many equipment guides skip: feeding gear. New packages and nucs almost always need supplemental feeding in their first weeks, especially during low-nectar periods. A simple entrance feeder or top feeder with sugar syrup (1:1 ratio in spring, 2:1 in fall) costs under $20 and can be the difference between a colony that builds out comb fast and one that stalls.
If you’re still sorting out where to buy locally, the guide to finding beekeeping supplies near you on The Easy Homestead covers how to track down local woodenware suppliers and package sources without the usual Facebook-thread research spiral.
Step 4: Site your hive correctly
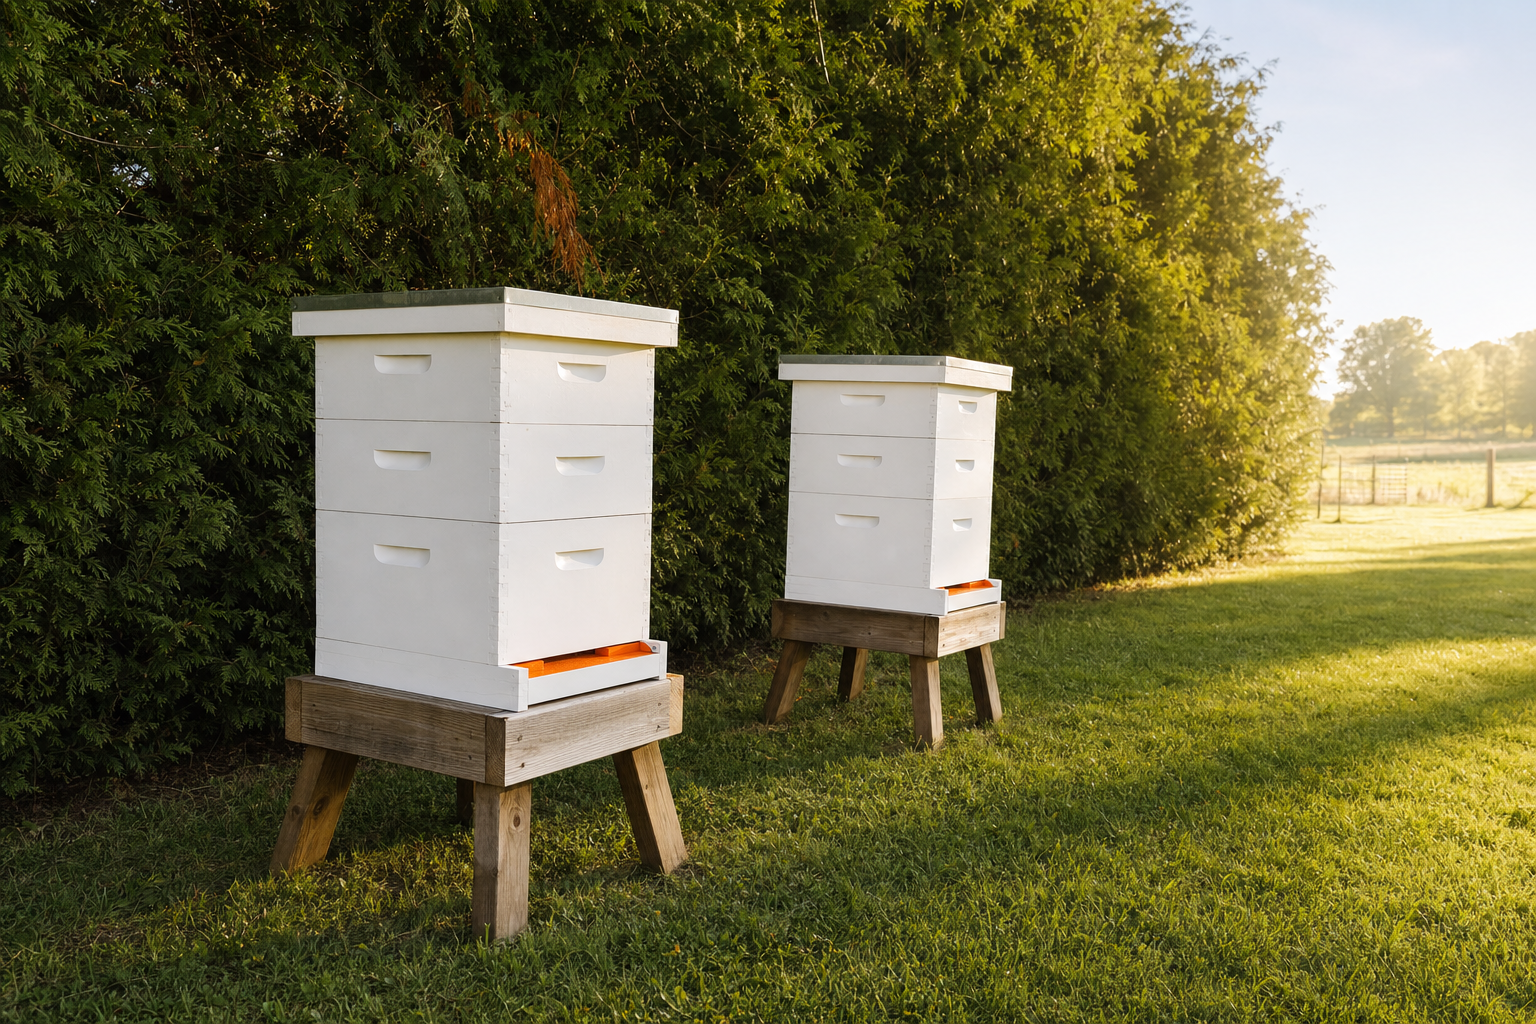
Hive placement has more effect on colony health and neighbor relations than most beginners expect. Get it right once and you mostly don’t revisit it.
Face the entrance southeast. This gives the colony morning sun, which gets foragers moving early. It also reduces moisture buildup inside the hive overnight. If your only option is a shadier spot, prioritize morning sun over afternoon sun , morning is what matters for colony activity.
Windbreaks matter more than most beekeeping guides emphasize. On calm warm days bees fly freely; add significant wind and flight activity drops noticeably. A dense hedge, a fence, or a barn wall on the north and west sides keeps the hive in calmer air without blocking sunlight. This is especially important in exposed rural sites where winter winds can stress clustered colonies.
Keep the flight path away from foot traffic. Bees fly in a straight line from the entrance for the first 10, 20 feet before gaining altitude. Position the hive so that line runs toward a fence, hedge, or open field rather than across a path, driveway, or neighbor’s yard. A six-foot barrier , solid fence or tall hedge , placed directly in front of the entrance forces bees to gain altitude immediately, which solves most neighbor concerns about flight lines.
Water source placement is easy to overlook. Bees need water daily during warm months and will find it themselves , often in a neighbor’s bird bath or pool if you don’t provide something closer. Set up a shallow tray, a bucket with floating corks, or a drip waterer within 50 feet of the hive before the bees arrive. Once bees establish a water source, they’re loyal to it, so you want them using yours from day one. If you’re building out a more permanent water setup on the property, a local plumber familiar with rural installations can help with running a dedicated line to your apiary area.
Key Takeaway: The single most impactful siting decision is southeast-facing with morning sun and a windbreak behind. Everything else is secondary.
Step 5: Source your bees and choose the right genetics
You have two main options for your first colony: a package of bees or a nucleus colony (nuc). They’re very different starting points.
A package is three pounds of bees and a mated queen in a screened box. There’s no comb, no brood, and no established relationship between the queen and her workers , they may have come from separate sources. The bees need to draw comb from scratch, which takes significant energy and feed. The upside: packages are available earlier in spring and cost less than nucs.
A nuc is a small working colony on five drawn frames. It has a laying queen, capped brood, some honey and pollen stores, and bees already functioning as a unit. Because drawing comb requires roughly eight pounds of sugar or nectar per pound of wax produced, the head start of drawn comb in a nuc is a significant advantage. Nucs cost more than packages and become available later in spring, but a well-sourced local nuc almost always outperforms a shipped package in the first year.
The genetics question matters more than many starter guides admit. Italian bees are docile and productive but can be heavy honey consumers and less resistant to varroa. Russian bees show stronger hygienic behavior and better natural mite resistance, though they can be more defensive. Carniolan bees build up fast in spring and are very gentle. Whatever breed you choose, buying locally matters: bees raised in your region are already adapted to your forage calendar and winter conditions.
There are also well-documented risks with bees shipped long distances. Queen problems and high hive loss rates are associated with package bees sourced from far away, with theories pointing to pesticide exposure and drought stress affecting queen quality. Local is genuinely better here, not just a preference.
Consider asking for a marked queen when you order. A queen marked with a small dot of paint on her thorax makes her much easier to find during inspections, which is a real time-saver when you’re still learning what you’re looking for. The color code cycles annually so you can also track her age.
Put your deposit down early. Local nucs sell out fast. In many areas, if you don’t commit by January or February for a May delivery, you’re waiting another year. The Easy Homestead’s directory lists verified beekeeping suppliers searchable by ZIP code and county , a faster route to local stock than scrolling through Facebook groups. Find a verified beekeeping supplier near you on The Easy Homestead.
Step 6: Manage pests, disease, and seasonal inspections
Varroa destructor is the dominant threat to managed honey bee colonies. It’s a parasitic mite that feeds on developing bees and transmits viruses that weaken the colony over time. Most untreated colonies in the US collapse within one to two years of introduction. This is the single management task you cannot skip or delay.
Monitor with an alcohol wash at least once a month during the active season. The method: collect about 300 bees (roughly half a cup) in a jar with rubbing alcohol, shake for 60 seconds, and count the mites that fall out. Keep the result below the established action threshold for your region; if you exceed it, treat immediately. Below that, keep monitoring.
Treatment options that are organically approved and well-documented include oxalic acid vaporization (most effective when the colony is broodless in late fall or early winter) and formic acid strips (effective with capped brood present). Timing matters: treat in late summer before the colony raises the winter bees that need to survive until spring. Winter bees born into a high-mite load won’t live long enough to carry the colony through.
Beyond varroa, follow a seasonal inspection rhythm. A month-by-month task calendar keyed to local bloom timing is a useful structural template even if your specific bloom calendar differs. The core pattern: winter checks without opening the hive (heft the box to gauge food stores), early spring feeding if stores are low, spring swarm prevention once both brood boxes fill, summer mite monitoring, fall feeding to build winter stores, and a final mite treatment before the cluster forms.
Swarming is the colony’s natural reproduction method and the most common surprise for first-year beekeepers. A colony that’s running out of space will raise queen cells and half the bees will leave with the old queen. You can prevent most swarms by adding space before the colony crowds and by checking for and removing extra queen cells during weekly inspections in May and June. If a swarm does happen, it’s not a disaster , but catching it requires quick action and a spare box.
Keep a simple inspection log. Date, weather, queen status (eggs visible?), brood pattern, mite count, and any notes on behavior. A one-paragraph entry per inspection takes three minutes and gives you something to actually reference when something goes wrong. Most problems in beekeeping compound silently , a log makes them visible.
Frequently Asked Questions
How much does it cost to start beekeeping?
Expect to spend a variable amount on equipment and protective gear for a single hive, plus additional costs for a local nuc or package — pricing varies by region and supplier. Costs rise sharply if you add a second hive, which most beekeepers do by year two. Buy quality protective gear and a good smoker upfront , those are the items where cutting corners creates real problems.
How much time does beekeeping take per week?
During active season (April through August), plan for one inspection per week, which takes 30, 60 minutes per hive once you know what you’re doing. Off-season management is minimal , a monthly hive check in winter takes under 10 minutes. Research and learning add more time in year one. Most beekeepers with one or two hives spend two to four hours per week during peak months.
Is a nuc or a package better for a first-time beekeeper?
A local nuc is almost always the better choice. It arrives with drawn comb, established brood, and a proven laying queen , a significant head start over a package that has to build everything from scratch. Nucs cost more and become available later in spring, but colony survival rates through the first winter are consistently higher. Order early; local nucs sell out fast in most regions.
Do I need a permit to keep bees at home?
It depends on your county and zoning district. Many residential areas require a permit with setback requirements and a limit on hive numbers. Tennessee requires annual registration through the BeeWhere portal and hive marking with owner contact information. Check your county zoning office and any HOA covenants before purchasing equipment. Requirements vary significantly from one county to the next, even within the same state.
How do I find local beekeeping suppliers?
Your local beekeeping association is the fastest starting point , members usually know who’s selling nucs and woodenware in the county. The Easy Homestead’s directory lists verified beekeeping suppliers searchable by ZIP code, which cuts out the Facebook-thread research most homesteaders deal with when sourcing locally. Feed stores with agricultural sections sometimes carry basic equipment and can point you toward local producers.
When is the best time of year to start beekeeping?
Spring is the right time to install bees , typically April or May depending on your region’s nectar flow. This gives the colony a full season to build comb, raise brood, and store enough honey to survive winter. Order your nuc or package in January or February, use winter to complete your equipment setup, and plan your first inspection for a calm, sunny day above 60°F after installation.
Getting started
The beekeepers who make it past year three are the ones who treated varroa management as a non-negotiable from the start and sourced locally adapted bees from a supplier they could actually talk to. Get those two things right and most other problems are fixable. If you’re still tracking down a local nuc supplier or need to find beekeeping equipment in your county, The Easy Homestead’s guide to finding beekeeping supplies near you is a good next stop , and the directory search by ZIP code will show you verified local suppliers without another three-week Facebook hunt.