Swipe through all 24 ideas
See every idea at a glance, then jump to the one you like.
The Nightmare Before Christmas plays at our house twice a year. Once in October, when the kids are carving pumpkins at the kitchen table, and again in December, because they insist it is a Christmas movie too. Jack is the Pumpkin King after all, so a Jack pumpkin on our porch feels right from the first frost until the tree goes up.
Here are 23 Nightmare Before Christmas pumpkin ideas I gathered from crafters and bloggers I love. You will find carved Jack faces, no carve painted pumpkins, Jack and Sally pairs, a patchwork Sally, Oogie Boogie, Spiral Hill, swirl stacks, a Jack pumpkin Christmas tree and free stencils for Jack, Oogie and Zero. Each one links to the site it came from, and I added how to make it at home. For more ideas, our pumpkin painting ideas and pumpkin carving ideas cover every style, and our Oogie Boogie Christmas decor and Sally costume ideas keep the movie going all season. Save the seeds from your carving pumpkin, too, and roast them for movie night.
1. Pumpkin King grin on a craft pumpkin
 Save
Credit: Make Life Lovely
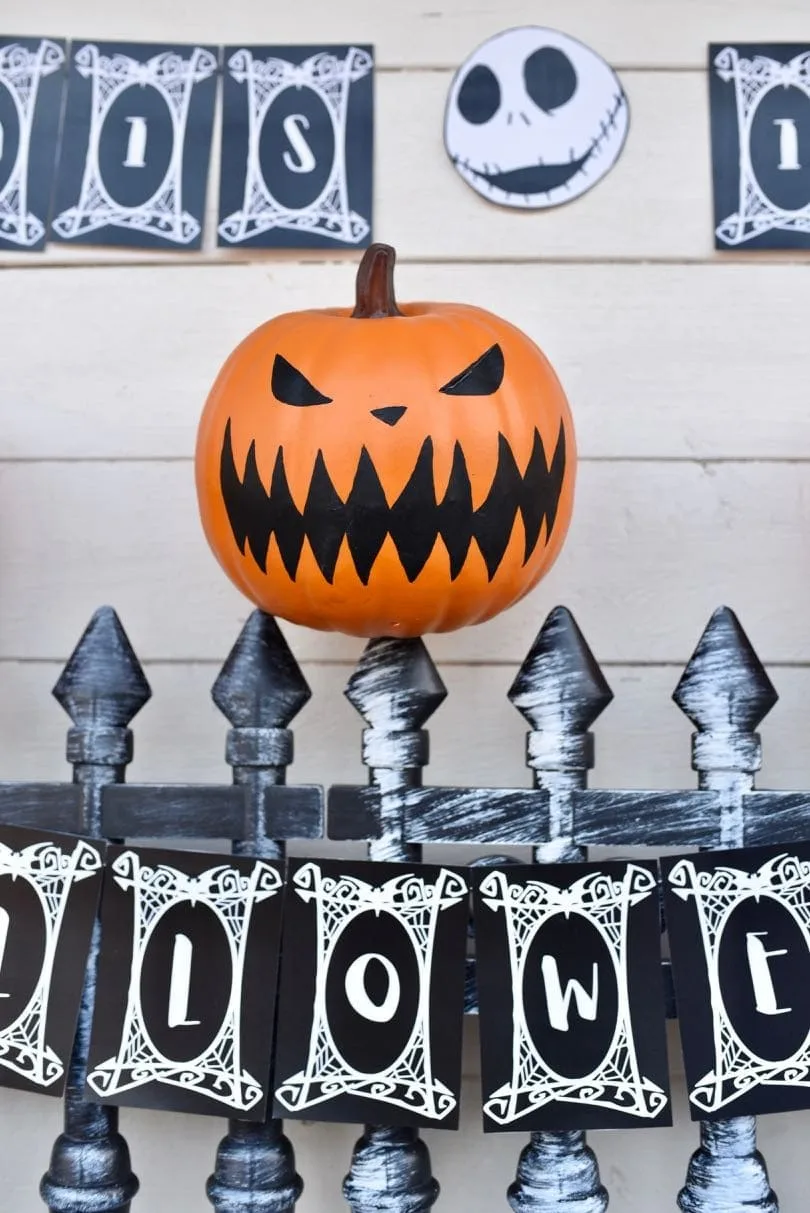
In the movie Jack is the Pumpkin King, and this is the grinning jack-o’-lantern face from Halloween Town’s opening song. It is painted, not carved, so it lasts from October right through Christmas.
Sketch the narrow angry eyes, a small triangle nose and a long mouth full of jagged teeth with a pencil. Fill it in with black acrylic craft paint and a small brush, then give it a second coat so the orange does not show through.
2. A row of grinning pumpkins on a cemetery fence
 Save
Credit: Make Life Lovely
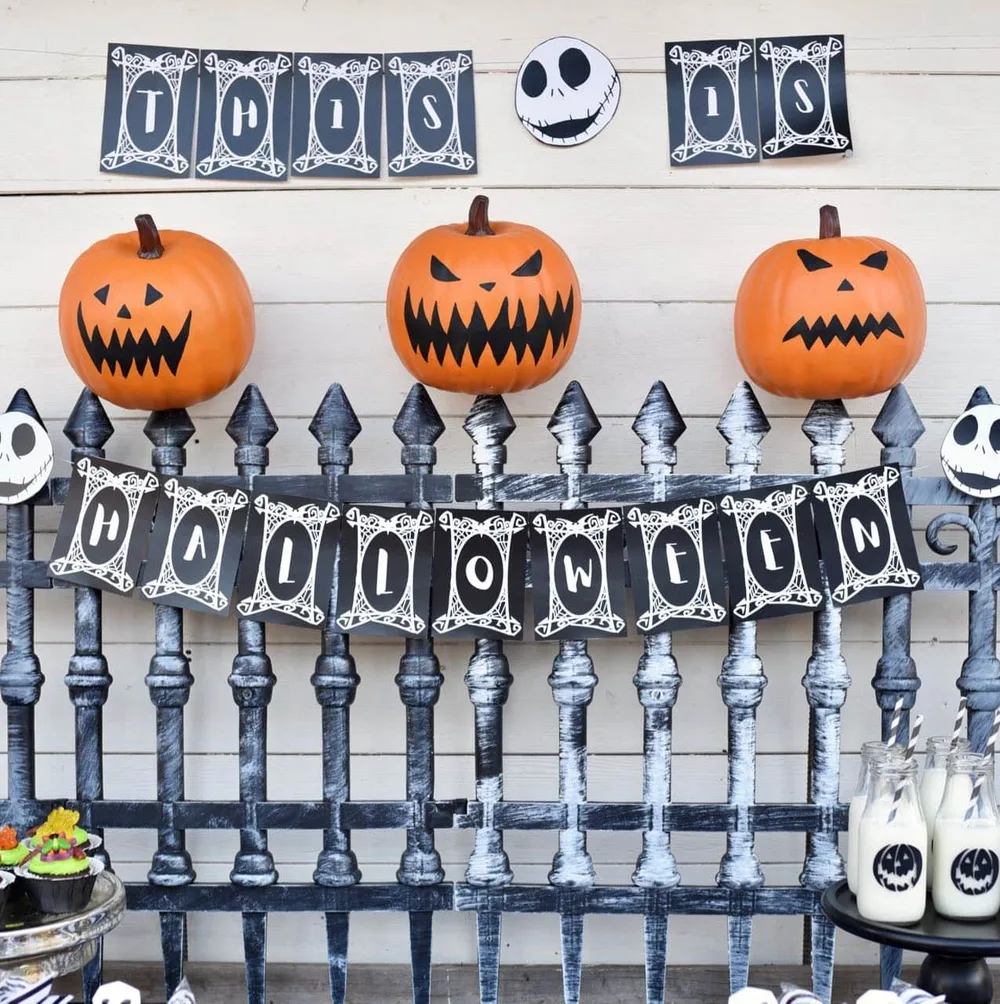
One painted pumpkin is cute. Three in a row along a little cemetery fence looks like a scene straight out of the film.
Paint three foam pumpkins the same way, changing the eyes a little on each one so they each have their own mood. Set them on top of a dollar store fence or a mantel and hang a black and white banner behind them.
3. Classic carved Jack Skellington face
 Save
Credit: Disney
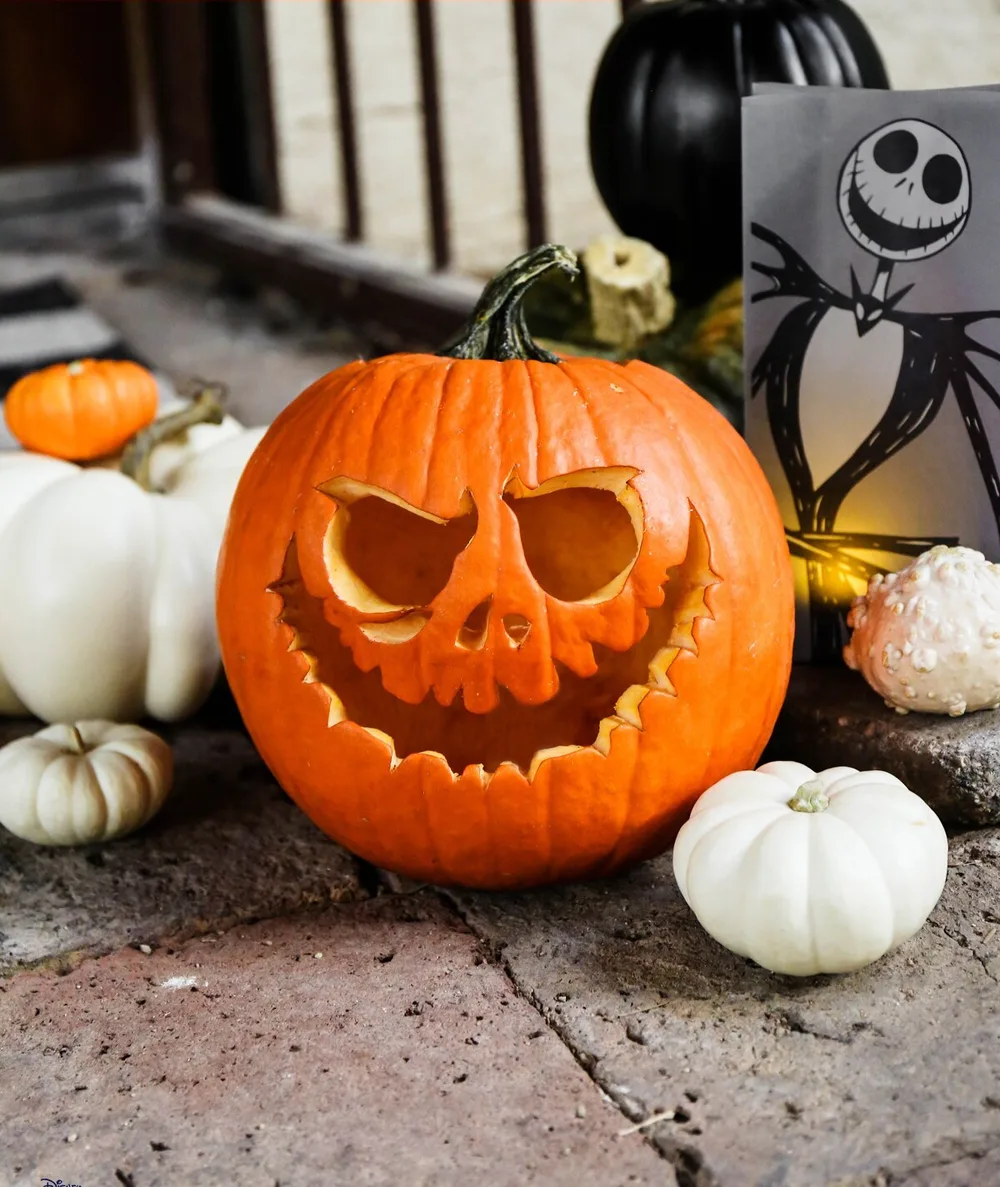
This is the carving most people picture when they hear Nightmare Before Christmas pumpkin. Big curved eyes, two little nostrils and that long stitched smile.
Print a Jack template, tape it to a cleaned out pumpkin and poke along the lines with a pin tool. Carve the eyes and nose all the way through, then carve the smile as a wide grin with little stitches at the corners.
4. White pumpkins painted like Jack
 Save
Credit: Good Gourds
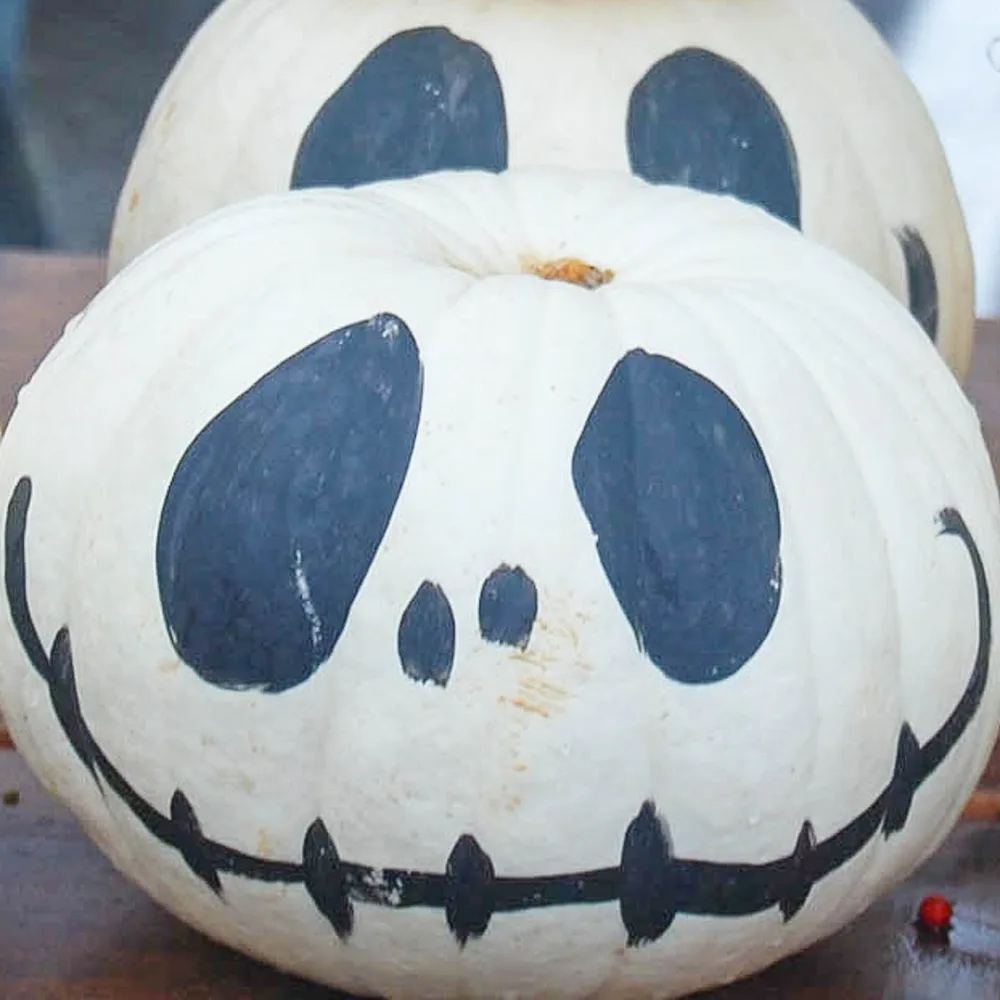
A white pumpkin already looks like Jack’s skull, so all you add is the face. My kids can do this one with a paint pen and almost no help.
Pick a white pumpkin or paint an orange one with two coats of white chalk paint. Paint two big oval eyes and two small nostrils in black, then draw the long smile with a thin line and short stitches across it.
5. Glowing Jack with a scratched smile
 Save
Credit: Good Gourds
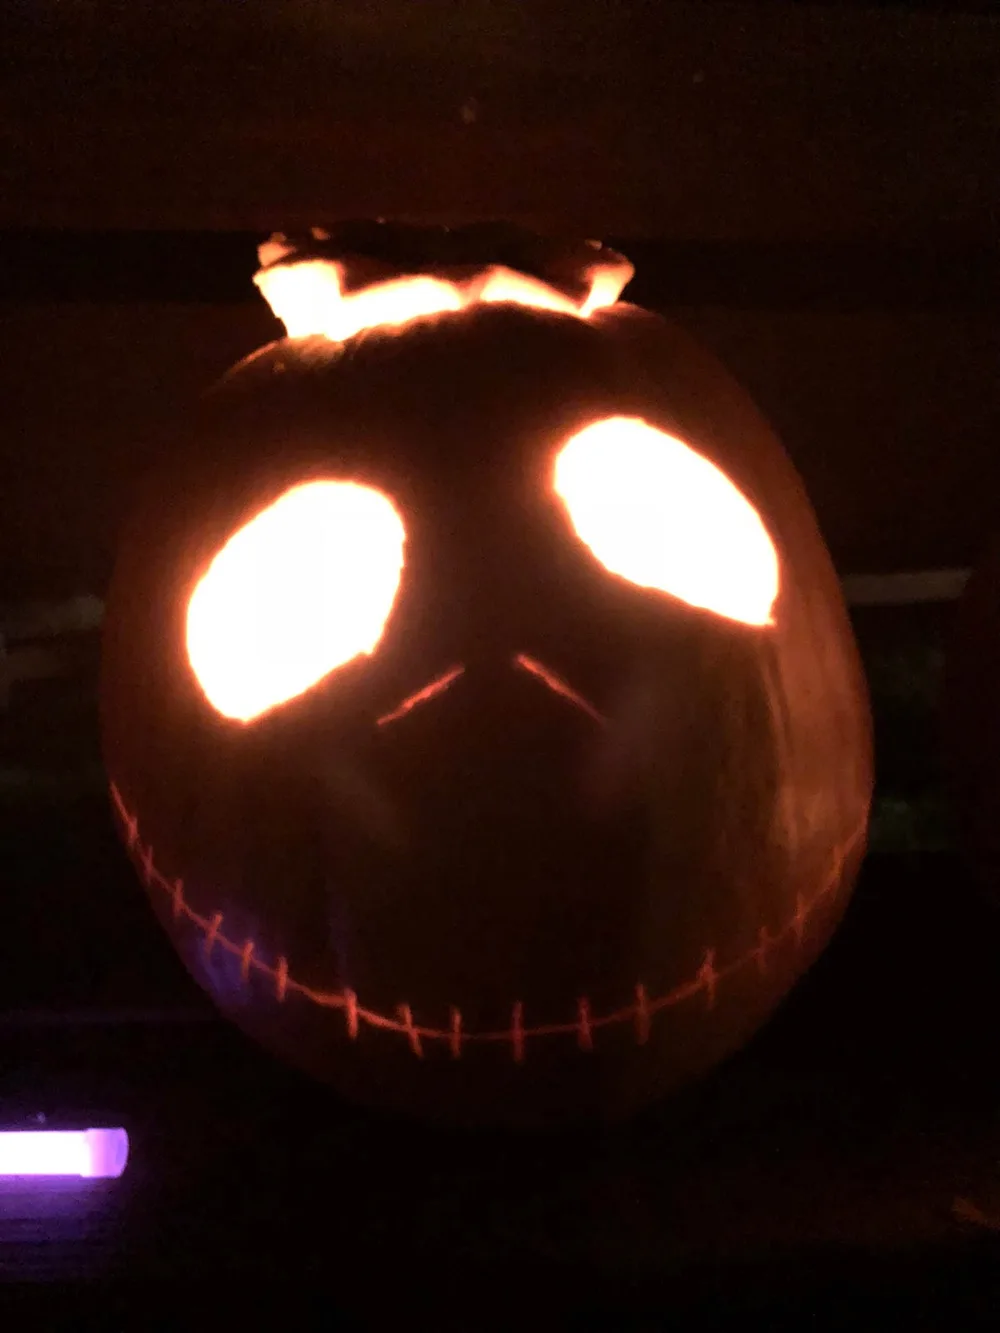
Only the eyes and nose are carved here. The smile is just scraped into the skin, so it glows soft instead of bright.
Carve the eyes and nose all the way through. For the mouth, use a linoleum cutter or a small loop tool to shave off the skin along the smile line without cutting through, then put a candle or LED light inside.
6. A pair of carved Halloween Town lanterns
 Save
Credit: Good Gourds
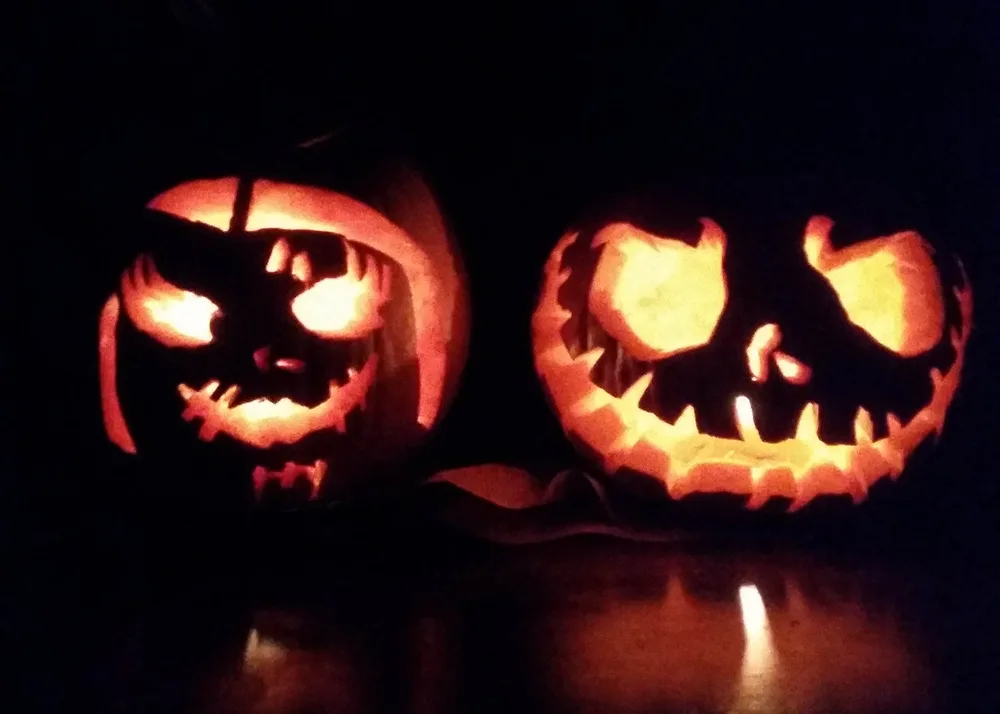
Two lit pumpkins side by side on the porch steps, each with its own spooky face, make a great welcome for trick or treaters.
Carve one pumpkin with Jack’s round eyes and wide grin and the other with a meaner face, like the Pumpkin King from the parade. Set them close together and light both so the glow blends.
7. A pile of mini Jack pumpkins
 Save
Credit: Good Gourds
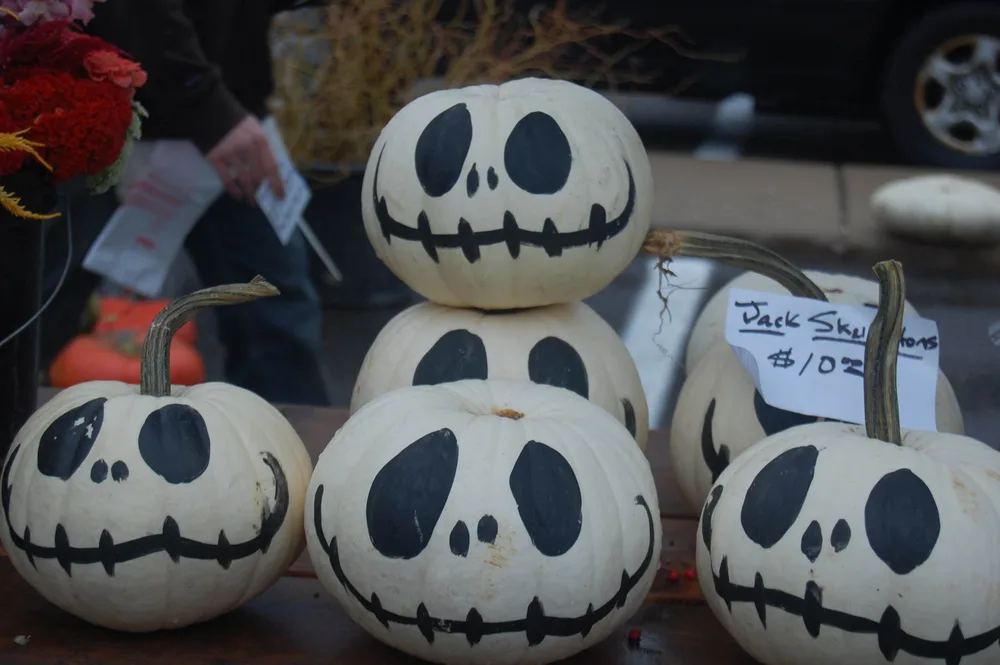
Little white pumpkins painted as Jack look adorable piled in a basket or lined up on a windowsill. They also make easy gifts for teachers and neighbors.
Buy a bag of mini white pumpkins. Paint the eyes, nose and stitched mouth with a black paint pen, and let them dry before you stack them.
8. Jack on Spiral Hill carving
 Save
Credit: Frosted Events
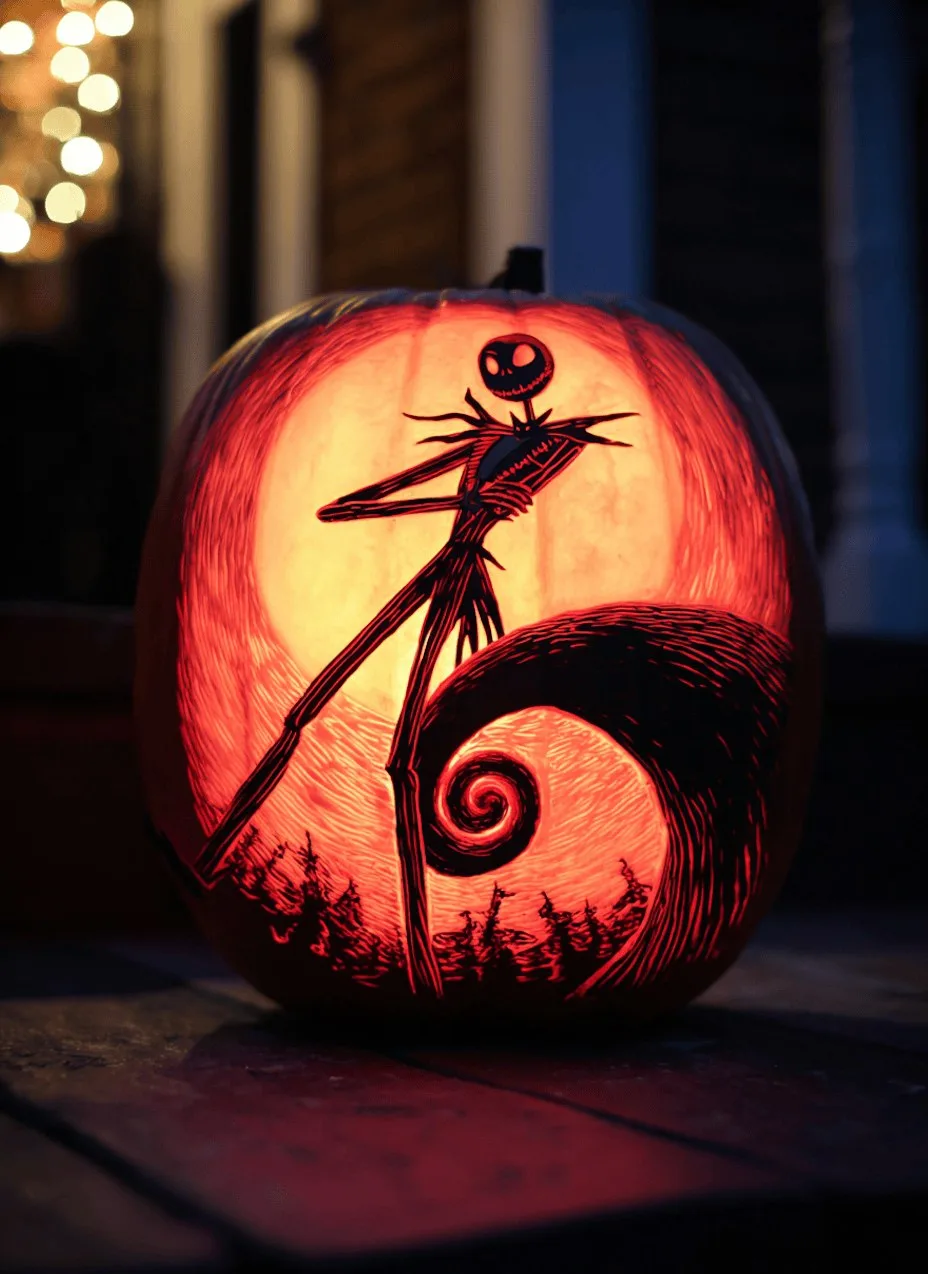
Jack standing on the curling Spiral Hill is the most famous picture from the whole movie. Carved on a big pumpkin, it is the showstopper of the porch.
Use a Spiral Hill stencil and carve the black parts out completely, leaving a thin band of pumpkin between Jack’s feet and the hill so the design holds together. Shave the sky area thin instead of cutting it out so it glows orange behind him.
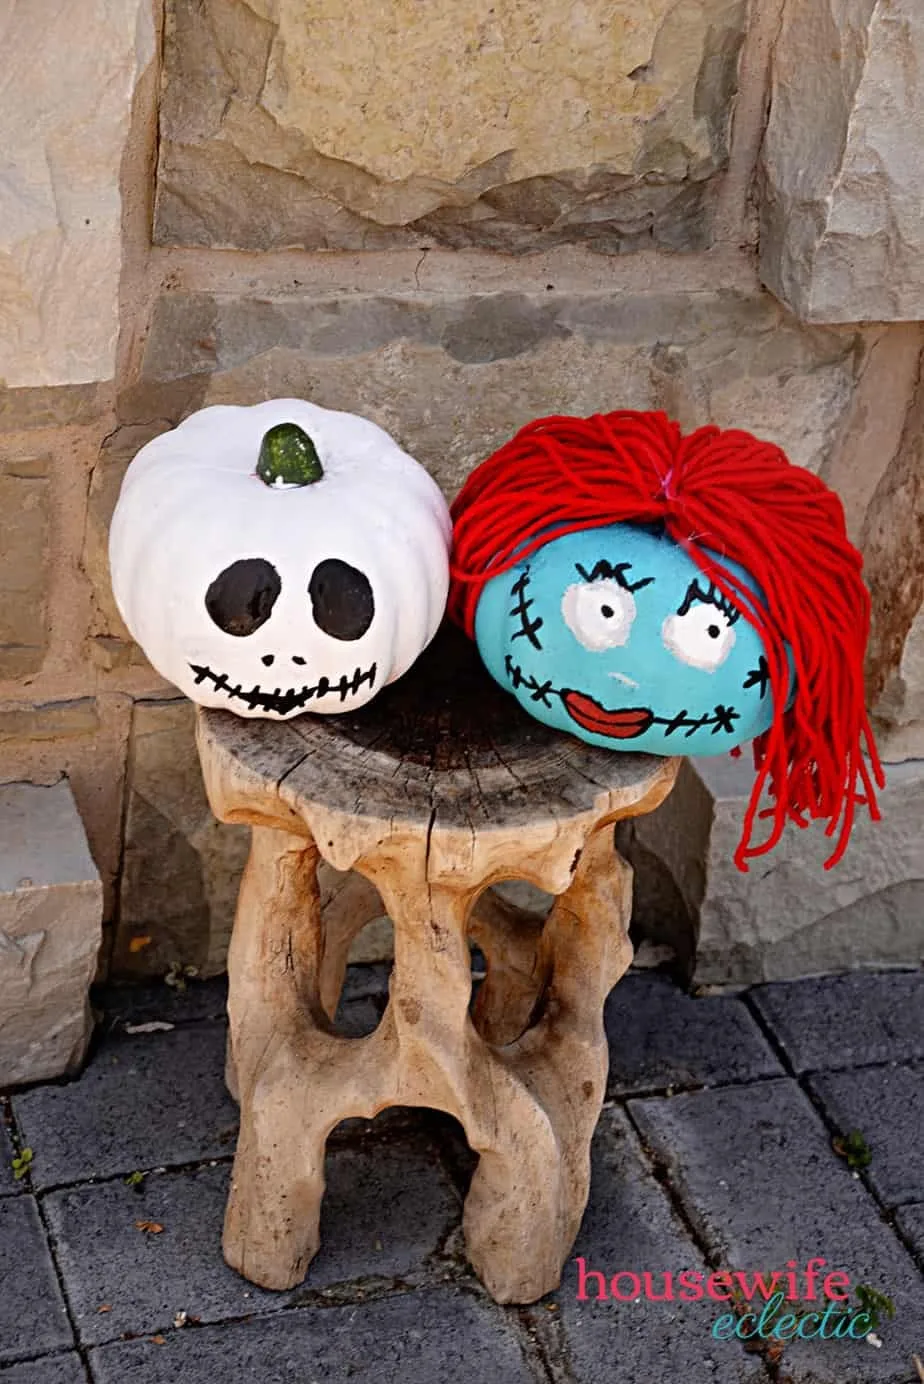
9. No carve Jack and Sally with yarn hair
 Save
Credit: Housewife Eclectic
This sweet little couple is made from dollar store craft pumpkins. Sally’s red yarn hair is what makes everyone smile.
Paint one small pumpkin white for Jack and one teal for Sally. Add Jack’s eyes and stitched mouth in black, give Sally her stitches, eyes and red lips, then hot glue a bundle of red yarn to the top of her pumpkin for hair. Cover the stems with tape while you paint.
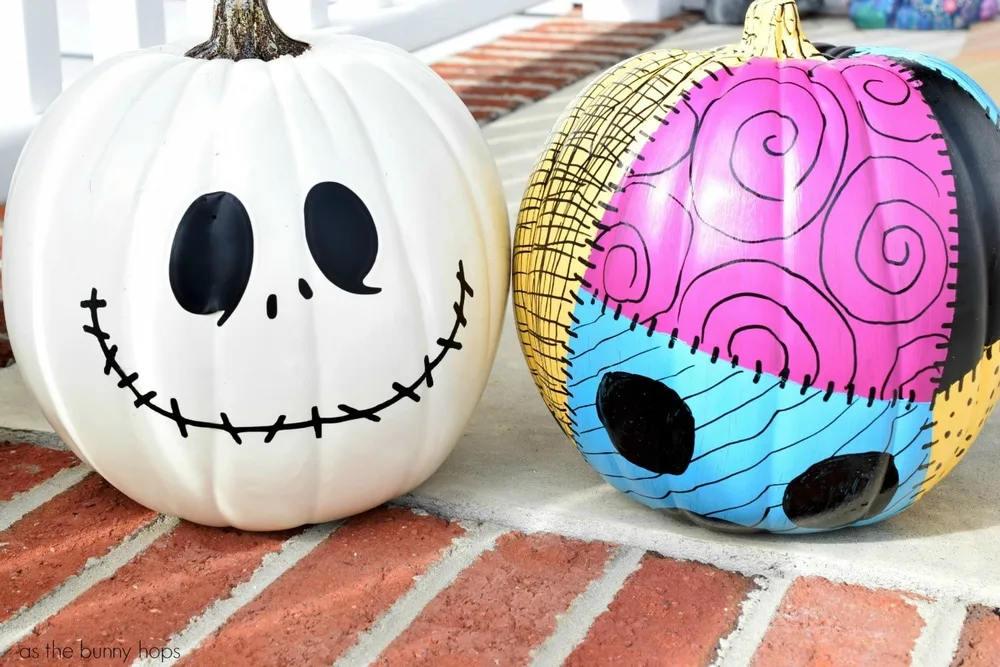
10. Jack and Sally painted craft pumpkins
 Save
Credit: As The Bunny Hops
A big white Jack and a patchwork Sally side by side are a fun way to show off the movie’s love story on the front step.
Paint Jack with a white base and black features. For Sally, tape off curved sections on a black pumpkin and fill each one with a different color, like pink, blue and yellow, then add stitch marks along every seam with a black paint pen.
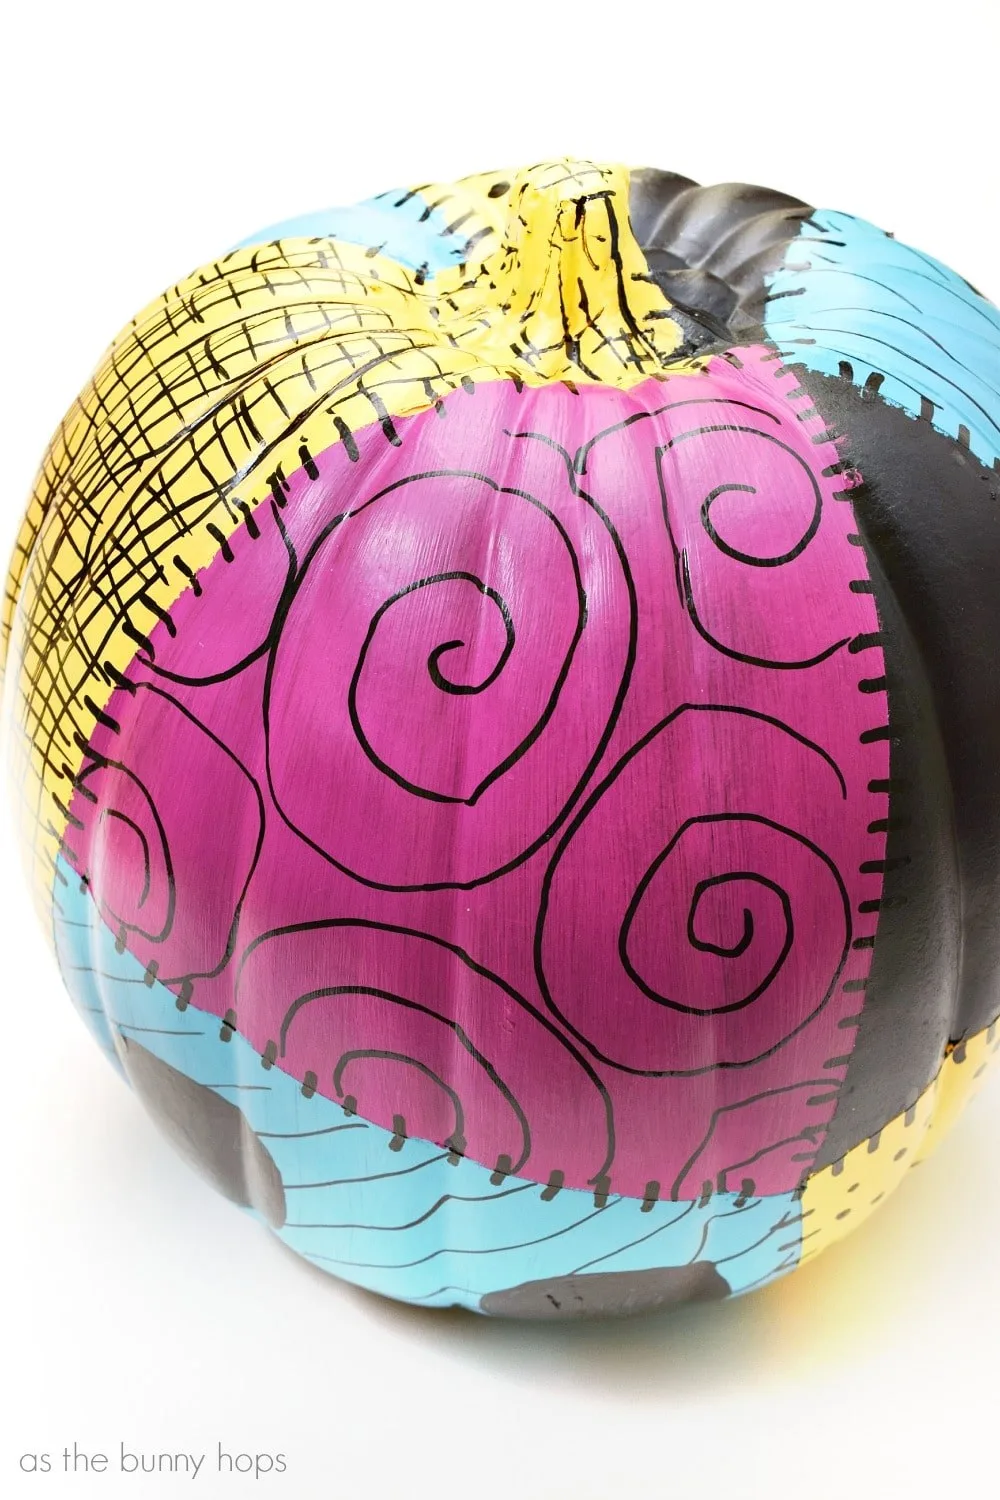
11. Patchwork Sally pumpkin
 Save
Credit: As The Bunny Hops
Sally’s dress is made of bright patches, and that pattern looks gorgeous wrapped around a pumpkin. No face needed.
Start with a black craft pumpkin and mark off sections with painter’s tape. Paint the patches in hot pink, sky blue and yellow, then draw swirls on the pink, crosshatch on the yellow and wavy lines on the blue. Finish with stitches along every edge.
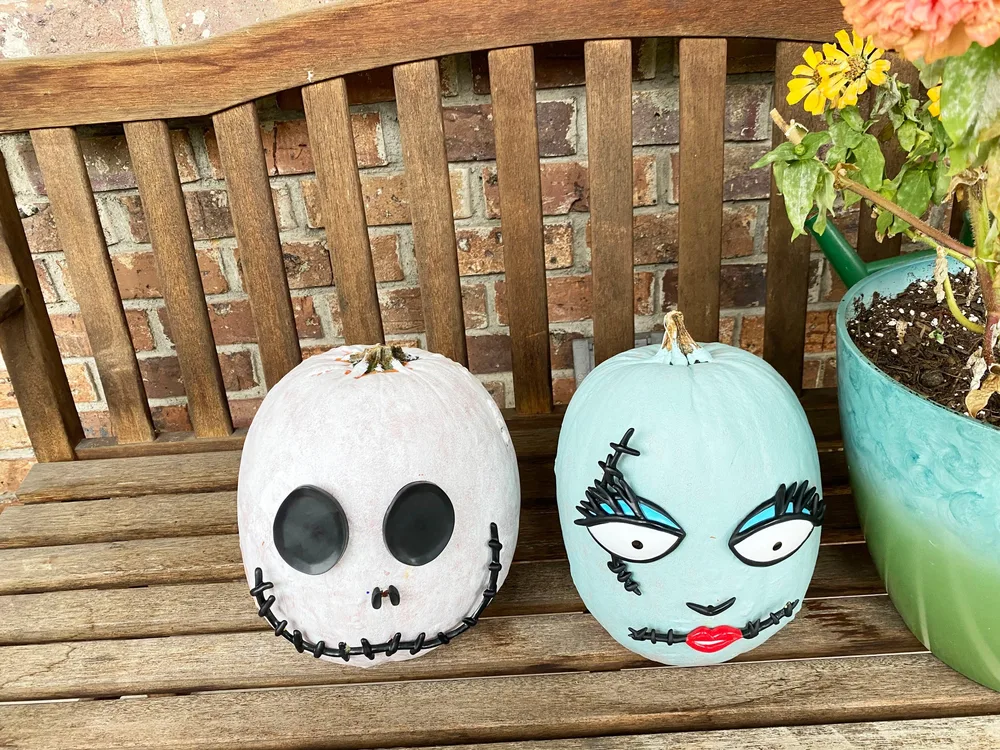
12. Real pumpkins painted as Jack and Sally
 Save
Credit: Life According to Jamie
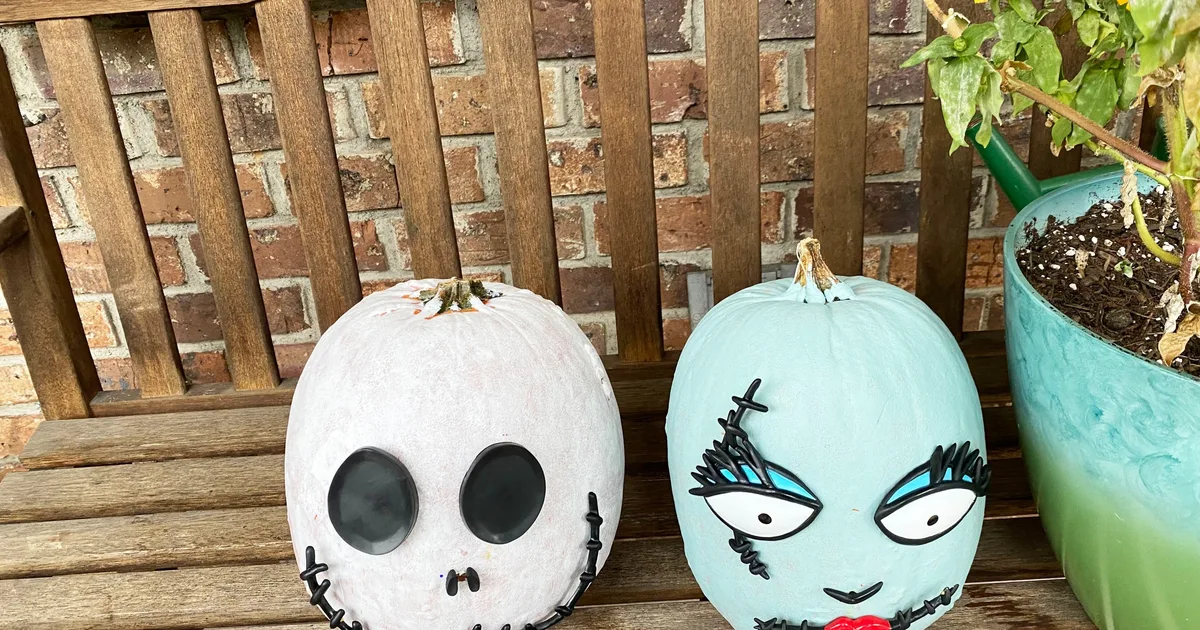
These were made from real farm stand pumpkins, which I love. A tall pumpkin makes a perfect Sally and a round white one makes Jack.
Paint one pumpkin a soft white and one a pale blue green with two coats of acrylic. Add Jack’s eyes and stitched mouth, then give Sally her big lashes, stitches and red lips. Set them on a bench with a potted mum.
13. Sally’s face up close
 Save
Credit: Life According to Jamie
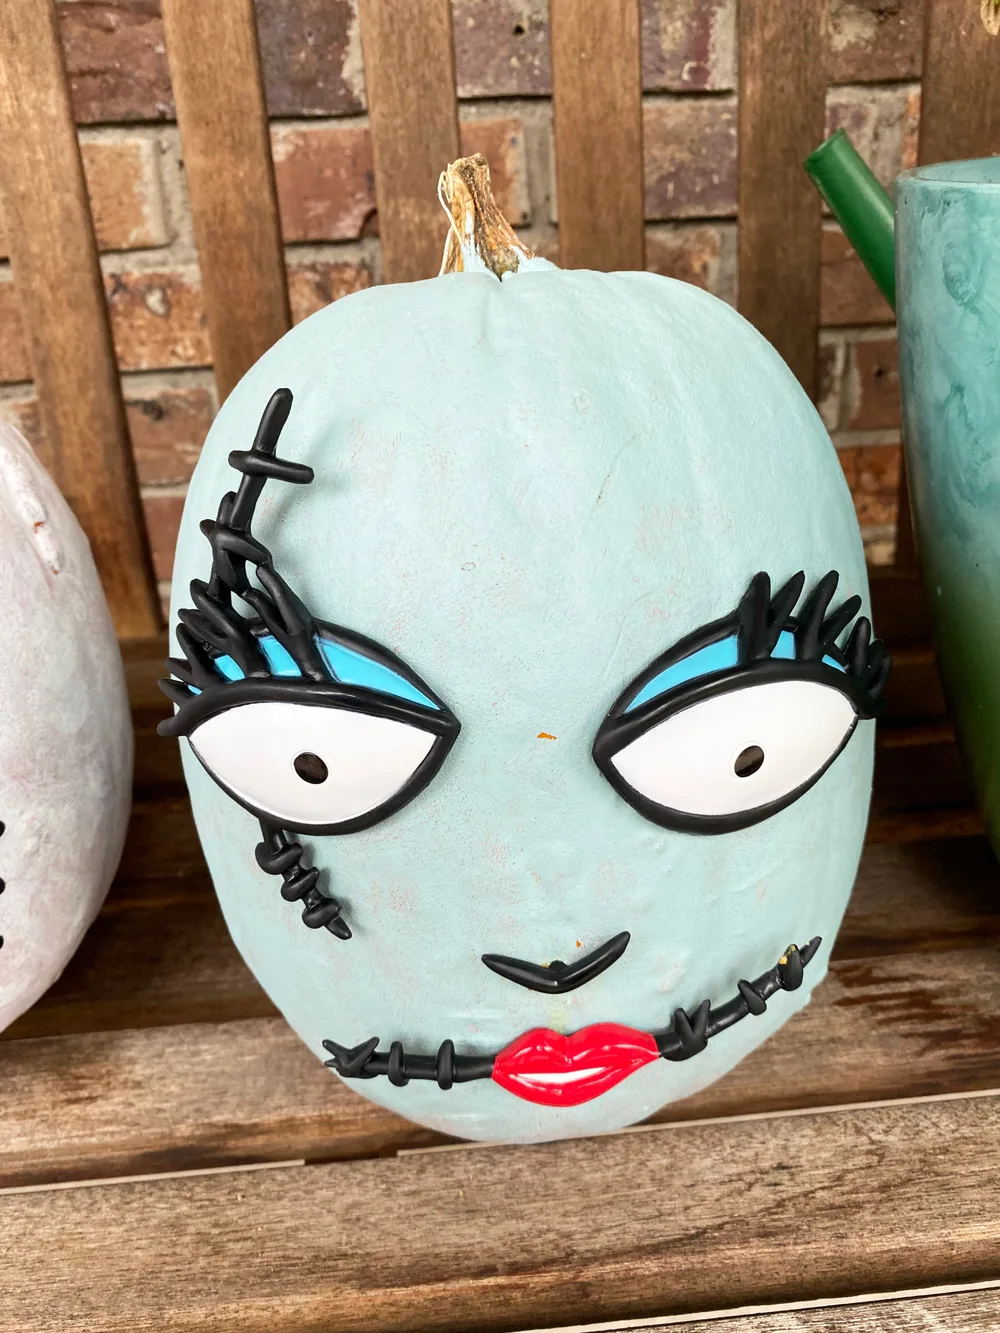
Sally’s face is a little harder to paint than Jack’s, but the result is worth it. Those big lashes and the stitched cheek make her look so sweet.
Paint a tall pumpkin pale blue. Draw almond eyes with heavy lashes, a stitched line across one cheek and a few at the mouth, then paint red lips last so they stand out.
14. Jack with push in face pieces
 Save
Credit: Life According to Jamie
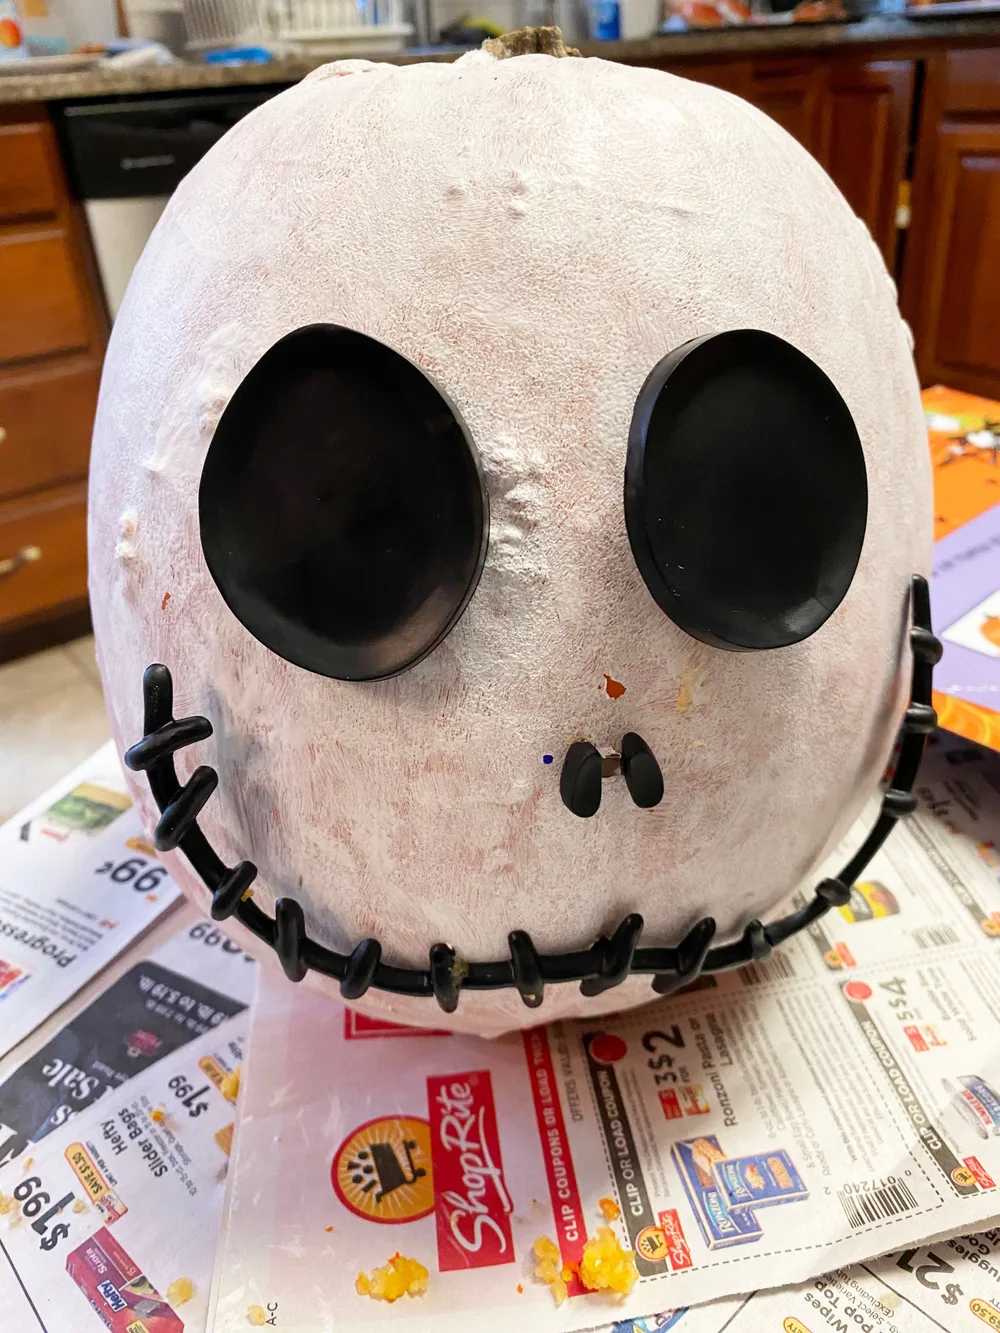
If you do not trust your painting hand, push in pumpkin face kits are the easy way. The pieces press right into a real pumpkin.
Paint the pumpkin white first and let it dry. Press in the black eyes, nose and the stitched smile from a Jack face kit, and the pumpkin is done in minutes.
15. Oogie Boogie with a pile of pumpkins
 Save
Credit: Make Life Lovely
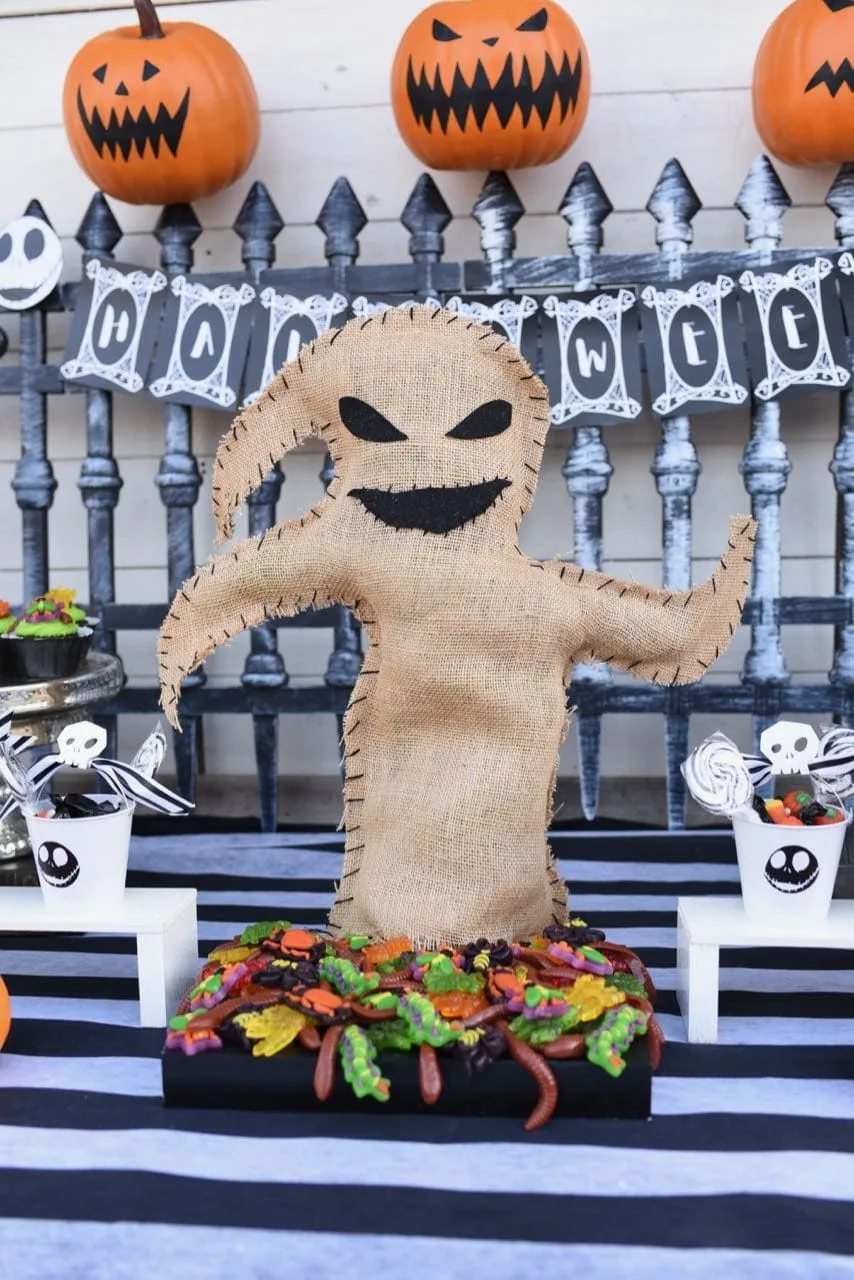
Oogie Boogie is a burlap sack full of bugs, so he is easy to make with craft supplies. Standing behind a row of grinning pumpkins, he steals the show.
Cut two Oogie shapes from burlap, add his eyes and mouth in black felt and stitch around the edge with thick thread. Stuff him and set him over a pile of plastic bugs with your painted pumpkins around him.
16. A whole Halloween Town table
 Save
Credit: Make Life Lovely
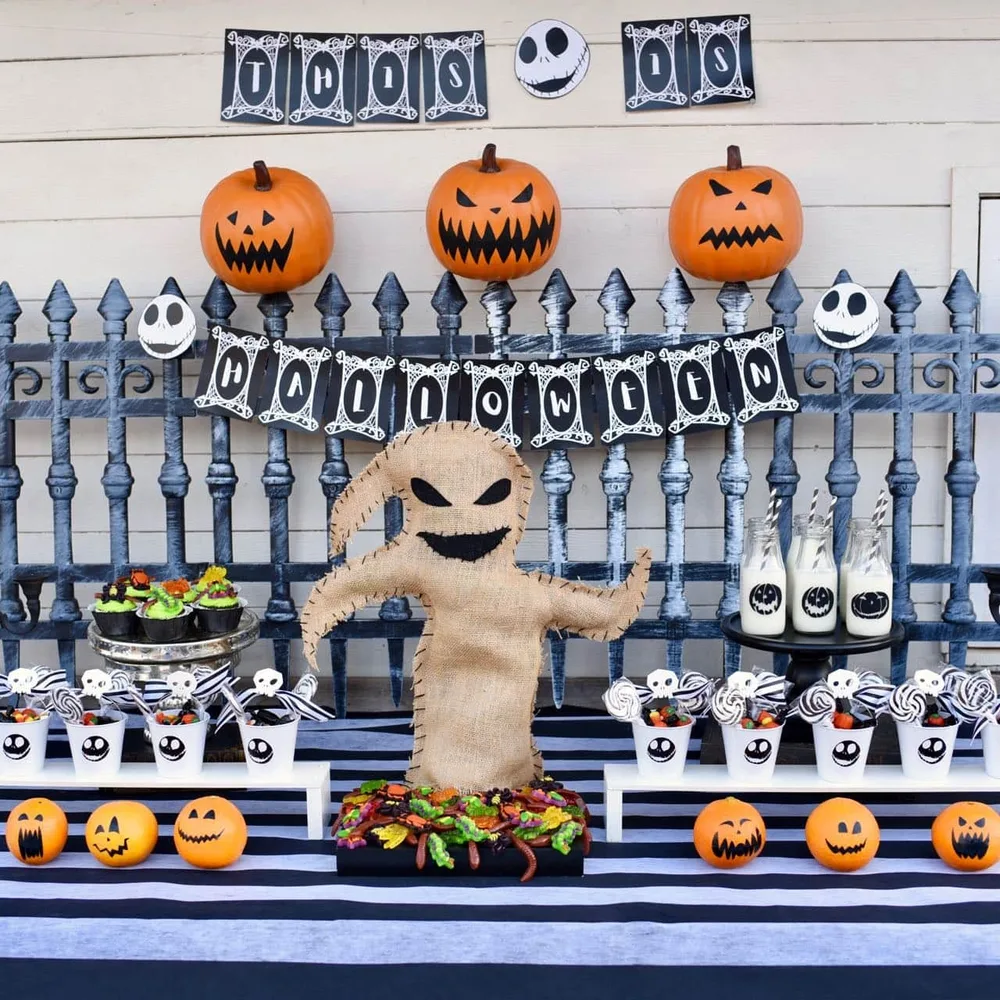
When I host a movie night this is the kind of table I dream about. Pumpkins on the fence, Oogie in the middle and treats on every level.
Hang a banner across the wall, set a cemetery fence along the back and line it with your painted pumpkins. Use a black and white striped cloth on the table and fill the front with small pumpkins and Jack treat cups.
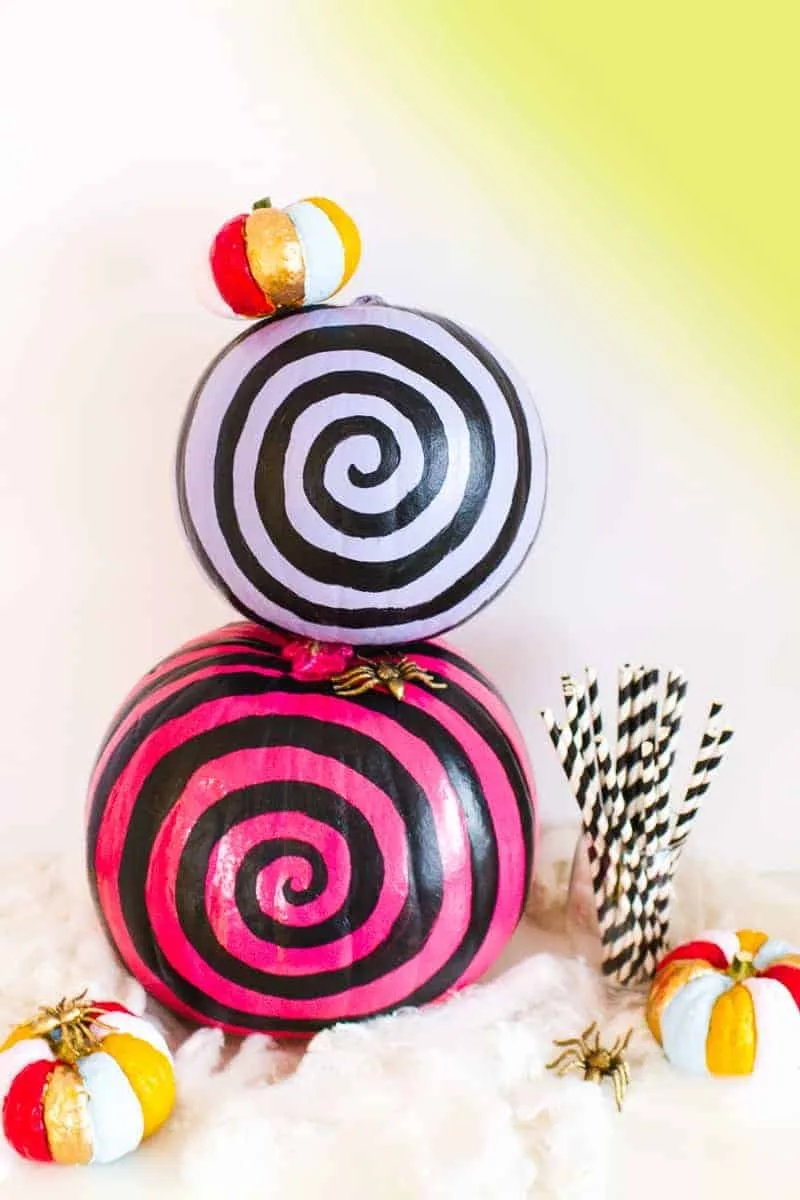
17. Tim Burton swirl pumpkin stack
 Save
Credit: Bespoke Bride
The swirling stripes are a nod to Spiral Hill and to Tim Burton’s style. Stacked two high, they make a striking little tower.
Paint one pumpkin white and one pink. Paint a black spiral from the stem outward with a medium brush, keeping the lines about the same width. Stack them and top with a tiny striped pumpkin.
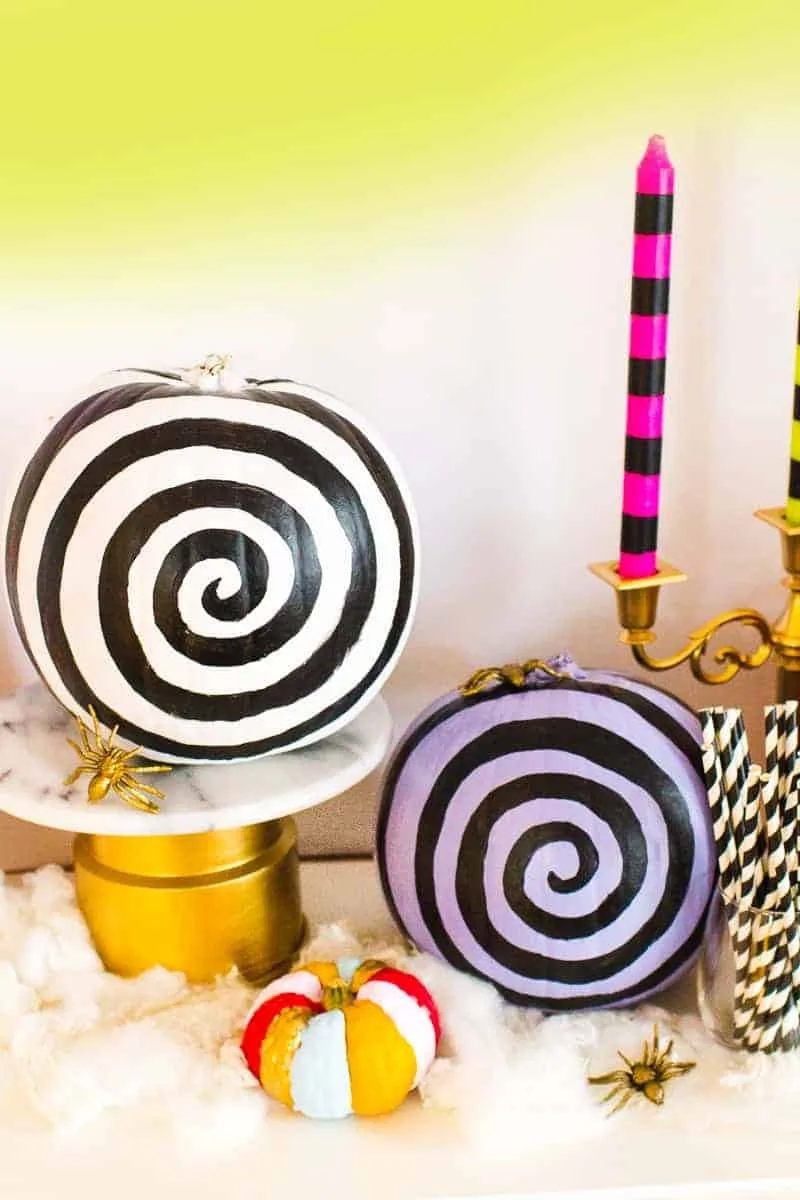
18. Black and white spiral on a gold stand
 Save
Credit: Bespoke Bride
One spiral pumpkin on a gold cake stand looks fancy enough for the dining table. It stays nice well past Halloween.
Paint a pumpkin white, draw the spiral in pencil and fill it in with black acrylic. Set it on a gold candle holder or cake stand with black and white striped paper straws in a cup beside it.
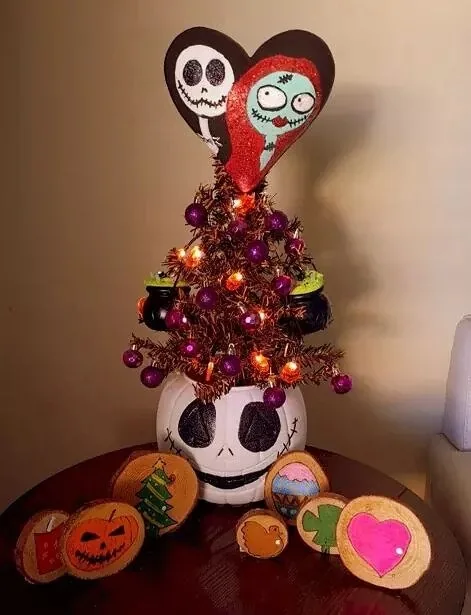
19. Jack pumpkin Christmas tree
 Save
Credit: Hometalk
This one fits the Christmas half of the movie best. A white Jack pumpkin becomes the pot for a little tinsel tree with a Jack and Sally heart on top.
Paint a plastic pumpkin pail white and give it Jack’s face. Push a small tinsel tree into it, add mini ornaments and string lights, and top it with a paper heart showing Jack and Sally.
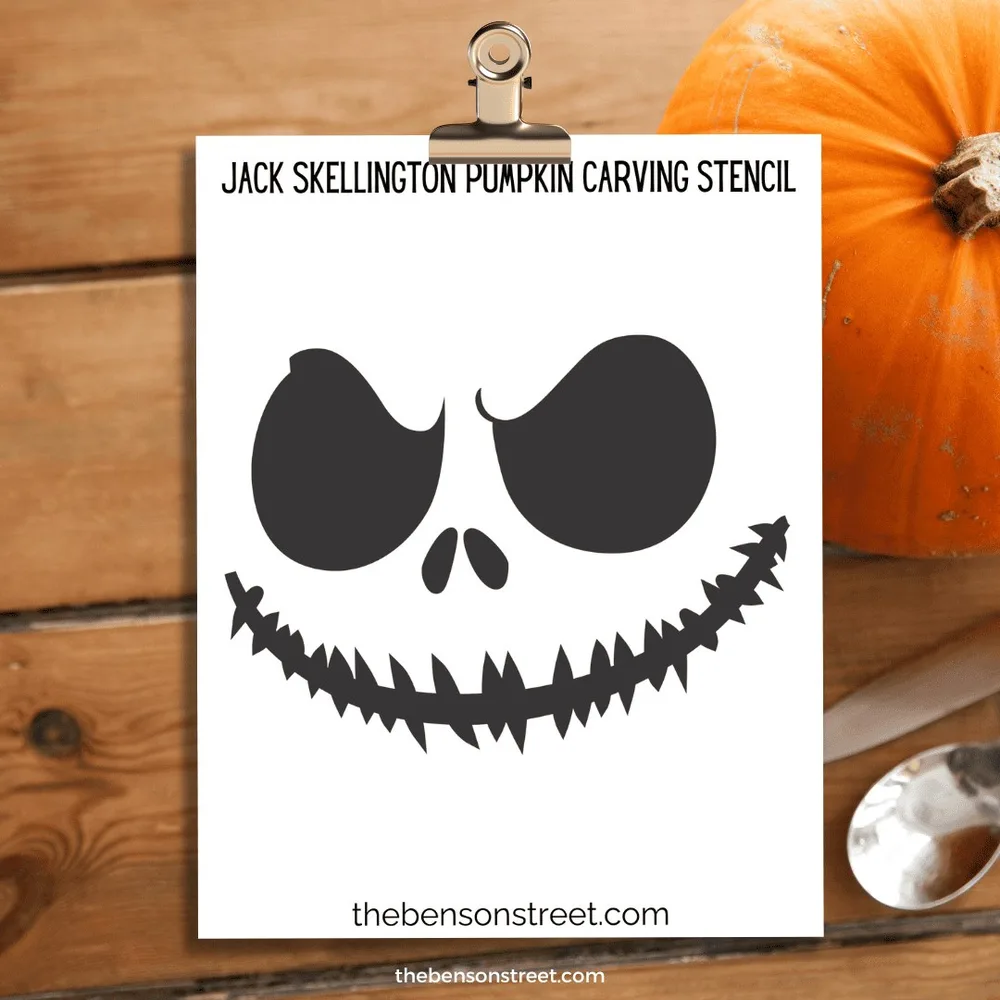
20. Free Jack Skellington stencil
 Save
Credit: The Benson Street
A good stencil makes all the difference if you are carving with kids. This one has the classic eyes and big stitched grin.
Print the stencil, tape it to your pumpkin and trace the lines with a pin tool or a ballpoint pen. Carve the black parts out and leave the white parts as pumpkin.
21. Oogie Boogie carving stencil
 Save
Credit: The Benson Street
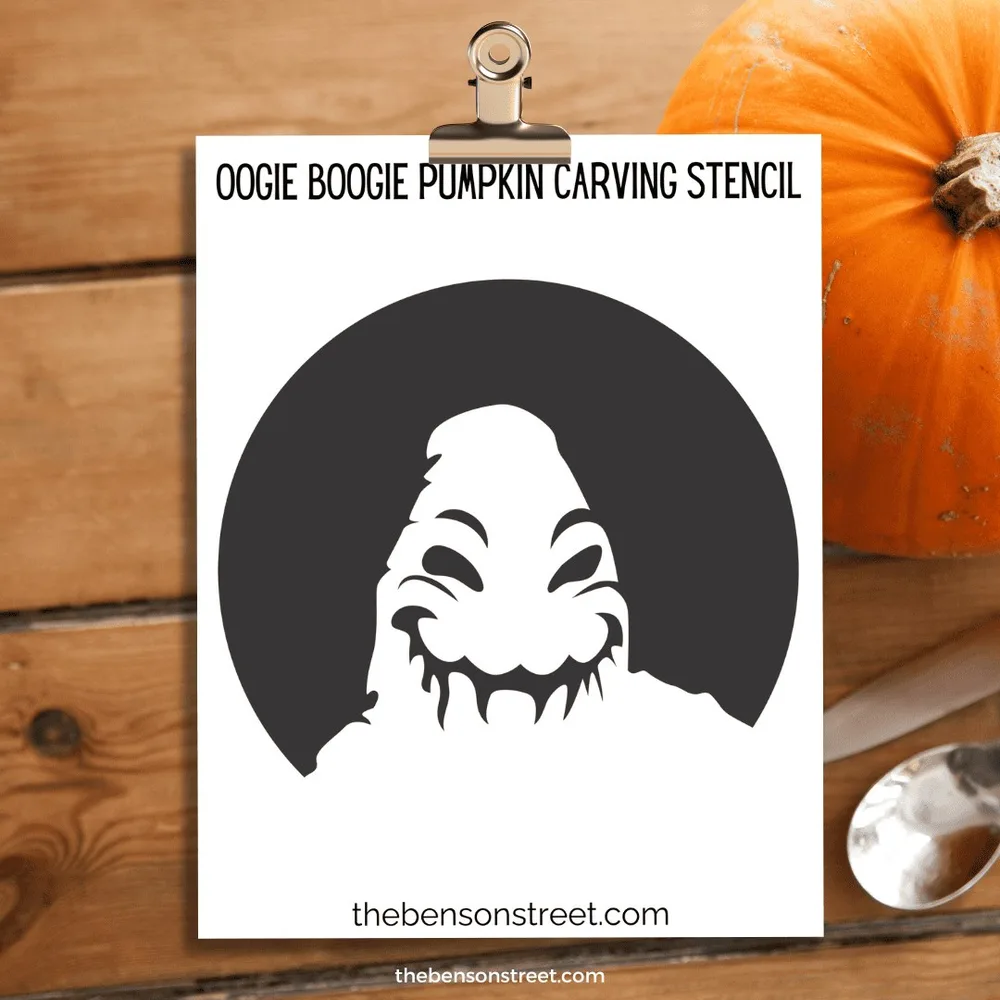
Oogie Boogie looks great as a dark shape against a glowing round moon. It is a fun pick for the older kids.
Tape the stencil on and transfer it with a poke tool. Carve out the moon around him and leave Oogie as solid pumpkin, then cut his eyes and mouth through so they glow.
22. Zero the ghost dog stencil
 Save
Credit: Disney Parks Blog
Zero, Jack’s little ghost dog with the glowing nose, is the cutest carving of the bunch. Disney shares a free stencil for him.
Print the Zero stencil and carve the dark areas out. If you like, push an orange or red LED light into a small hole where his nose is so it glows like in the movie.
23. A whole set of Jack face stencils
 Save
Credit: Homemade Heather
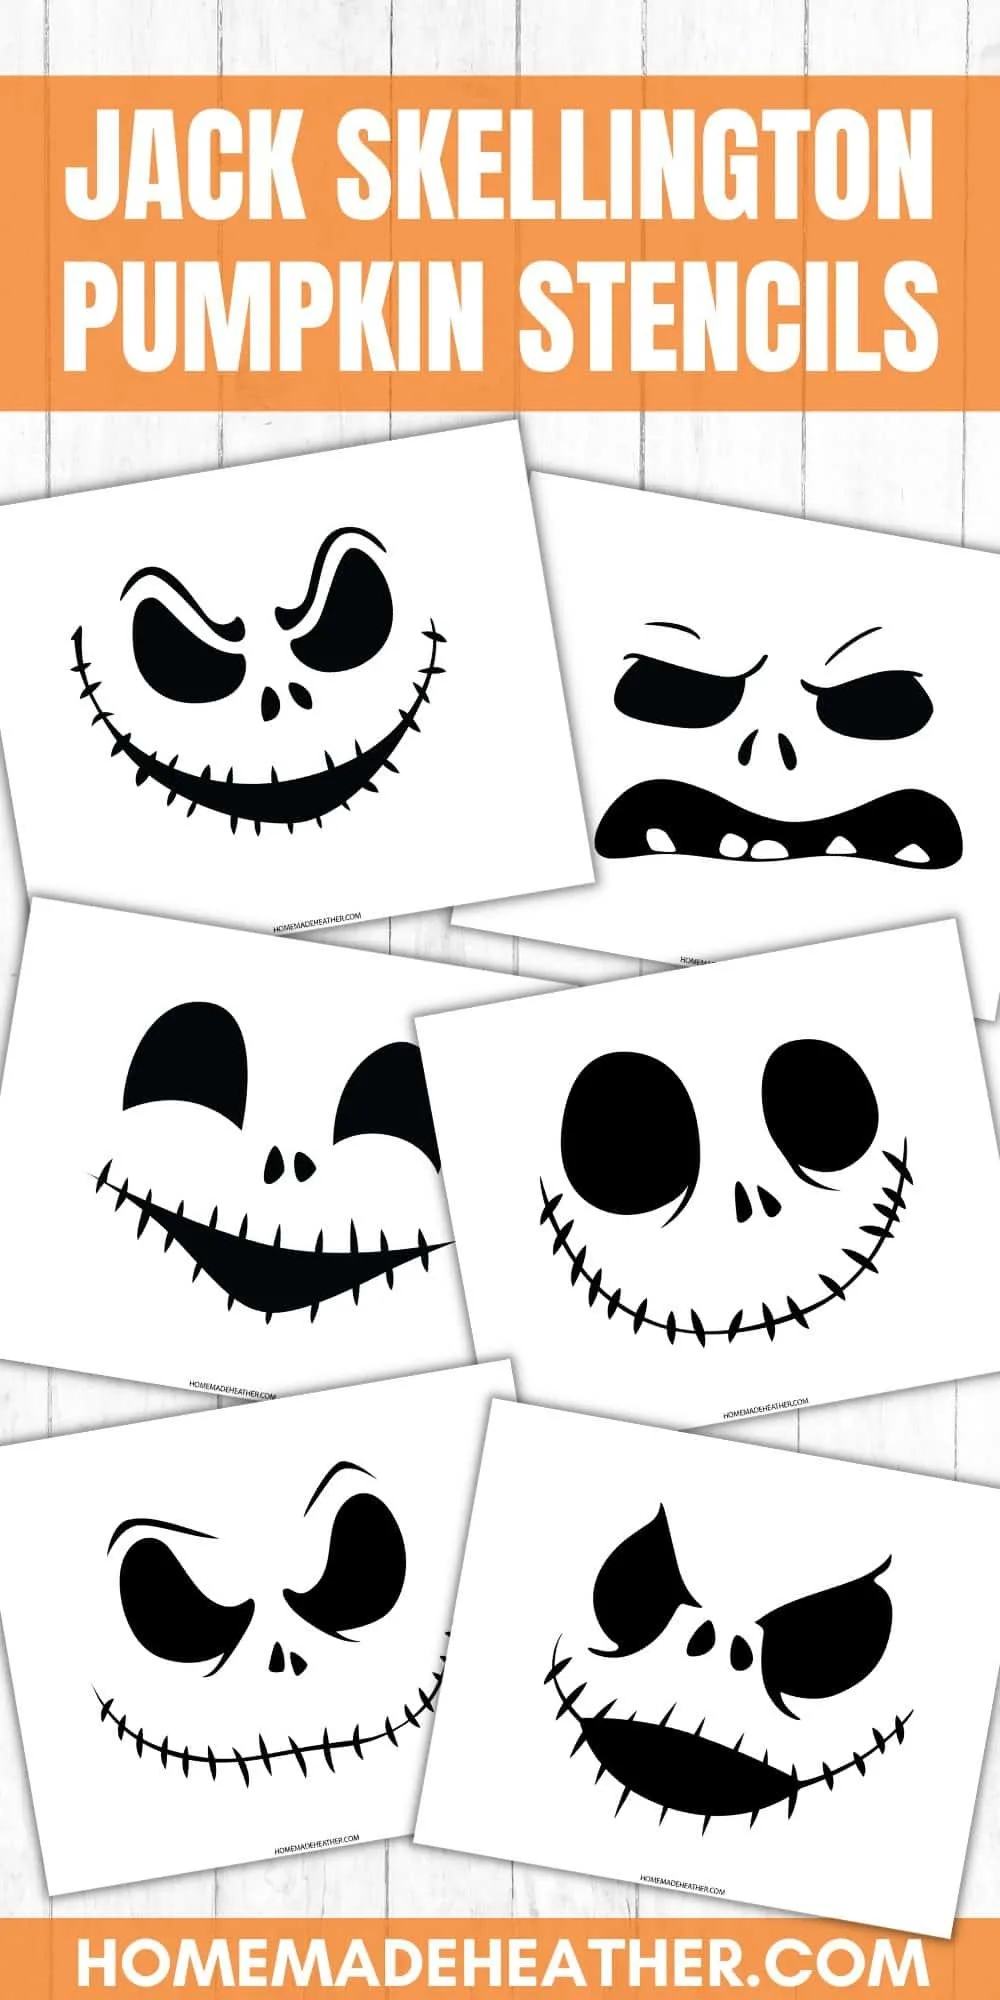
Jack has a lot of moods in the film, and this stencil set covers his happy, sneaky, scared and grumpy faces. Line up a different one on every pumpkin.
Print the faces you like at the size of your pumpkins. Tape each one on, trace it, and carve or paint the black shapes.
How to make a Nightmare Before Christmas pumpkin last until Christmas
A carved pumpkin usually lasts about a week or two before it softens, so carve close to the day you want to show it off.
For a pumpkin that stays up from Halloween to Christmas, paint instead of carving. Uncut pumpkins kept in a cool, dry spot often last a couple of months, and foam craft pumpkins last for years.
Wipe a real pumpkin clean and let it dry before painting. Acrylic craft paint and paint pens stick well, and a coat of clear sealer helps the paint stand up to porch weather.
Use LED lights inside carved pumpkins instead of candles, especially around kids and dry leaves.
When December comes, add a little Santa hat to your Jack pumpkin, the way Jack becomes Sandy Claws in the movie, and he is ready for Christmas.
Nightmare Before Christmas pumpkin FAQ
What is the easiest Nightmare Before Christmas pumpkin to make? A white pumpkin painted with Jack’s face. You only need black paint or a paint pen for two eyes, two nostrils and a stitched smile.
How do you make a Sally pumpkin? Paint a pumpkin pale blue for her face, or paint it in pink, blue and yellow patches for her dress. Add stitches with a black paint pen and glue on red yarn if you want her hair.
Do I need a stencil to carve Jack Skellington? No, but it helps. His face is simple enough to draw freehand with a marker, and free printable stencils make the eyes even.
Is The Nightmare Before Christmas a Halloween or Christmas movie? Both. It starts in Halloween Town and ends at Christmas, which is why so many families decorate with Jack pumpkins in October and keep them out through December.