Swipe through all 26 ideas
See every idea at a glance, then jump to the one you like.
These cool pumpkin painting ideas are the creative way to decorate for fall without any carving. A painted pumpkin has no mess, no knife and no slimy seeds, and it can sit on your porch or your table for weeks.
Below are 24 pumpkin painting ideas for kids and adults, from simple dots and vines to a painted pet portrait. Each idea says what to paint and how to do it.
After the list you will find the supplies, a simple step by step method and a few tips for sealing your pumpkin so the paint lasts. If you do want to carve one, see our pumpkin carving ideas.
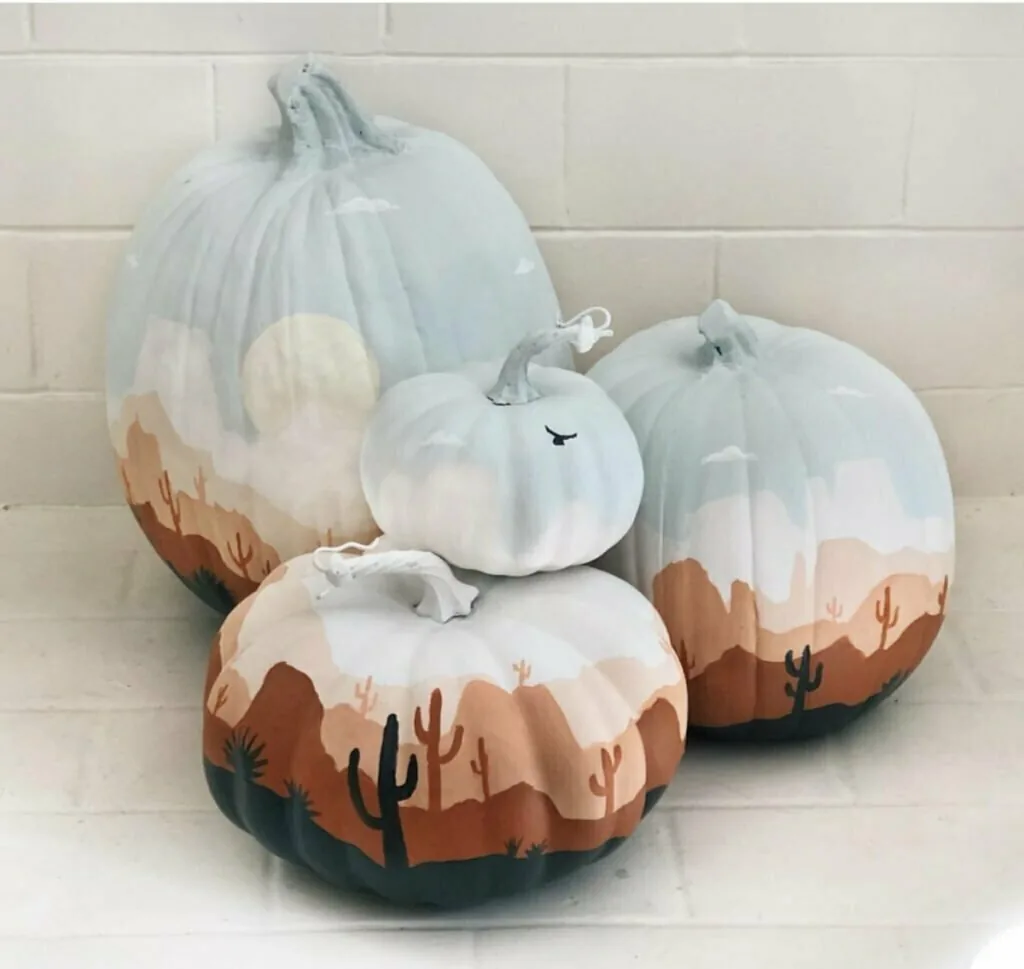
1. A desert sunset scene across a trio of pumpkins
 Save
Credit: Color Made Happy
Painted mountains, a pale moon and tiny cactus silhouettes turn a group of white pumpkins into a little desert at dusk. It is a lovely cool pumpkin painting idea for a mantel because the three pumpkins read as one landscape.
Start with a pale sky wash on the top half, then paint rust and tan hills in layers, letting each layer dry before the next. Finish the cactus shapes with a thin brush and dark brown paint.
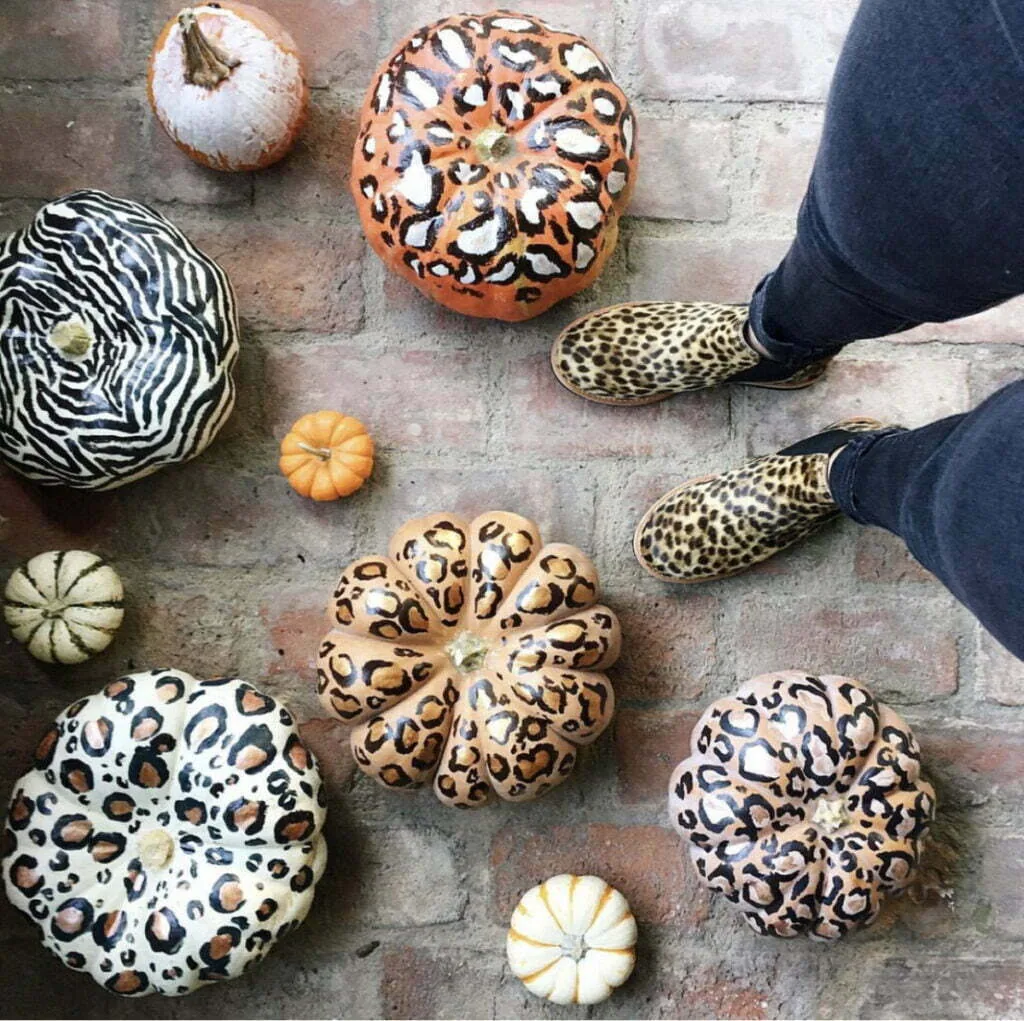
2. Animal print pumpkins in leopard and zebra
 Save
Credit: Color Made Happy
Leopard spots and zebra stripes are bolder than they look and very forgiving. A few wobbly spots only make the pattern feel more real.
Paint the base coat first, then dab brown ovals and fill the edges with black using a small round brush. Zebra stripes work best when they are different widths and curve with the ribs of the pumpkin.
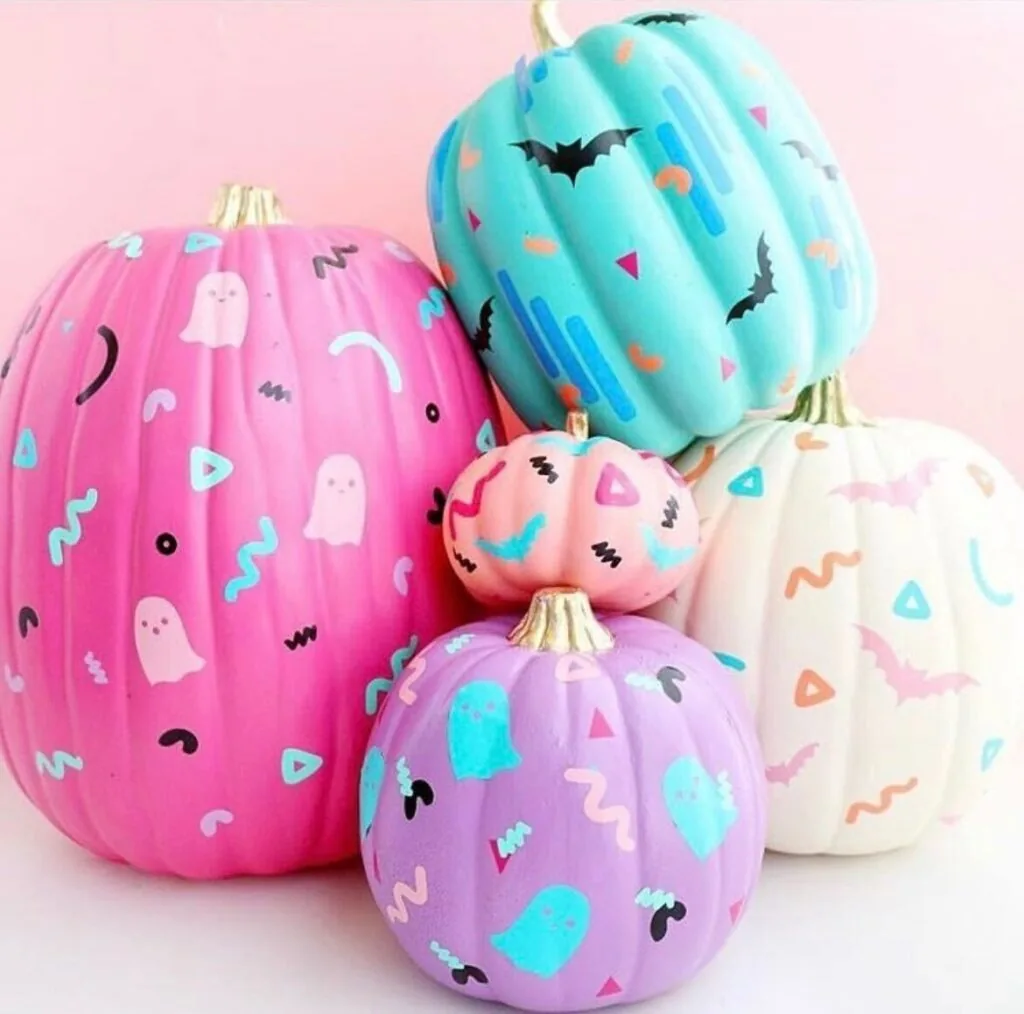
3. Retro confetti pumpkins in bright pastels
 Save
Credit: Color Made Happy
Squiggles, triangles and tiny ghosts on pink, teal, lilac and cream pumpkins give you a playful 80s party look. It is a fun pick for kids because there is no wrong squiggle.
Paint each pumpkin one solid color and let it dry. Then use paint pens or a small brush to add confetti shapes, and stack the pumpkins in different sizes for a happy cluster.
4. Dipped mini pumpkins that look like donuts and cute animals
 Save
Credit: Color Made Happy
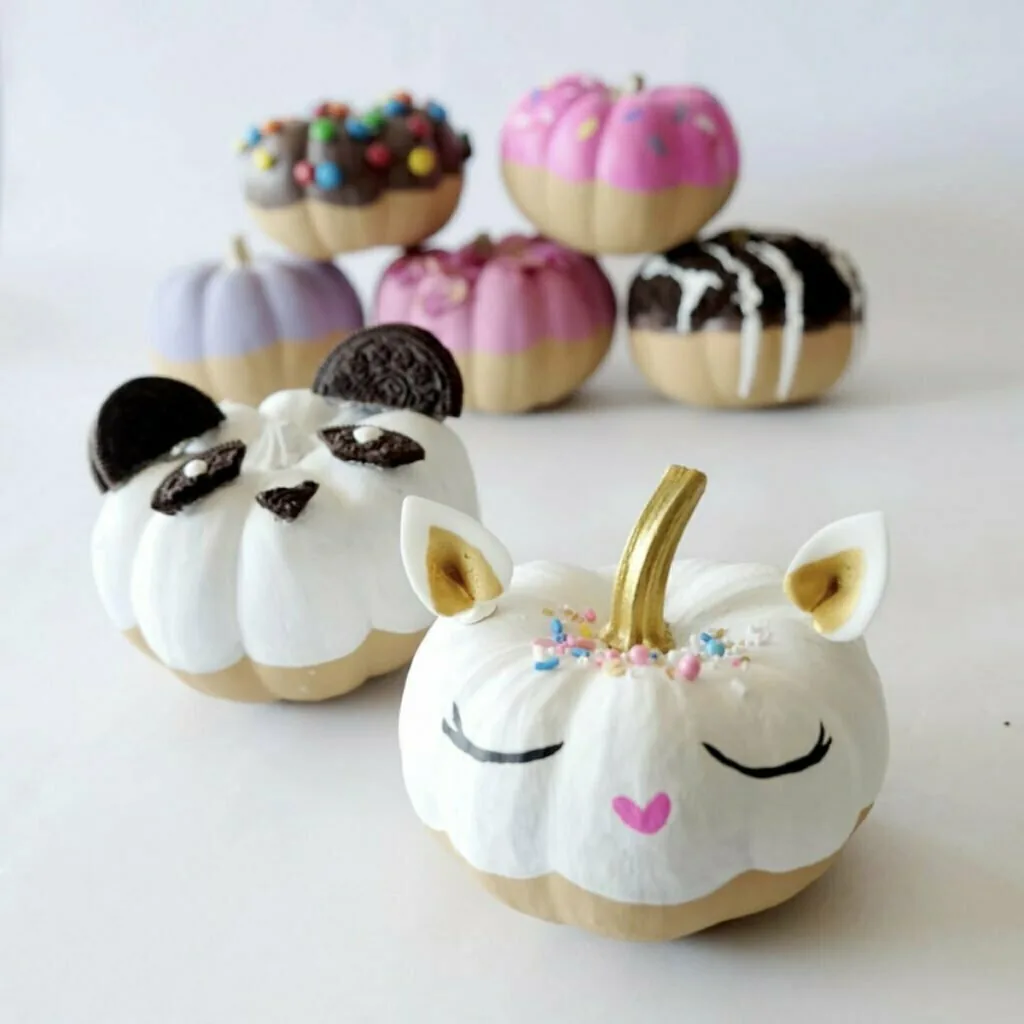
Paint mini pumpkins with a colored cap to look like dipped donuts, with sprinkles on top. Add small ears, a nose and sleepy eyelashes to make a panda or a unicorn.
Use a white base, then paint the top third pink, lilac or chocolate with a wavy edge. Dot on sprinkles with a toothpick, and glue felt or craft foam ears on once the paint is dry.
5. Simple white vines and dots on classic orange pumpkins
 Save
Credit: Color Made Happy
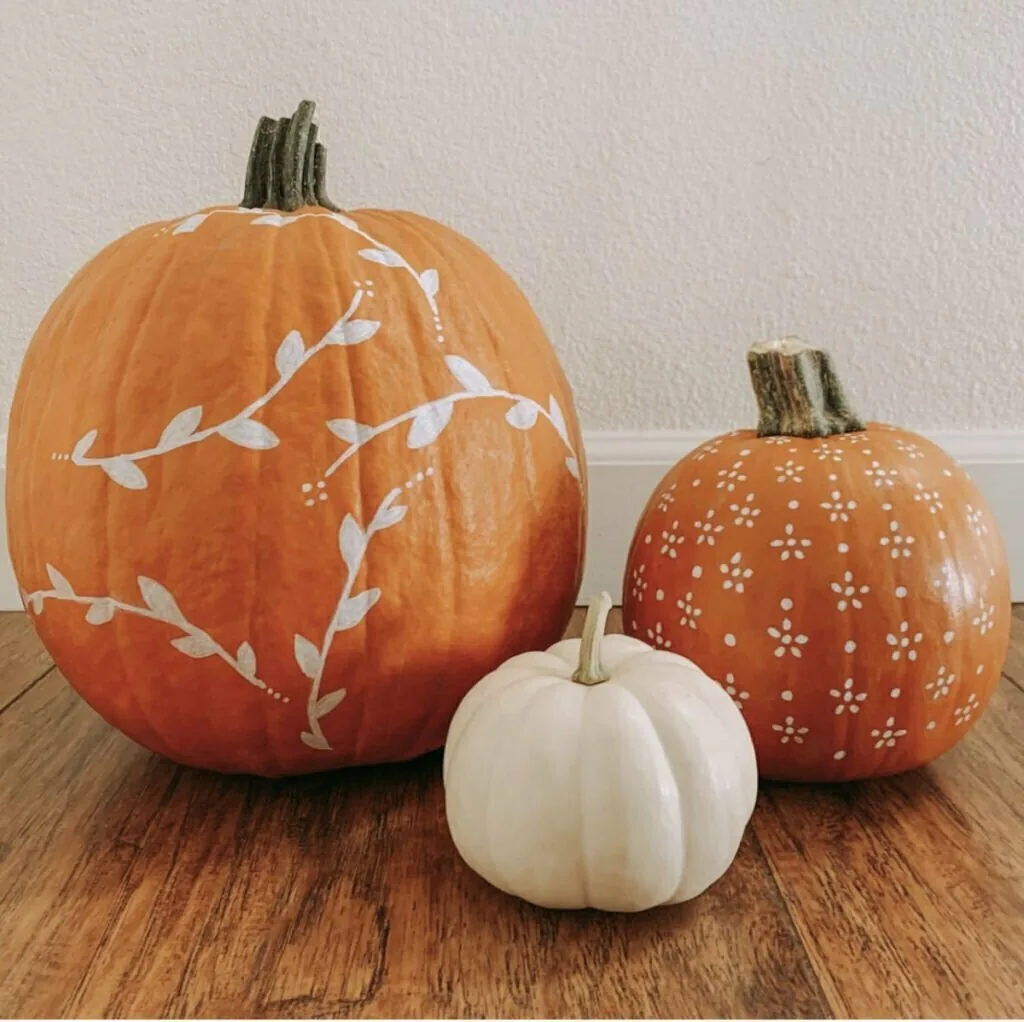
You do not have to cover the whole pumpkin. A few white vines and tiny dots on a plain orange pumpkin look fresh and a little farmhouse.
Sketch a loose vine with chalk first, then trace it with white paint and add leaves with small presses of the brush. Use the back end of the brush to make the dots, which keeps them round.
6. Gold leaf and color dipped pumpkins
 Save
Credit: Color Made Happy
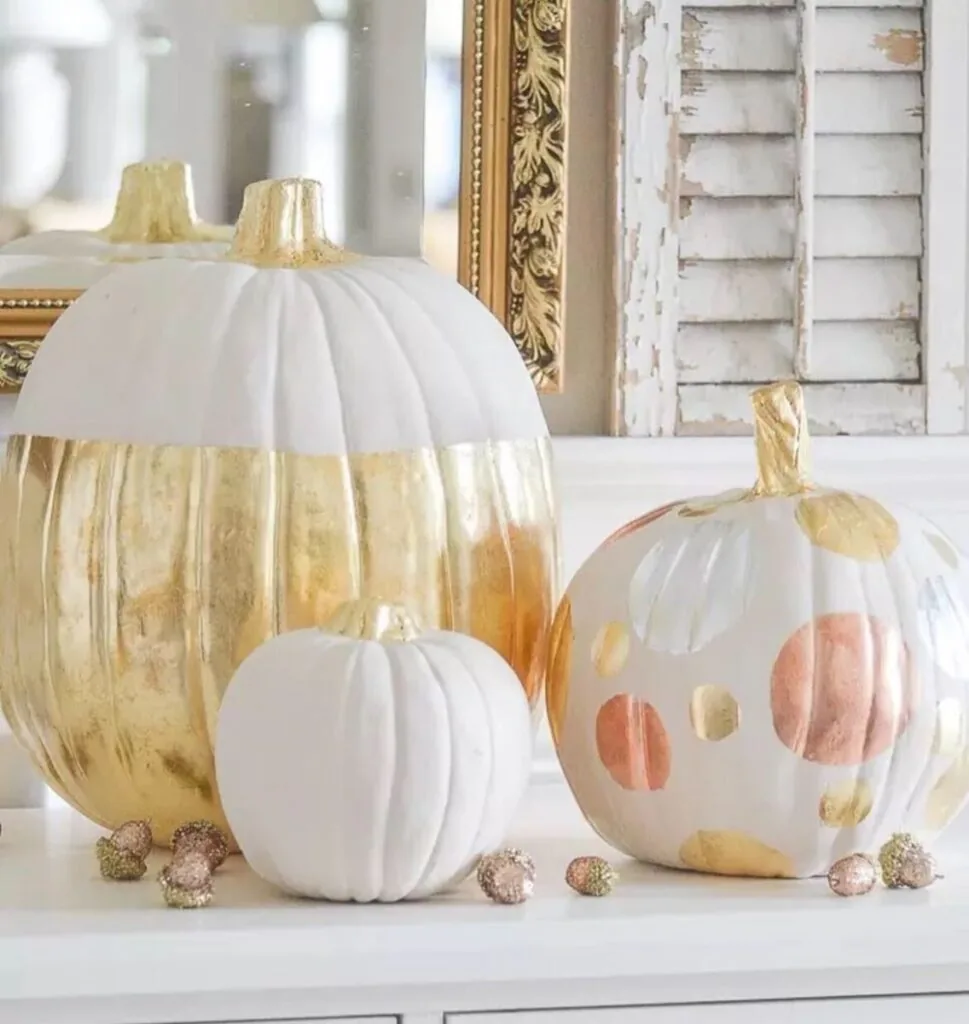
A half white, half gold pumpkin feels dressed up without much effort. Add a few blush and copper polka dots and the whole set looks like it came from a boutique.
Paint the bottom half with sticky gold leaf size, then press the gold leaf on and brush off the extra. A gold leafing paint pen is an easier way to get the same shine.
7. Black and white mud cloth patterns
 Save
Credit: Color Made Happy
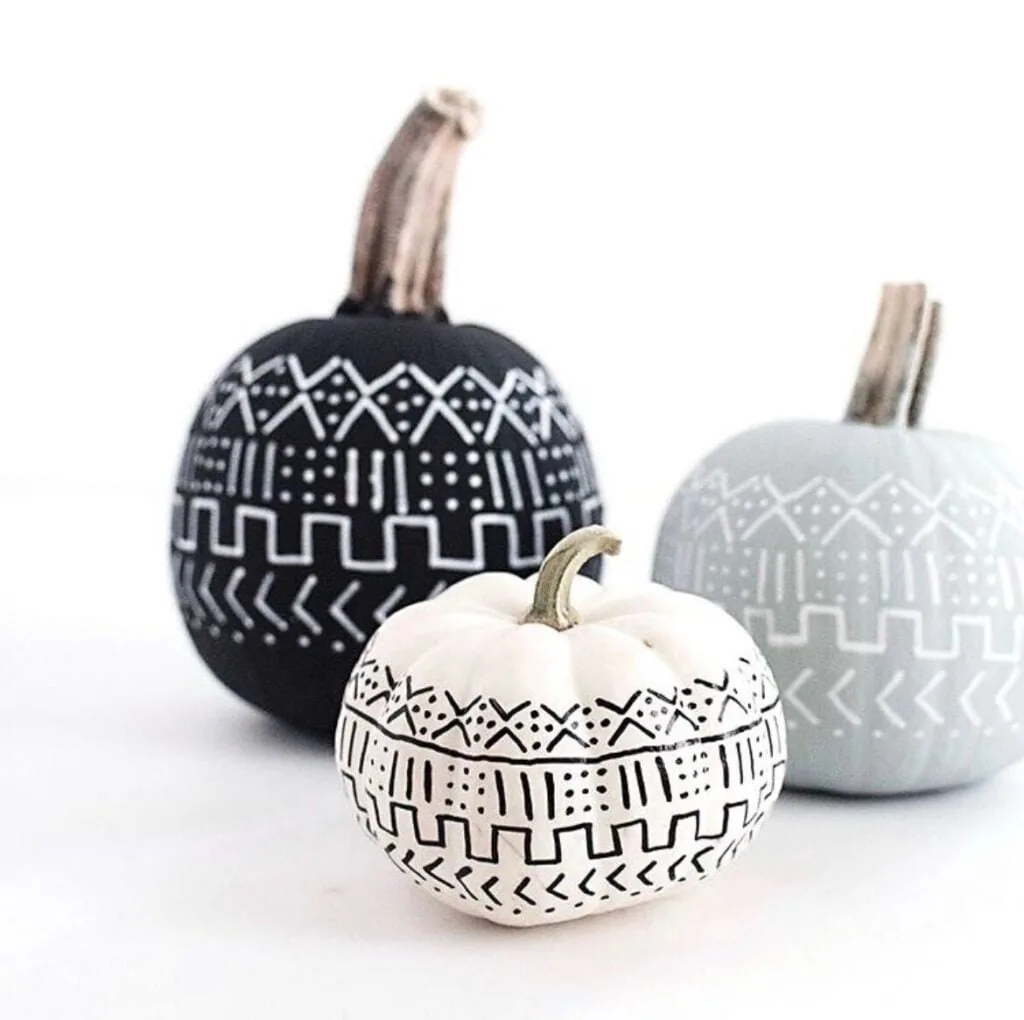
Bold black and white patterns look modern and calm at the same time. Mix black, white and soft gray pumpkins in the same pattern for a set that feels collected.
Use a paint pen for clean lines. Paint the pumpkin first, then draw zigzags, dashes and little triangles in rows and let them dry before you move the pumpkin.
8. A black cat and a spiderweb pumpkin
 Save
Credit: Color Made Happy
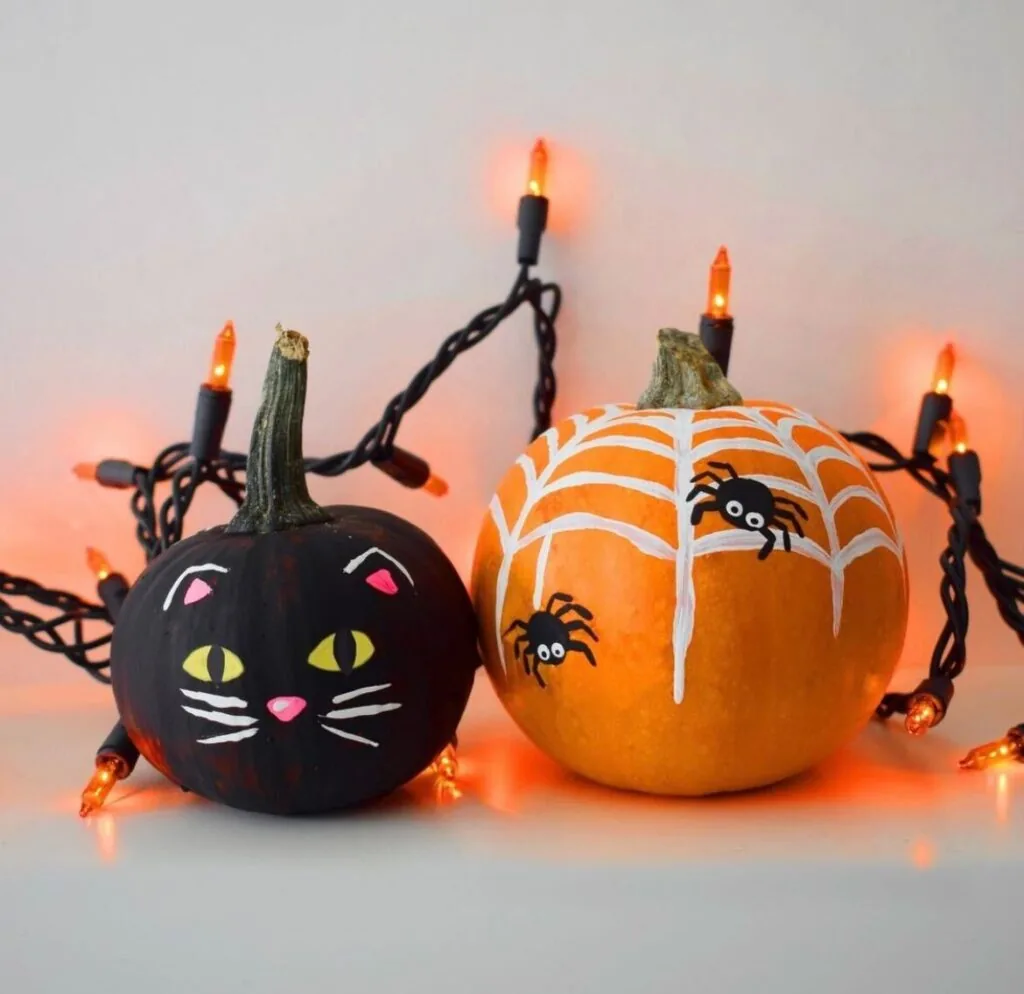
A solid black pumpkin with a cat face is a classic for a reason. Pair it with an orange pumpkin and a white spiderweb and you have a Halloween pair in about an hour.
Paint the cat pumpkin black, then add yellow green eyes, a pink nose and white whiskers. For the web, draw a spoke pattern with a white paint pen, then curve the lines between the spokes.
9. A stack of mini pumpkins painted in different patterns
 Save
Credit: Color Made Happy
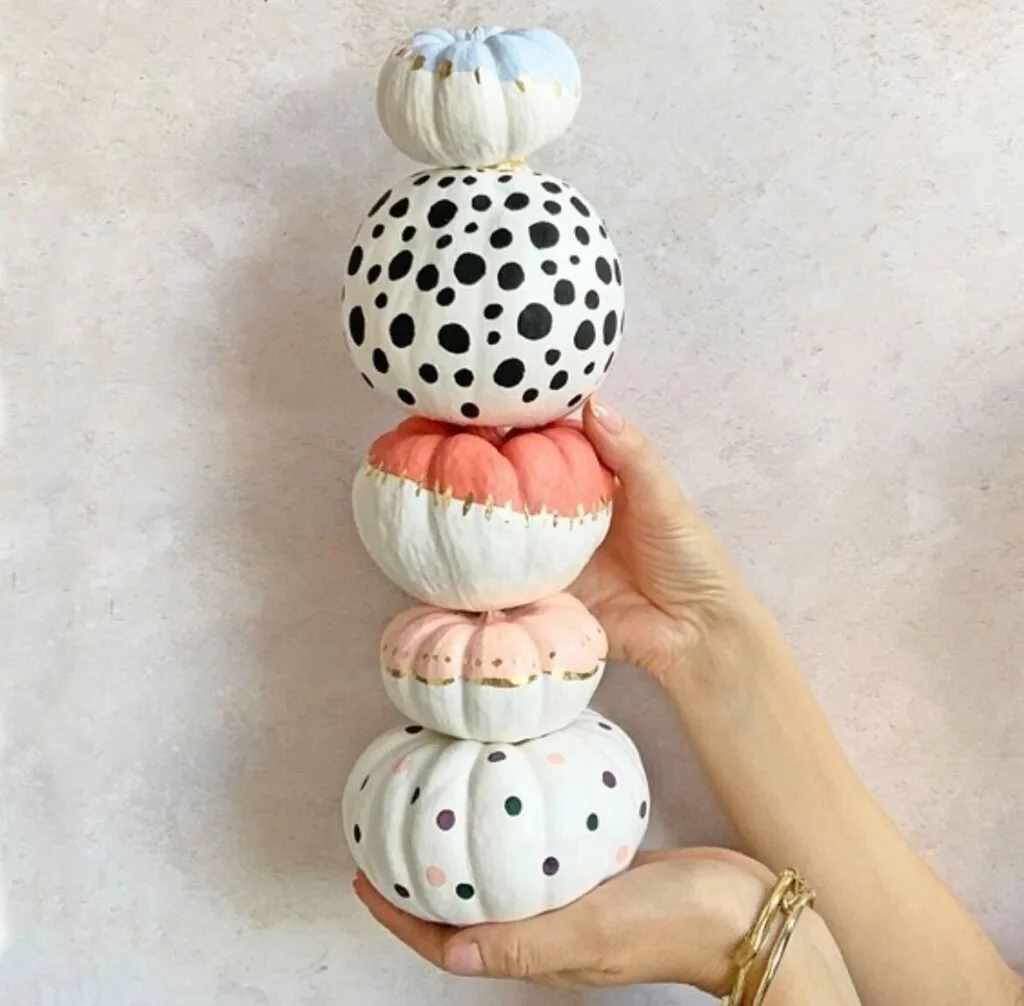
Stack small pumpkins with different patterns for a tower that looks like a piece of sculpture. Polka dots, scallops and color dipped edges work well together in the same palette.
Keep every pumpkin in black, white and one accent color so the stack feels planned. Dry fit the pumpkins before you paint, and use a dab of hot glue between the stems and the bottoms so the tower stays put.
10. Blue buffalo plaid with a monogram
 Save
Credit: Color Made Happy
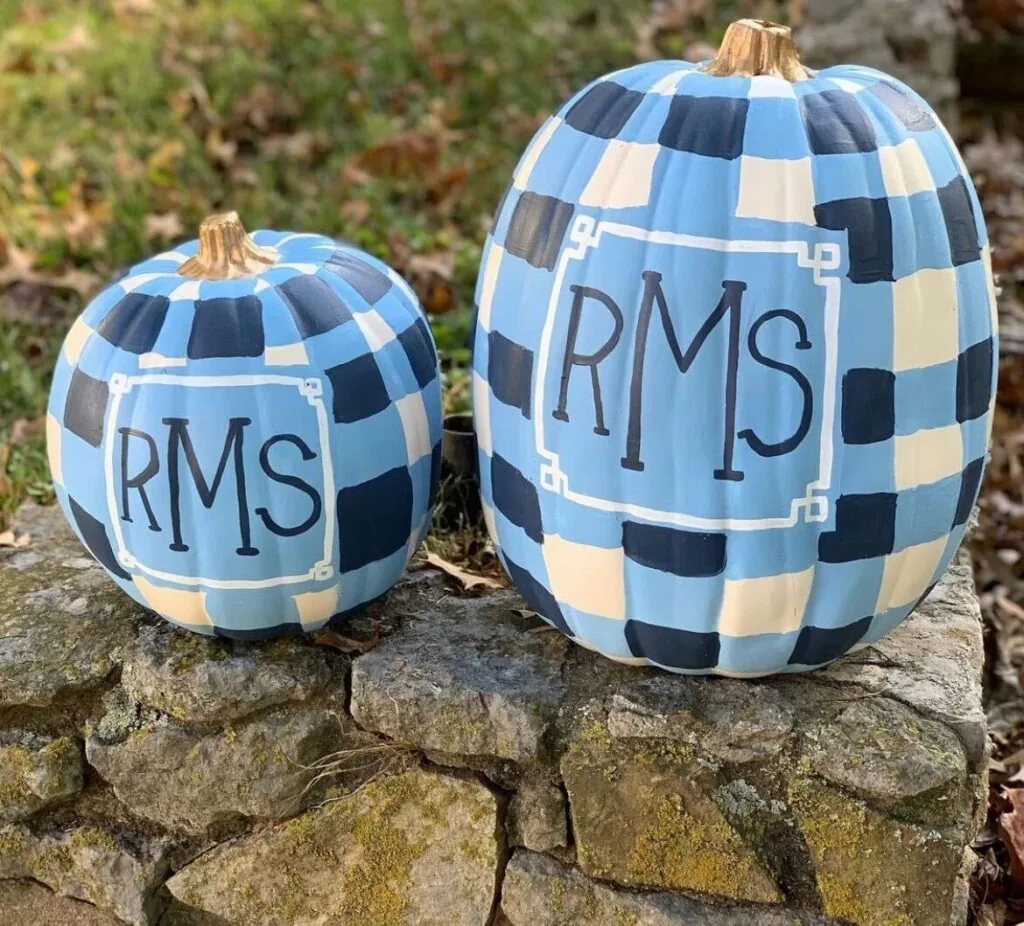
A blue and cream plaid pumpkin with a letter on the front is a tidy fall decor idea for a porch. You can match the colors to your front door.
Paint the base light blue, then lay the plaid with a flat brush using one wide stripe each way. Add a thin dark blue line over the top and paint the initial in a simple serif style.
11. Pastel dipped pumpkins in mint and lilac
 Save
Credit: Color Made Happy
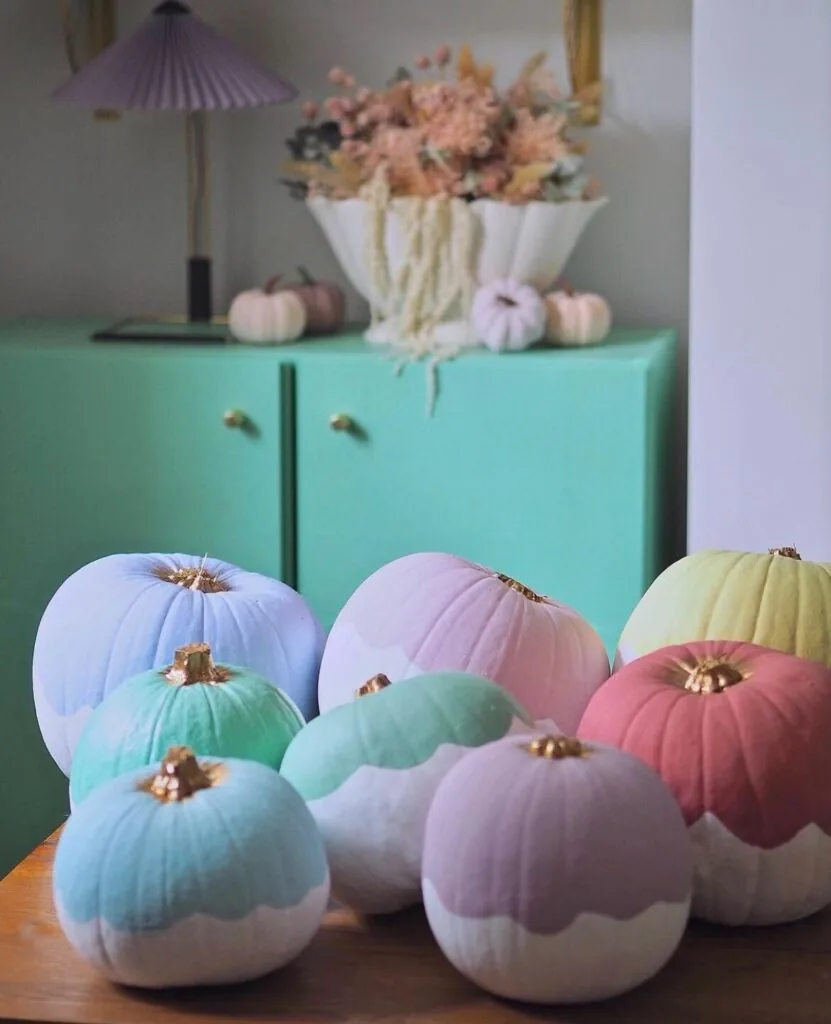
Soft color dipped pumpkins look like ice cream cones and feel calm next to a bright room. Choose three or four pastels and mix them in a group.
Paint the bottom of each pumpkin first, then add the top color with a wavy edge where the two meet. A sponge brush leaves a smooth finish and dries quickly.
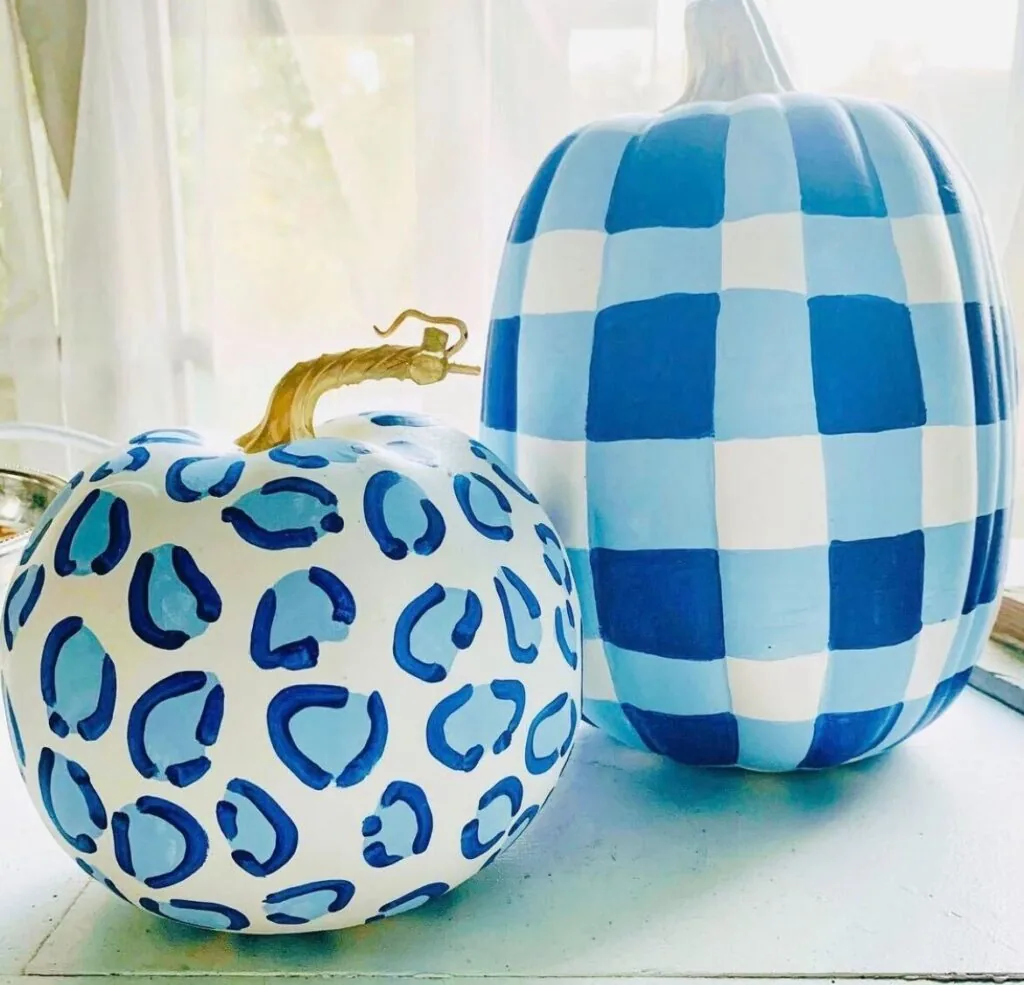
12. Blue gingham and blue leopard
 Save
Credit: Color Made Happy
Blue and white pumpkins feel cool and clean in the middle of an orange season. Gingham and leopard spots together are a little unexpected and a lot of fun.
For gingham, paint stripes across the pumpkin in pale blue and let them dry, then paint stripes in the other direction so the squares darken where they cross. For leopard, paint curved open shapes in a medium blue.
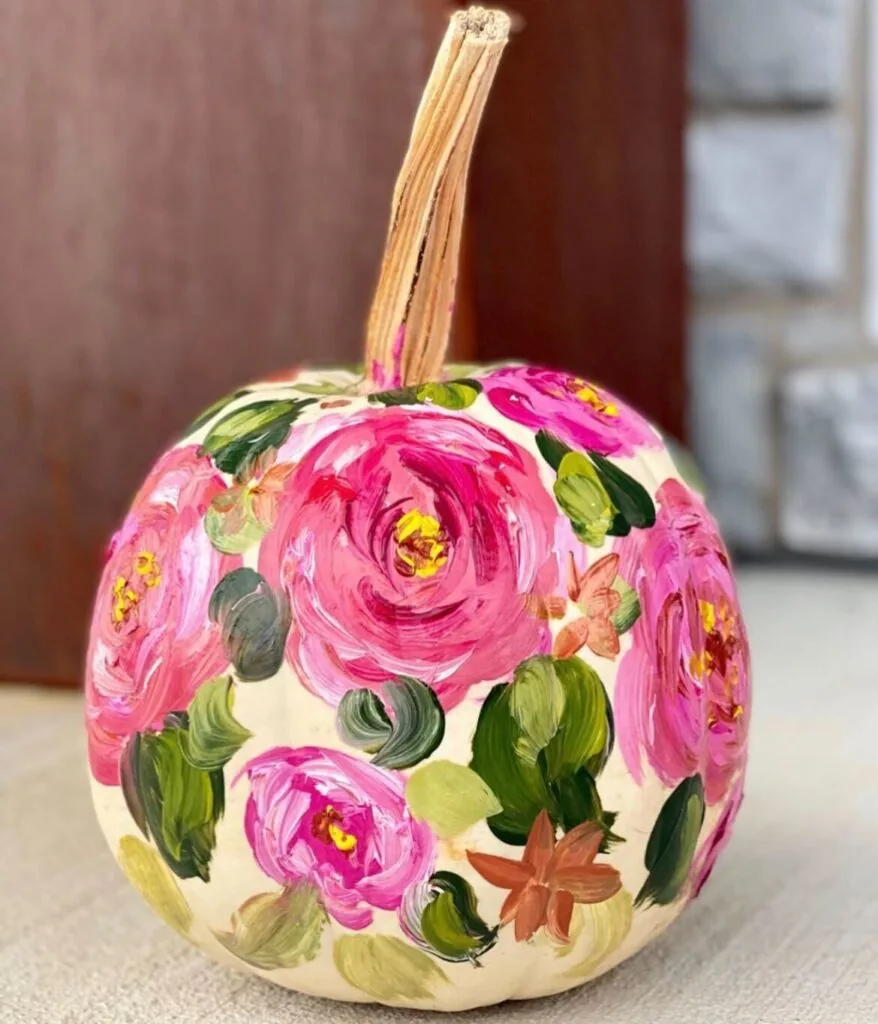
13. Pink peonies and hand painted florals
 Save
Credit: Color Made Happy
A single big painted bouquet on a cream pumpkin looks like a still life. It takes a little patience, but the shapes are simple.
Paint a loose pink circle, then add curved petal lines in a darker pink around it. Fill the gaps with green leaves and let the colors blend a bit, because a few soft edges are what make it look real.
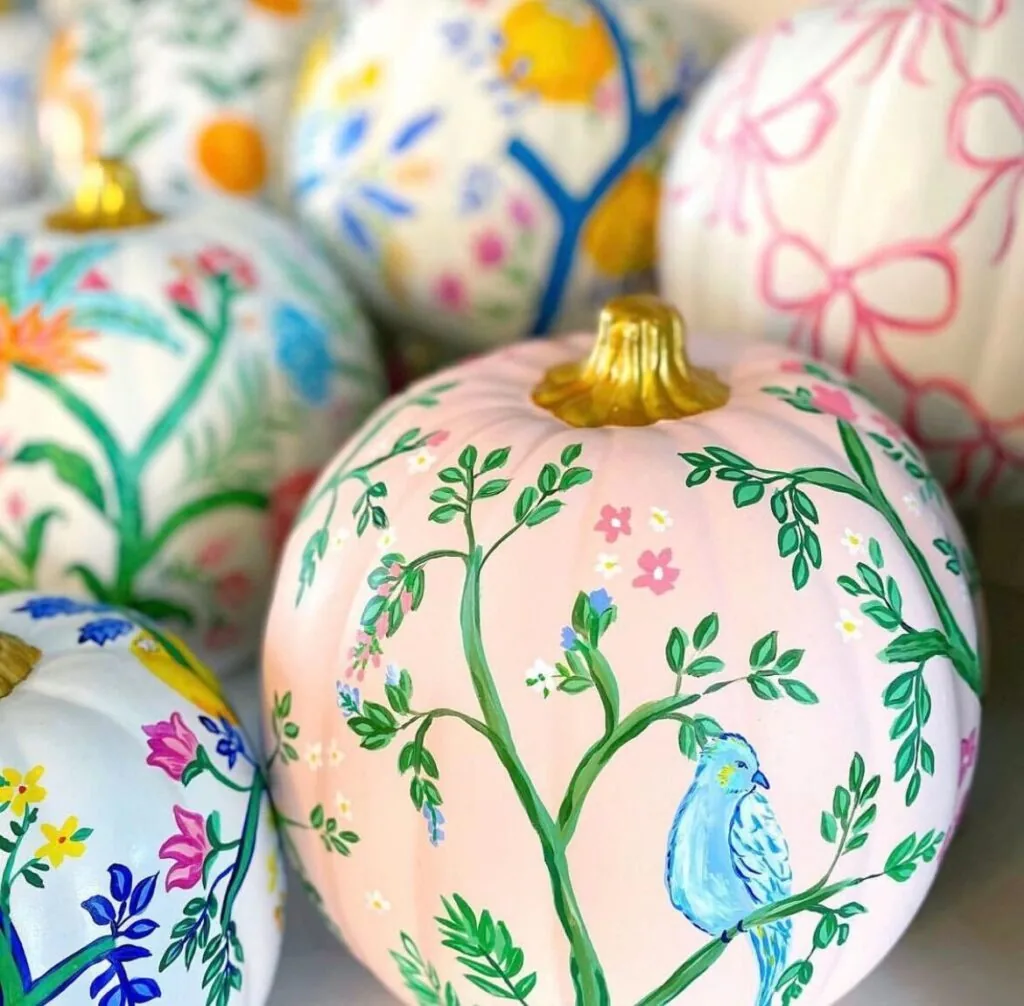
14. Chinoiserie birds and branches
 Save
Credit: Color Made Happy
Delicate birds, branches and tiny flowers on a pale pink pumpkin feel grown up and calm. Set a few on a mantel with real branches and the whole shelf looks designed.
Pick a soft base color and let it dry fully. Paint the branches with a thin liner brush, then add small leaves, the blue bird and little blossoms. A fine tip paint pen helps with the smallest lines.
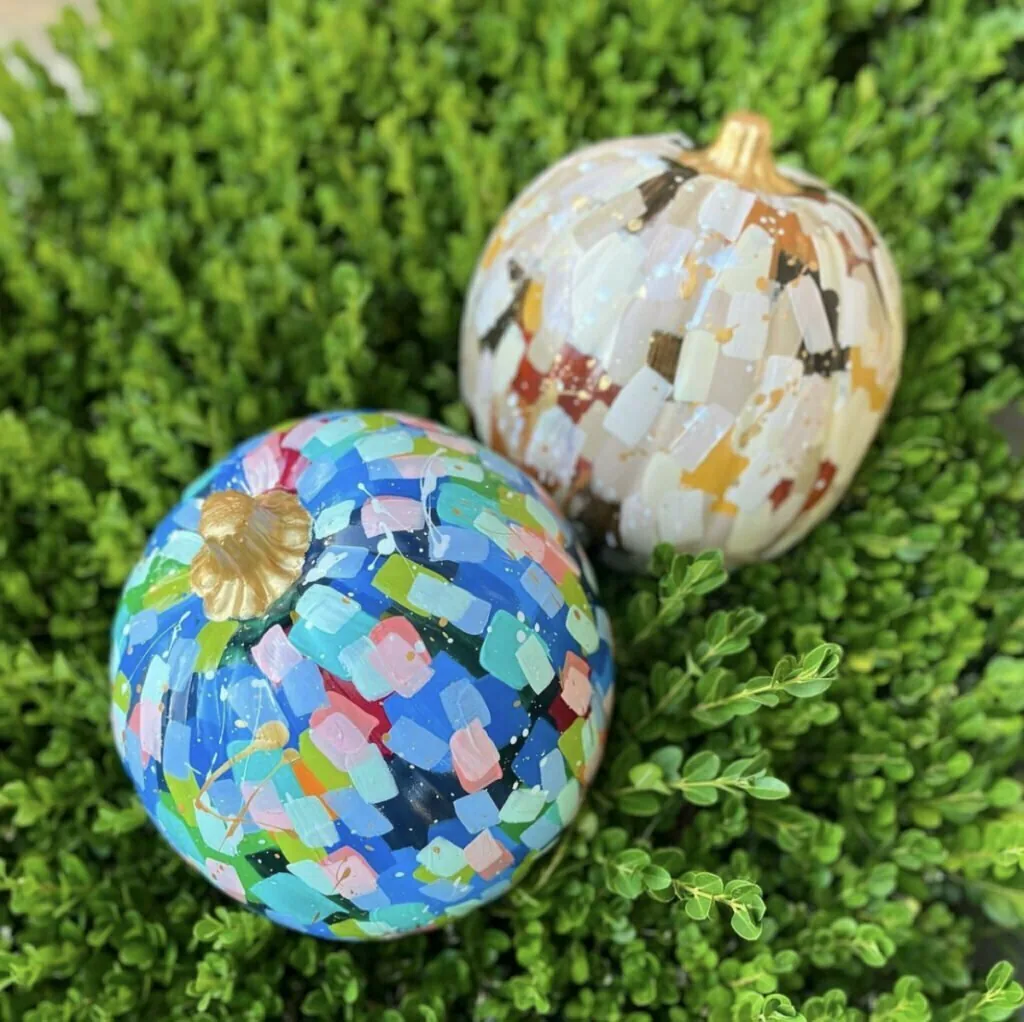
15. Confetti brushstrokes in blue and cream
 Save
Credit: Color Made Happy
Little squares of blue, green and white paint look like a mosaic or a pile of confetti. The technique is forgiving because every brushstroke is a small mark.
Use a flat brush and press it down once for each tile. Switch colors often and leave small gaps between the tiles so the pumpkin shows through.
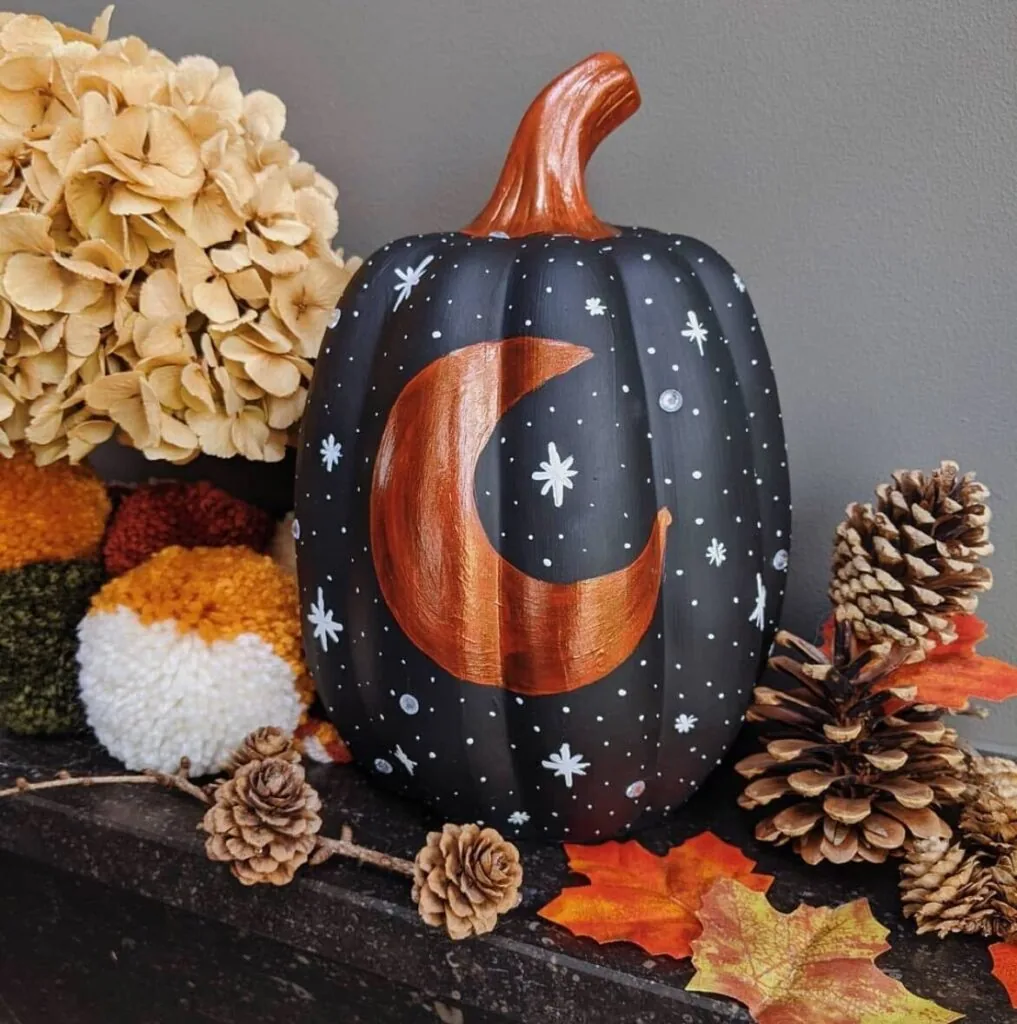
16. A black pumpkin with a copper moon and tiny stars
 Save
Credit: Color Made Happy
A black pumpkin with a copper crescent moon and small white stars is dramatic and not scary at all. It looks right at home with pinecones and dried flowers.
Paint the pumpkin black with two coats, then paint the moon in copper or rose gold. Add stars with the end of a toothpick dipped in white paint, and finish with a clear sealer.
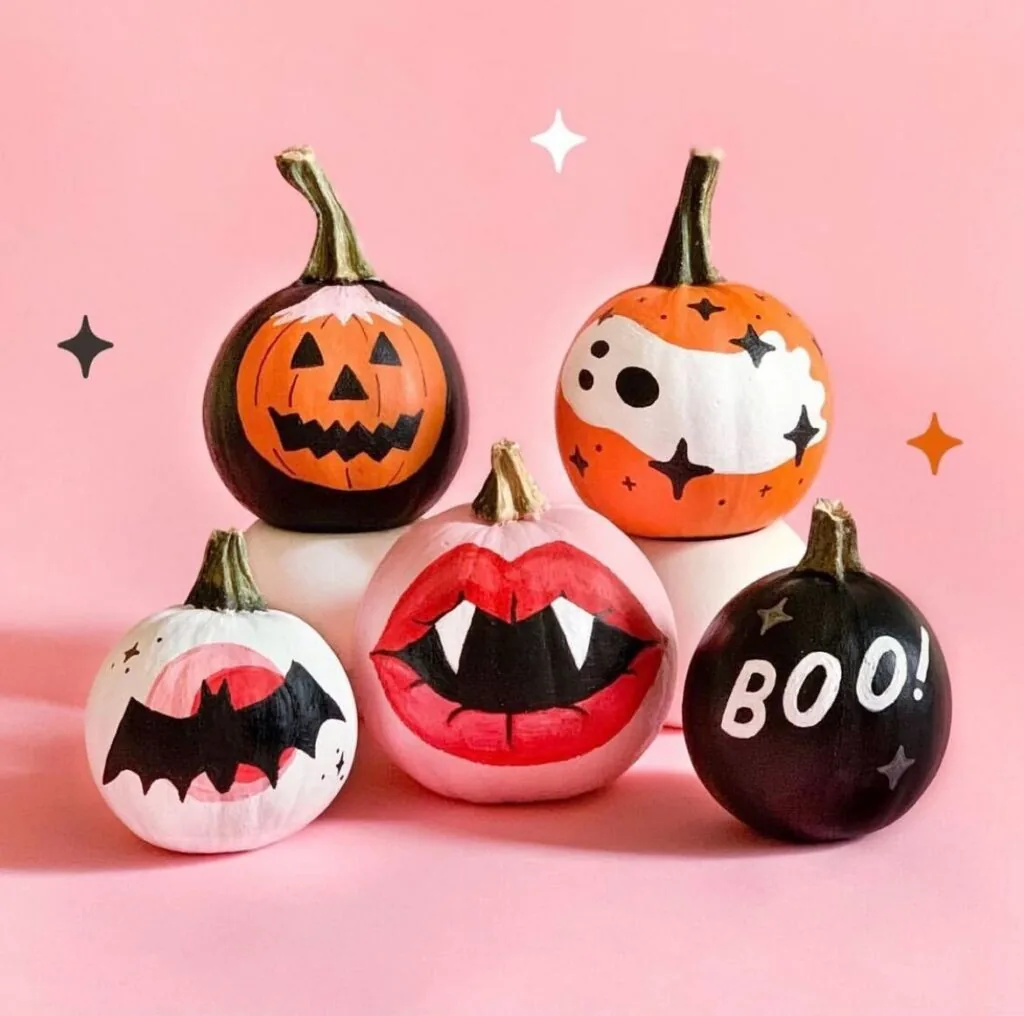
17. Cute spooky faces on mini pumpkins
 Save
Credit: Color Made Happy
A jack o lantern face, vampire lips, a bat and the word boo all fit on tiny pumpkins. It is the easiest Halloween set for kids because each pumpkin is a small project.
Paint each mini pumpkin in a solid base color first. Add the faces with paint pens, which are easier for small hands than a brush, and let them dry flat before you move them.
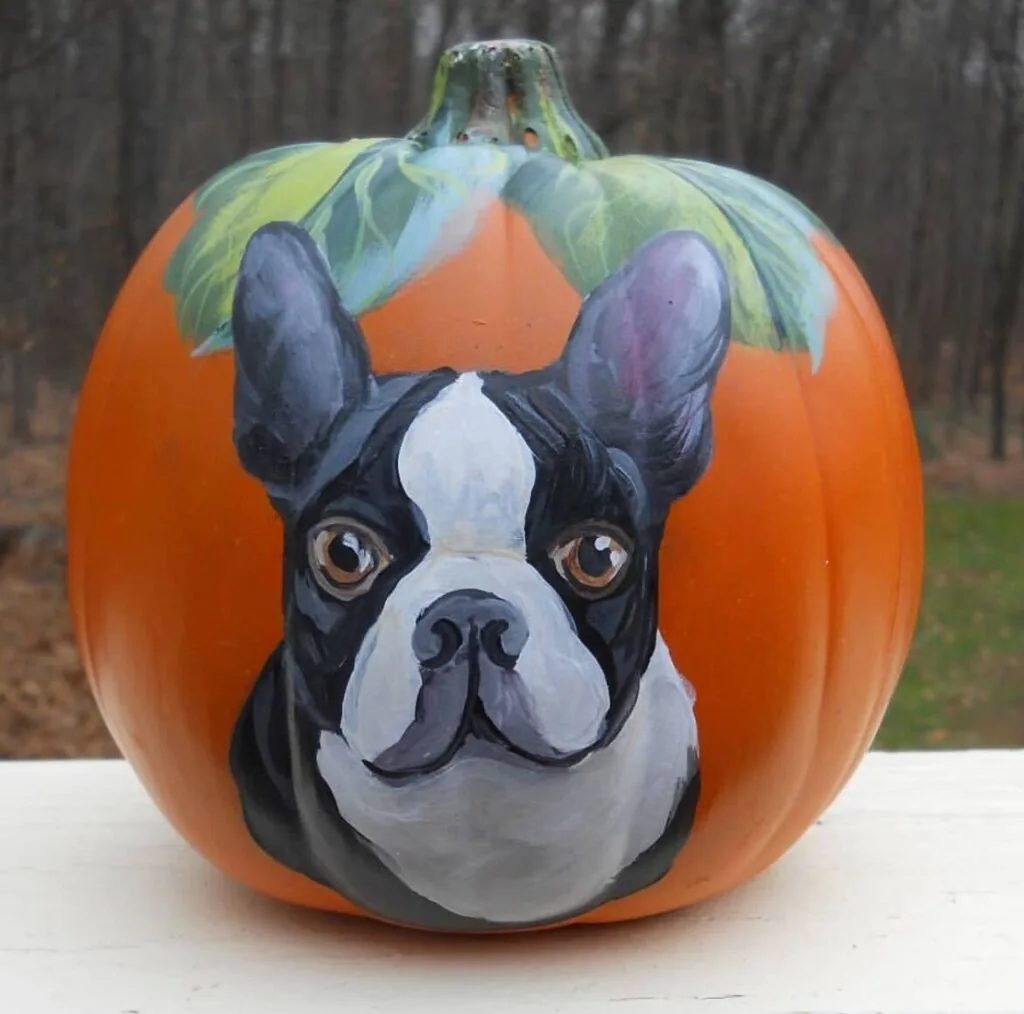
18. A pet portrait on a big orange pumpkin
 Save
Credit: Color Made Happy
A painted portrait of your dog is the most personal pumpkin you can make. It takes patience, but it is a lovely keepsake for a front step.
Start with a photo and sketch the main shapes in chalk. Paint the large areas first, then add the eyes and the highlights last, because those details make the face look alive.
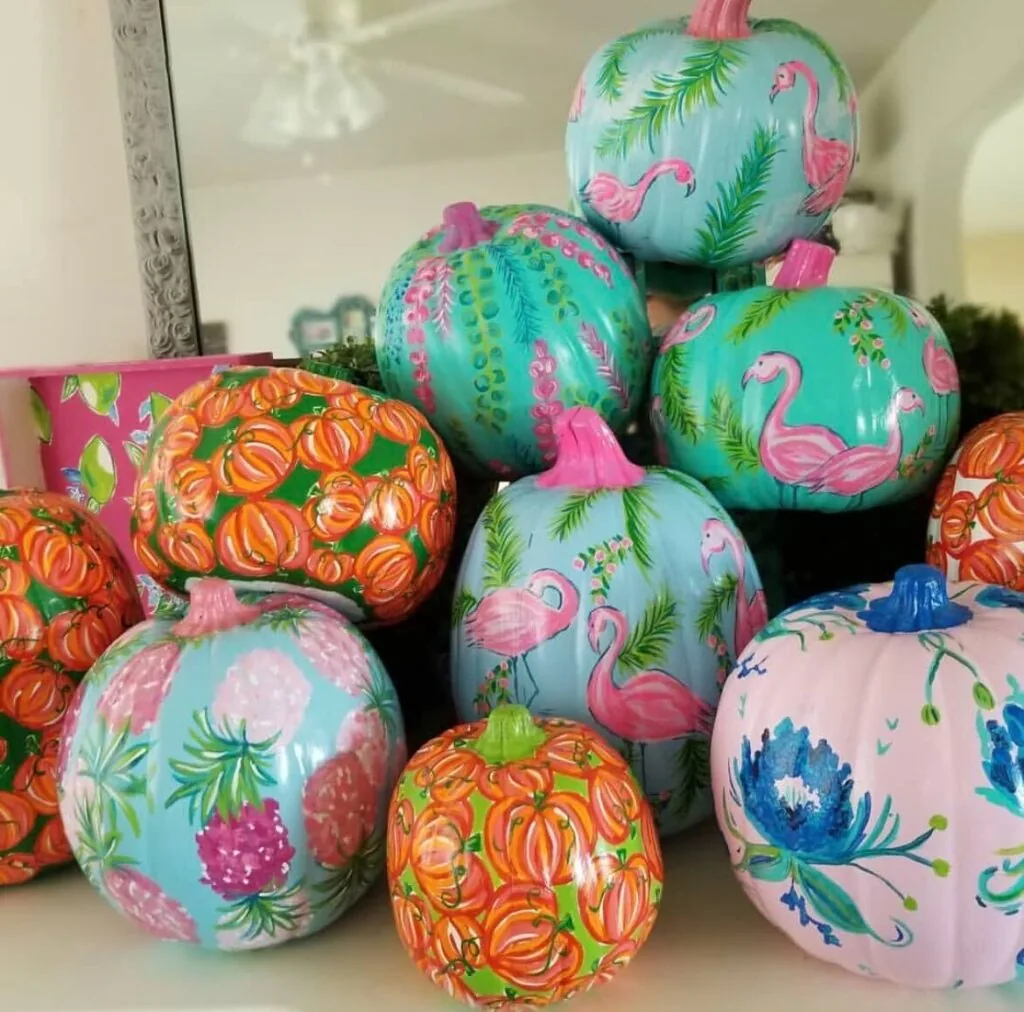
19. Bright tropical prints in teal, pink and orange
 Save
Credit: Color Made Happy
Flamingos, pineapples and tiny pumpkins in a happy tropical print feel like a summer party in October. It is the perfect idea when you do not want a dark fall look.
Paint the pumpkin teal or pink as the base, then add the large shapes first and the small dots and leaves last. Using a bright palette of three or four colors keeps it from looking messy.
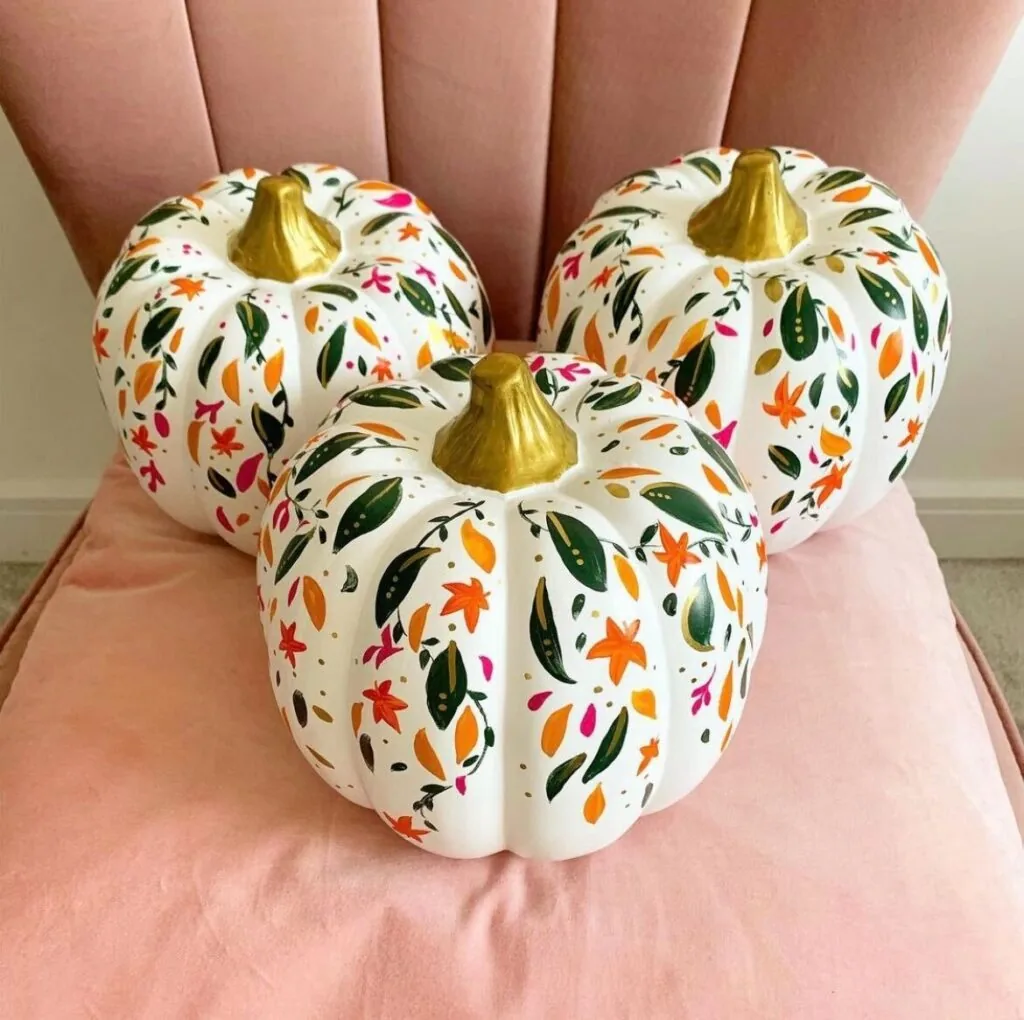
20. Autumn leaves on white pumpkins with gold stems
 Save
Credit: Color Made Happy
Scattered orange, rust and green leaves look pretty on a white pumpkin, and a gold stem makes the group look finished. Set three on a bench and they are all the decor you need.
Paint the stems gold first. Then add the leaves with a small flat brush, using one press for each leaf and a thin line for the vein.
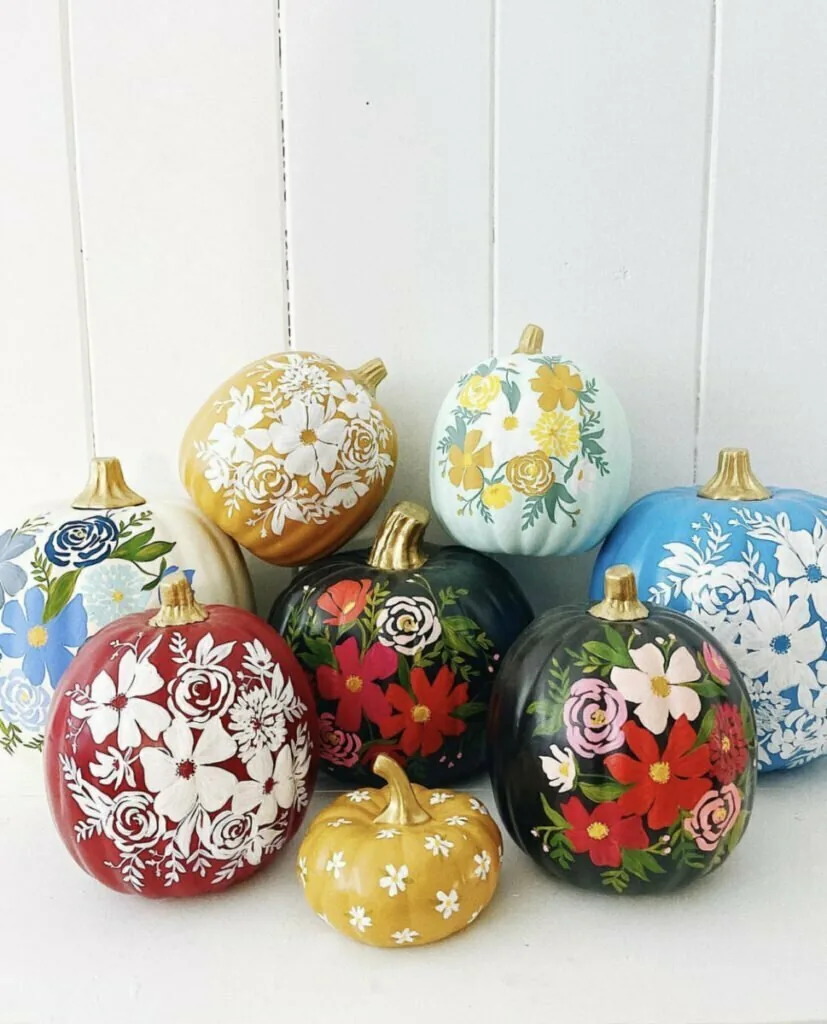
21. Folk art flowers in red, white and gold
 Save
Credit: Color Made Happy
Small folk art flowers painted in white, red and gold on dark and light pumpkins look like heirloom pottery. They are lovely on a dining table next to candles.
Choose a dark or very light base, then paint simple five petal flowers in clusters. Add dots and small leaves around them and use gold for the stems or the centers.
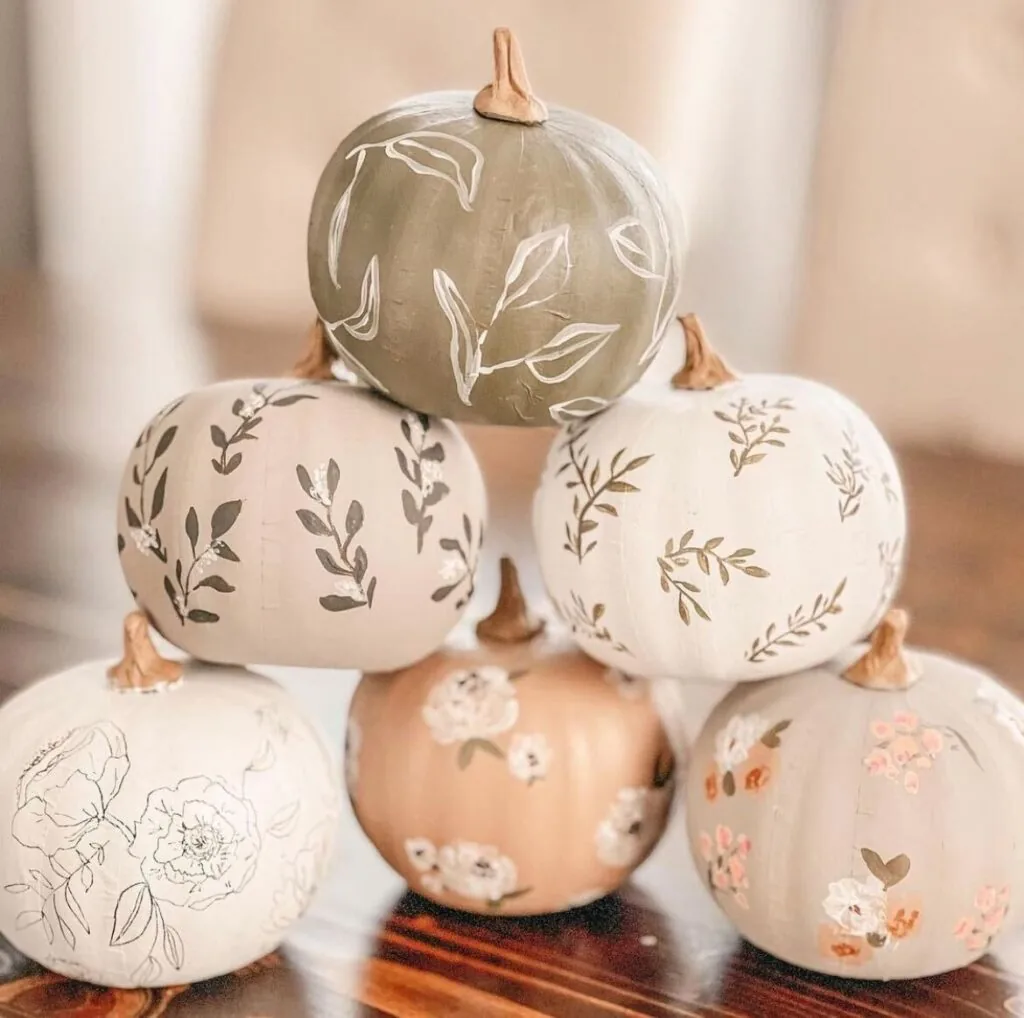
22. Neutral line art botanicals
 Save
Credit: Color Made Happy
Sage, tan and cream pumpkins with fine black leaf drawings are quiet and very pretty. They look good in any room, not just on a porch.
Paint the pumpkins in soft neutral colors, then draw leaves and stems with a thin black paint pen. Keep the lines loose so the drawings look relaxed.
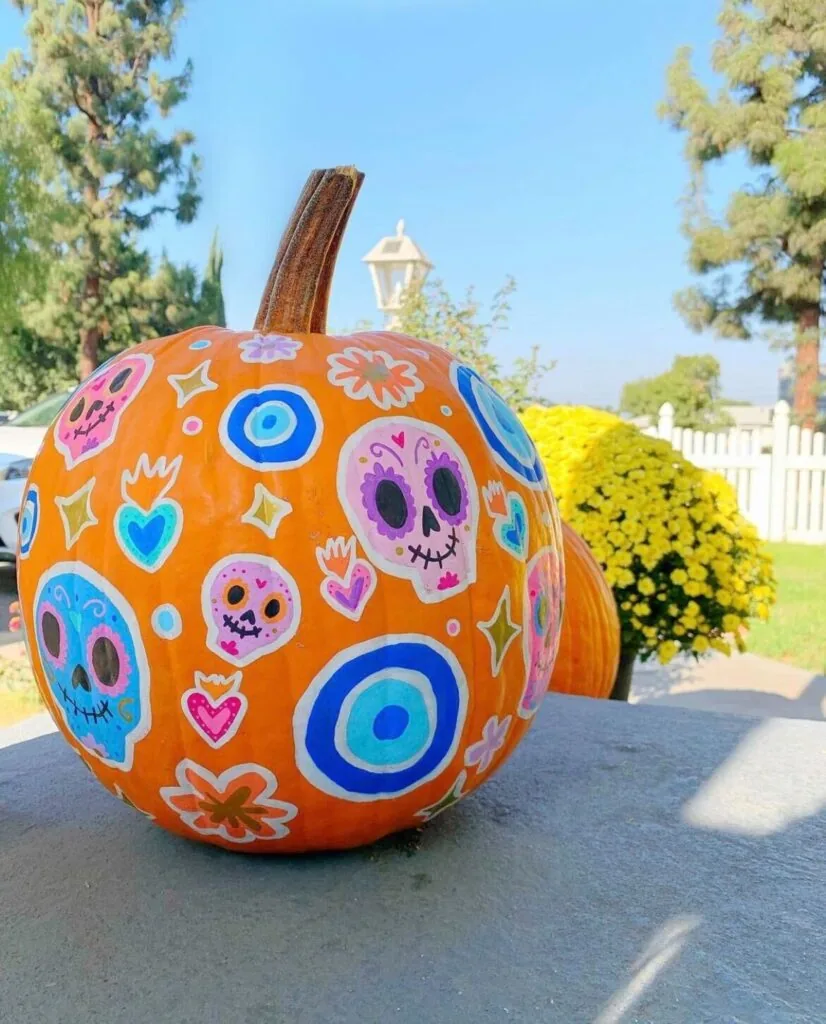
23. Sugar skulls and evil eyes on an orange pumpkin
 Save
Credit: Color Made Happy
A bright orange pumpkin covered in small sugar skulls, hearts and blue eyes feels festive and joyful. It is a good idea for Day of the Dead celebrations or for any bright fall table.
Use a white paint pen to outline each skull, then fill in with bright paint. Add dots and hearts in the empty spaces so the whole pumpkin feels full.
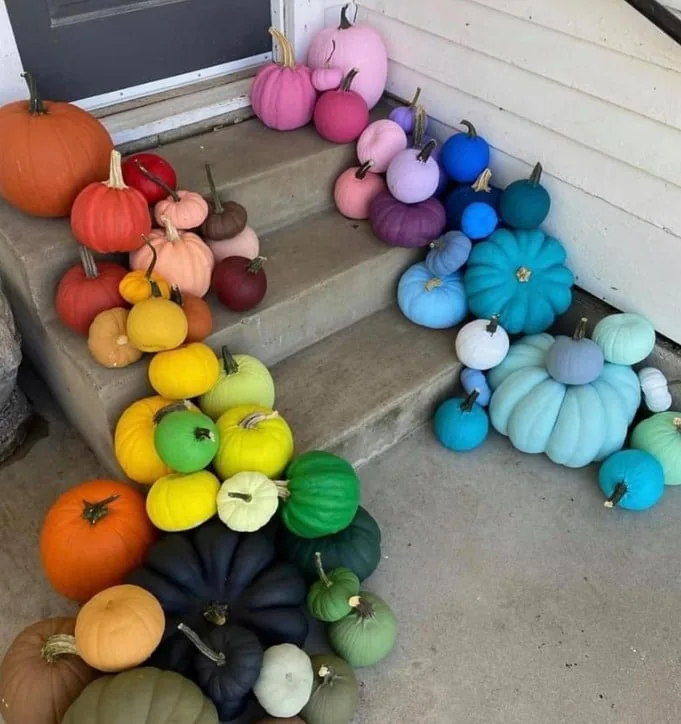
24. A rainbow of pumpkins down the steps
 Save
Credit: Color Made Happy
A rainbow made of small and large pumpkins runs down a staircase and makes the whole entry feel happy. You can add a pumpkin or two each year.
Paint each pumpkin one color of the rainbow, then arrange them in color order on the steps. Mix the sizes so the line curves and the steps do not look stiff.
Supplies for these pumpkin painting ideas
You do not need much to get started. Most of this is already in a craft drawer or costs a few dollars at a craft store.
- Acrylic craft paint in the colors you like, and a white and a black for the base coats.
- A few brushes, including a flat brush, a round brush and a thin liner brush.
- Paint pens in white, black and gold for fine lines and small details.
- A clear acrylic spray sealer to protect the finished pumpkin.
- Chalk or a pencil to sketch the design, and paper towels for cleanup.
Real pumpkins, craft pumpkins and foam pumpkins all take acrylic paint. A craft pumpkin lasts for years, while a real pumpkin gives you the true fall look and can be painted the same way.
How to paint a pumpkin in five steps
- Wipe the pumpkin with a damp cloth to remove dirt, then dry it completely so the paint sticks.
- Paint a base coat in one color. Two thin coats look smoother than one thick coat, so let the first dry before adding the second.
- Sketch your design lightly with chalk or a pencil. Chalk wipes off if you change your mind.
- Paint the large shapes first, then the smaller details, and add fine lines last with a thin brush or a paint pen.
- Let everything dry, then spray a light coat of clear sealer in a well ventilated spot. Let it dry before you move the pumpkin outdoors.
If you want a table full of fall color, our Thanksgiving table decor ideas show how a few pumpkins can finish a setting.
FAQ
Quick answers about paint, prep and keeping a painted pumpkin looking good.
What kind of paint works best on pumpkins?
Acrylic craft paint is the easiest choice because it covers well, dries fast and washes off brushes with water. Paint pens are great for fine lines and kids can use them easily. Spray paint also works for a quick base coat, but use it outdoors.
Do I need to prime a pumpkin before painting?
You do not need a primer for most designs. A white base coat helps bright colors look brighter on an orange pumpkin, and a black base coat gives dark pumpkins a deep color.
How long does a painted pumpkin last?
A painted real pumpkin usually lasts longer than a carved one because the skin stays closed. Keep it out of direct sun and rain, and bring it inside if the weather turns wet or freezing.
Should I seal a painted pumpkin?
A light coat of clear acrylic spray protects the paint from scuffs and moisture, especially on pumpkins that stay outside. Let the paint dry completely before you spray.